Accurate data is essential for decision-making. Google Analytics can provide that data, but it may need a bit of sanitizing. Filters in Google Analytics can remove data impurities, such as:
- Development or other internal (employee) traffic,
- Inconsistent capitalization of URLs, titles, events, campaigns, and similar,
- Multiple websites or hostnames are showing up in a single Analytics property.
In this post, I’ll introduce Google Analytics filters.
Creating a Filter
Access filters in the Admin tab of Google Analytics at the “Account” level or “View” level. (A “View” is a subset of an account “Property” that can have its own configuration settings for specific users or reporting.)
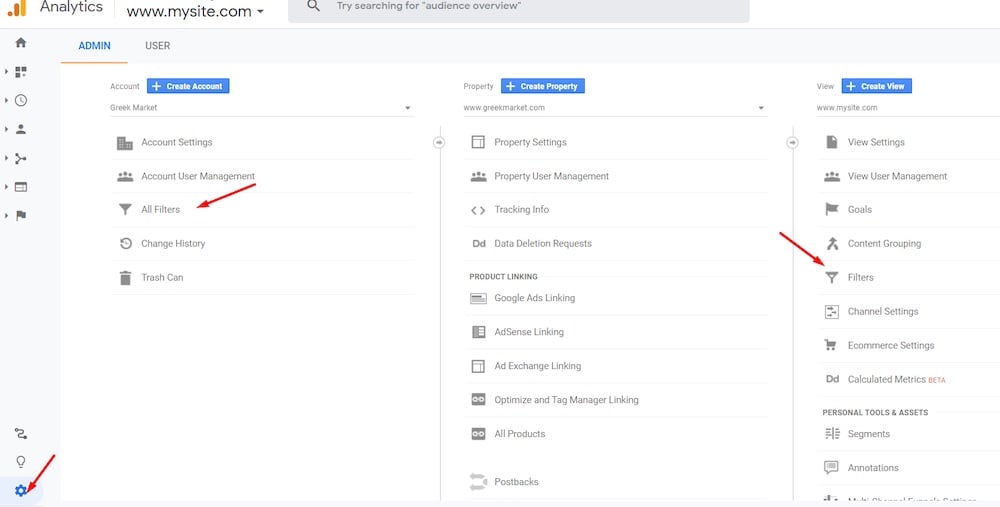
Access filters in the Admin tab at the “Account” or “View” level. Click image to enlarge.
Admin> Account > All Filters lists all filters for all Views. You can add, remove, or create new filters across all Views.
At Admin > View > Filters, you can create a filter or add an existing filter. I’ll use the View settings for the examples in this post.
Google Analytics does not include default filters. Thus no filters will appear unless you add them.
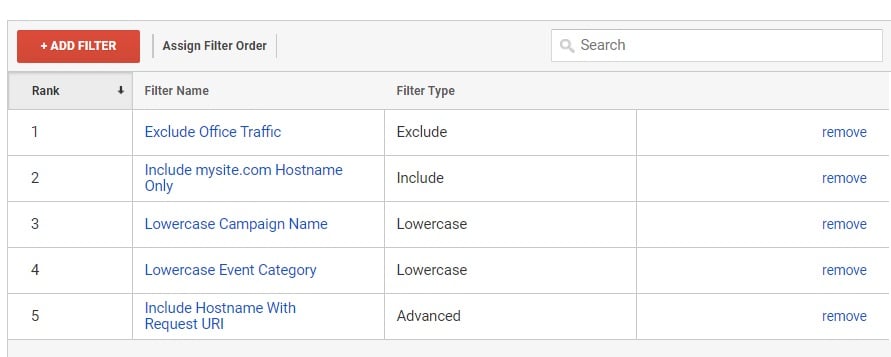
Google Analytics has no default filters. No filters will appear unless you add them, such as these examples. Click image to enlarge.
IP exclude filters exclude specific IP addresses or ranges, typically to block the reporting of employee traffic. Use descriptive names for this filter (such as “Exclude Office Traffic” or “Exclude My Home IP Address”), instead of repeating the IP address as the name.
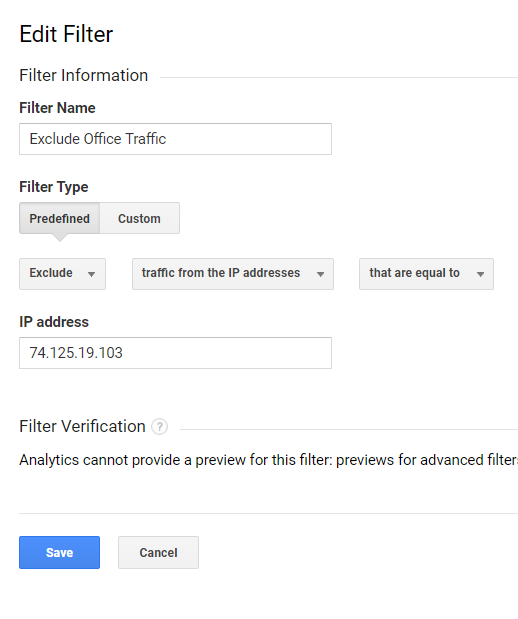
Use descriptive names for IP filter — such as “Exclude Office Traffic” or “Exclude My Home IP Address” — instead of repeating the IP address.
“Include” filters allow in reports only traffic from specific hostnames, geographic locations, campaigns, and other traffic.
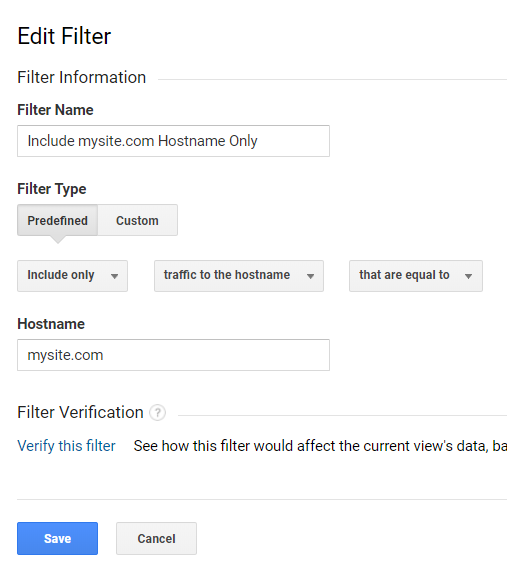
“Include” filters allow the reporting only from specific hostnames, geographic locations, campaigns, and other traffic.
Uppercase and lowercase filters clean up your inconsistent case in Events, Pages, Campaigns, and more. The lowercase filter is more common than uppercase.
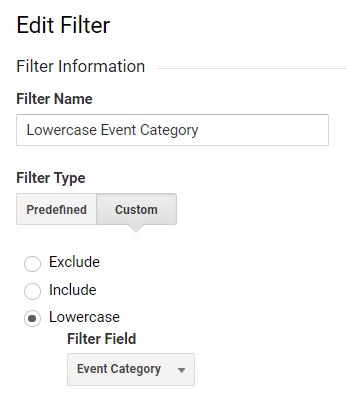
Uppercase and lowercase filters clean up the inconsistent case in Events, Pages, Campaigns, and more.
Search and replace filters and advanced filters modify field values. A typical example appends the hostname to the request URI (i.e., the web page), which can be helpful when a business has multiple websites and subdomains that visitors access in a single session.

A common advanced filter appends the hostname (“hub.powermyanalytics.com”) to a web page.
The settings for an advanced filter are:
- Filter Type. Advanced
- Field A. Extract A: Hostname = (.*) The (.*) characters capture everything.
- Field B. Extract B: Request URI = (.*)
- Output To. Constructor: Request URI = $A1$B1. This means the two fields will be combined.
Make sure the boxes “Field A Required” and “Override Output Field” are checked and leave the others unchecked. This means the hostname must be present and that the Request URI field will be overwritten with the combined hostname and Request URI.
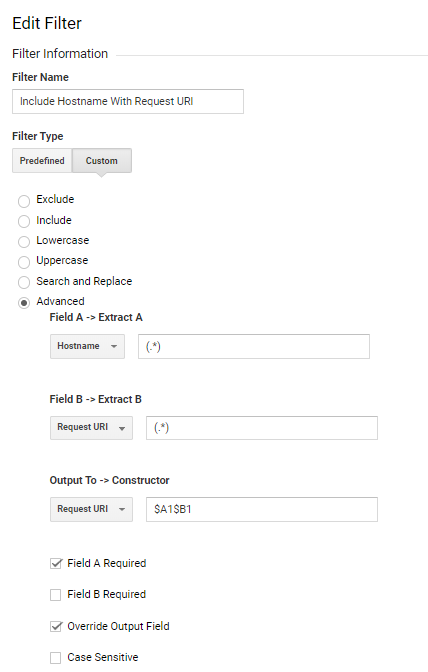
Make sure the boxes “Field A Required” and “Override Output Field” are checked and leave the others unchecked.
Verify Filters
Check your filters as soon as possible to ensure they work as intended, to minimize the impact on reporting if something went wrong. There are several ways to do this.
In the filter itself. Some filters allow you to view how the data will change the reporting.

Some filters will provide a preview of how the data will change the reporting.
Testing the same settings in your reports. If you include only a specific hostname, you can apply this same filter to your hostname report at Audience > Technology > Network, then click on the “Hostname” tab between the graph and table on the page.
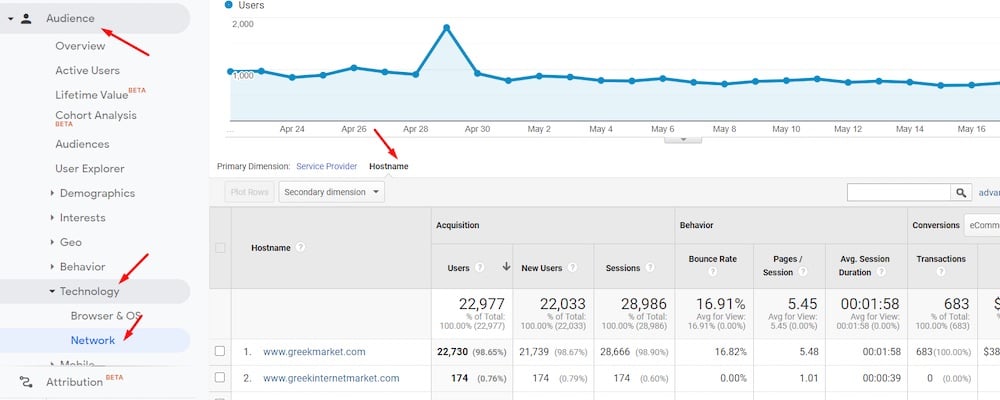
If including only a certain hostname, apply this same filter to your hostname report at Audience > Technology > Network, then click on the “Hostname” tab between the graph and table on the page. Click image to enlarge.
When verifying, align the filter settings with the setup at the View level.
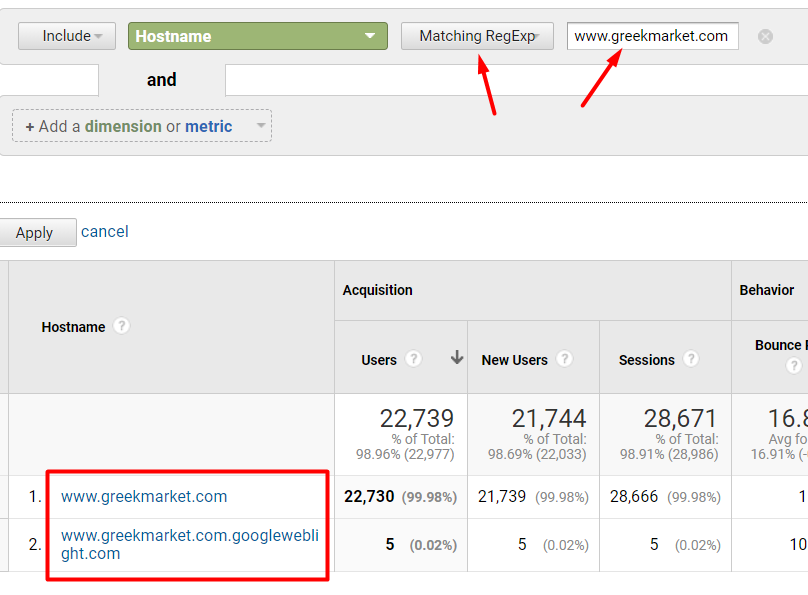
Align the filter settings when verifying with the setup at the View level. Click image to enlarge.
For example, if you used “that are equal to” in the filter settings at the View level, use that same setting when verifying in your reports.
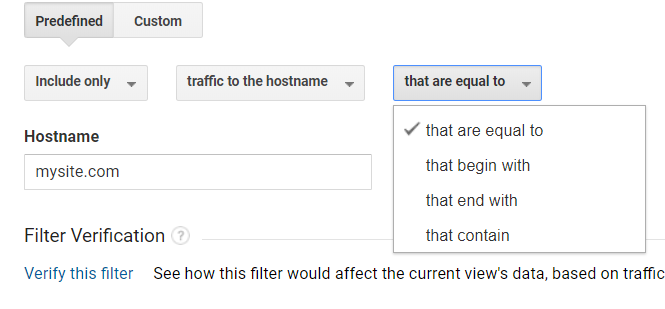
If you used “that are equal to” at the View level, use that same setting when verifying in your reports.
Realtime reports. Confirm in Realtime reports that the filters are working correctly. Certain filters, such as “Lowercase for Events,” are easier to confirm than others. If you see incorrect Events showing up in Realtime, revisit your filter.

The Realtime report in this example shows that the filters are not working.
Subsequent reports, such as later in the day or the next day.
Filter Order
The order that filters are listed for a View impacts the data. In general, place filters in this order:
- Include/exclude filters.
- Search and replace filters or advanced filters.
- Lowercase/uppercase filters.
The sequence above simplifies the process and enables the filters to apply to as much raw data as possible. For example, there is no reason to lowercase a hostname that you will filter out anyway.
You can modify the filter order by clicking the “Assign Filter Order” button.
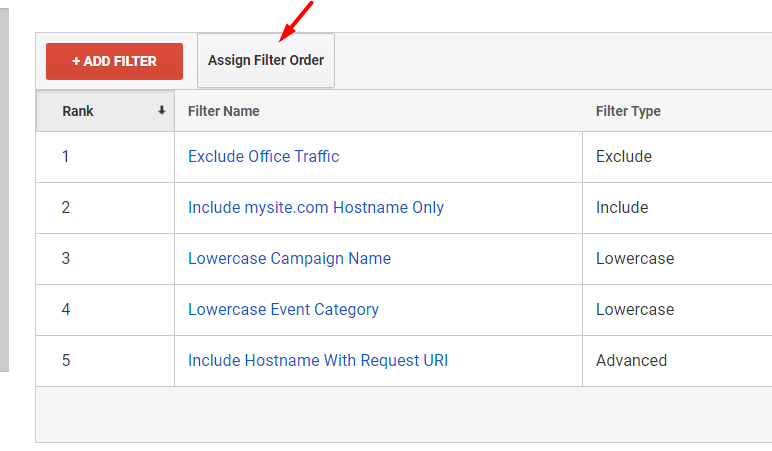
Modify the filter order by clicking the “Assign Filter Order” button.
For more resources, see “About View filters” in Google’s “Analytics Help.”

