Social media managers often feel like they’re playing an endless game of catch-up: chasing new stories, checking when new blog posts are published, managing tons of requests from different teams, and figuring out new ways to streamline content production.
Last year, when I onboarded a new client and saw their social media process, it was all manual; all they had was a scheduling tool, and it wasn’t enough. I had to be on the edge of my seat throughout the day to make sure I didn’t miss any posts, and I had to check which ones had already been done since I had no visibility apart from what the scheduling tool offered.
Here’s how I streamlined their entire social media management process, created a content flywheel that included multiple stakeholders, and reduced my workload simultaneously.
Close the gap between teams and your social media content
Your customer success reps know their clients best, while your engineering team knows all about the latest product updates. Instead of chasing the news for which of your clients raised funding or acquired a company, or keeping tabs on exactly when your product’s latest update was released and what features were upgraded, give the power to the experts.
This helped me maintain a healthy pipeline of social posts, without overwhelming myself with the dreaded feeling of what to post next and how to drive more engagement.
For instance, if your product is a QR code marketing tool, a sales manager that works with North American clients can quickly request a reshare of posts where their clients have used your product. This helps in localized promotions, generates instant customer recognition, and delivers a more holistic, personalized customer experience.
Optimize content for your brand’s point-of-view
Non-marketing teams should be able to create content for social media without having to ask for access or publishing rights on a million platforms. But here’s the challenge: you have a brand tone and voice guide, set KPIs, and a cadence for social media content. How do you empower team members to actively share their ideas for social while ensuring the final posts align with your internal goals and needs?
Most organizations still depend on tired methods: people hunt in Slack channels to find the right point of contact and then send them a message about what they want to get published or simply head over to the main profiles to publish posts directly if they have access. There’s no centralized dashboard to see all the previous, upcoming, and published posts—social media managers play catch-up on what went out or optimize posts after they’ve been published.
To make it easier for different teams to create and post content on social media, while making sure they stay on-brand and go through a review phase before publishing, I turned to automation. By implementing this new process with my client, it not only made my job easier but increased engagement 3x within one month on their social profiles.
How I automated my client’s entire social media content publishing process with two simple automations in Asana
I built a four-step process in Asana to enable different teams and stakeholders to submit their social post requests and have a granular view of all of my tasks in a centralized database.
Step 1: Create a form in Asana
Asana forms make it easier and faster for other teams and clients to request work. It also comes with automations and lets you set up Rules to help you instantly route requests to the right person and kick off work quickly.
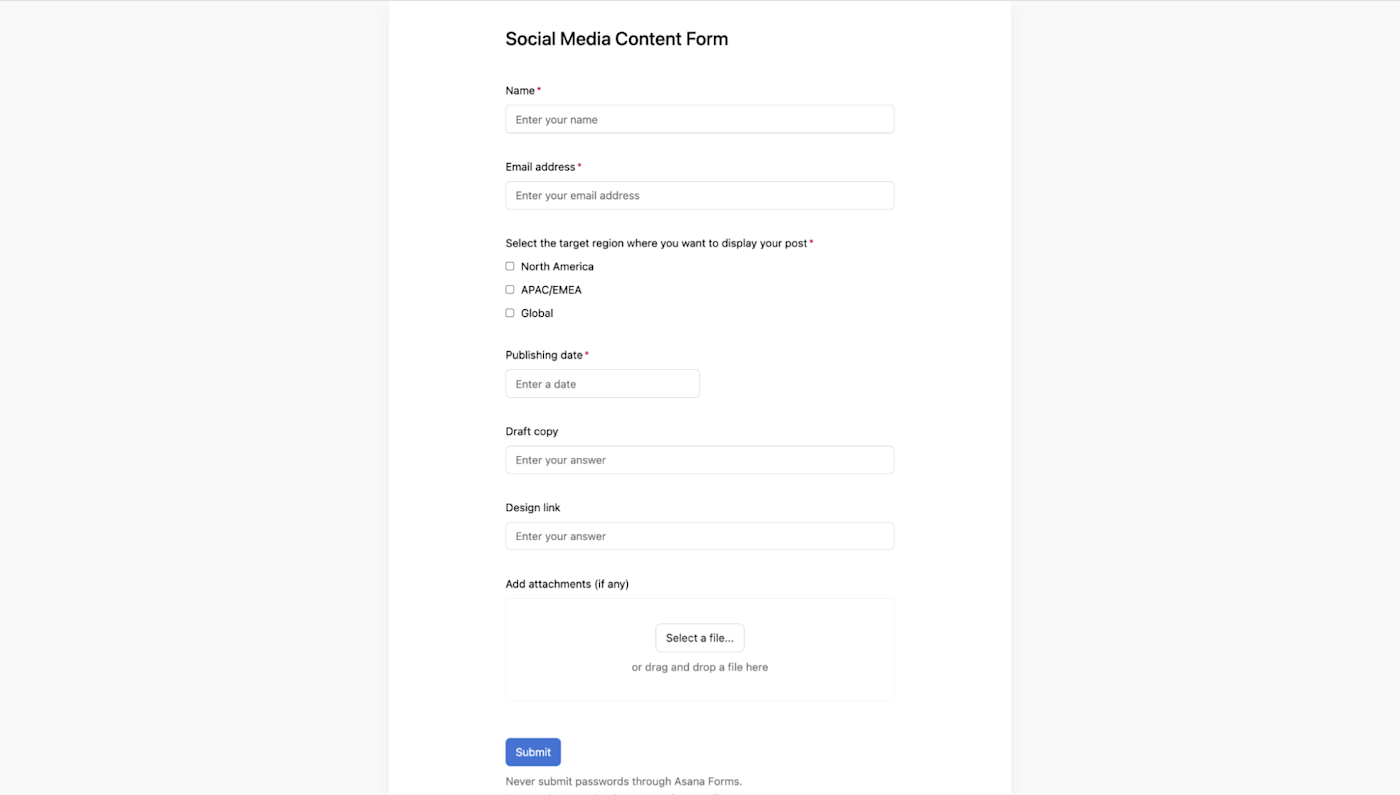
You can design the entire form: add different fields based on what you want to ask the submitter, customize it to ensure it stays on brand, and share it with others once it’s ready. I added specific fields like name, email address, target regions, publishing date, draft copy, design link, and others that I needed to successfully schedule a post on my client’s social media profiles.
Here’s what the form looks like for my client:
Step 2: Design your database
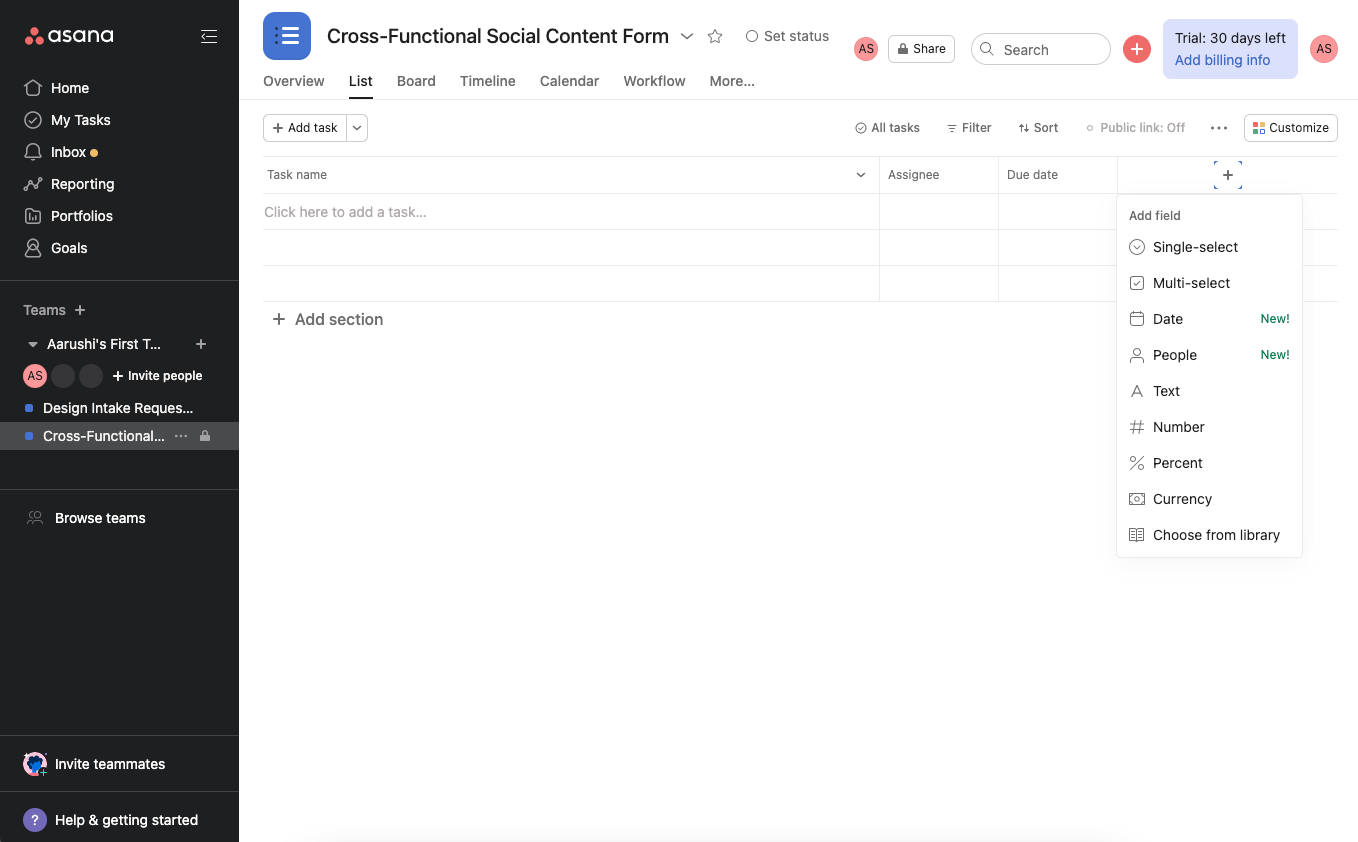
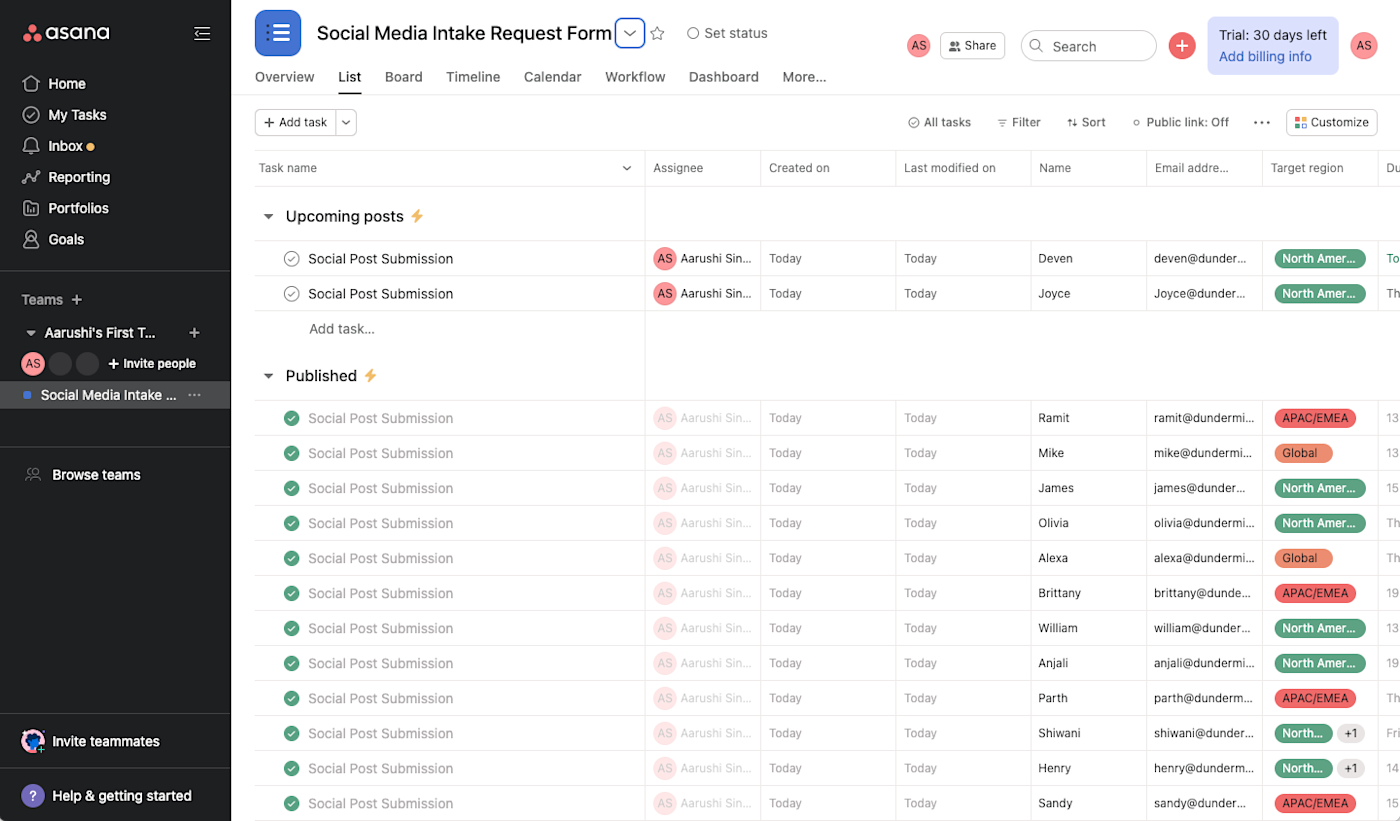
Asana’s database gives you a unified view of all of your tasks. You can see your form submissions here, use drag and drop to reorder tasks, tag the submitter in the comments section, add collaborators, record a video response, or even give appreciation for excellent post ideas.
Once you’ve created a form, it’s time to customize your database, so you can map your form fields here.
Step 3: Connect your form to the database
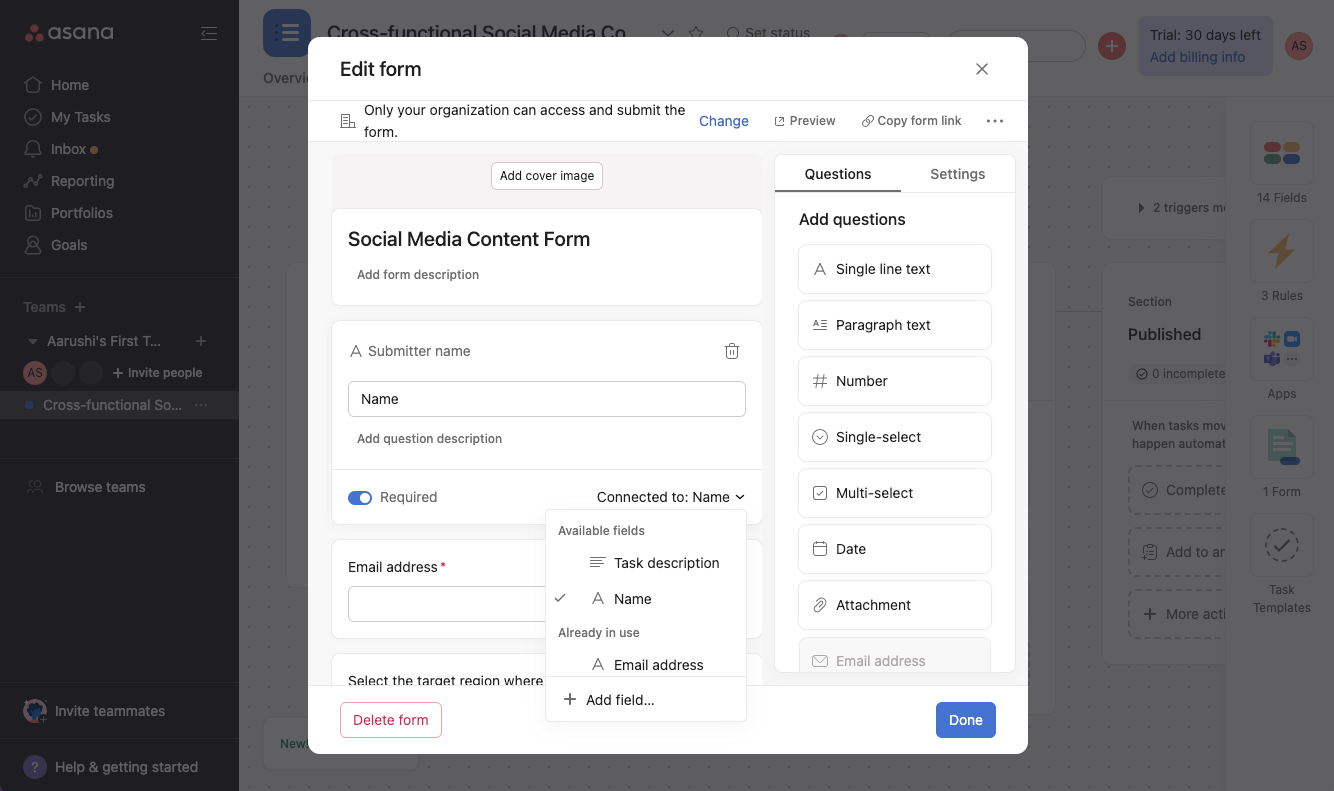
Here comes the fun part: you can connect your form to your database directly and map all of your fields. Go to Workflow > select your form > select a field you want to map > Connect to: > select the desired field from your database.
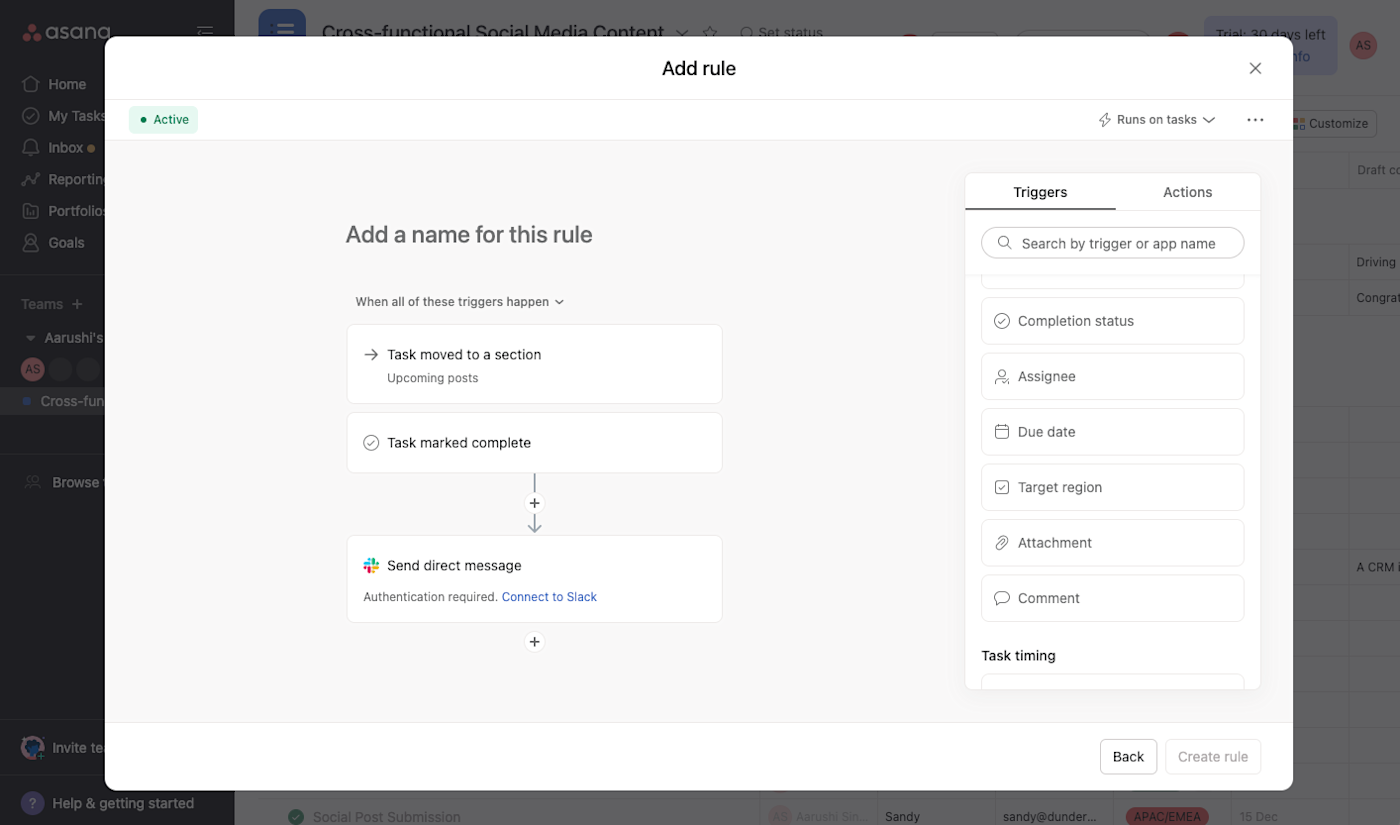
You can also add triggers and actions in the database to define when a task will be moved to a different section and what will happen after that. For example, you can send a Slack message to the submitter notifying them about their post once it’s been scheduled and marked as complete in the database.
Asana offers a variety of database views, including list, Kanban, and calendar. I prefer the list view since it has a more grid-like structure that makes it easier to scan what needs my attention first, and allows me to organize tasks faster.
Step 4: Distribute the form
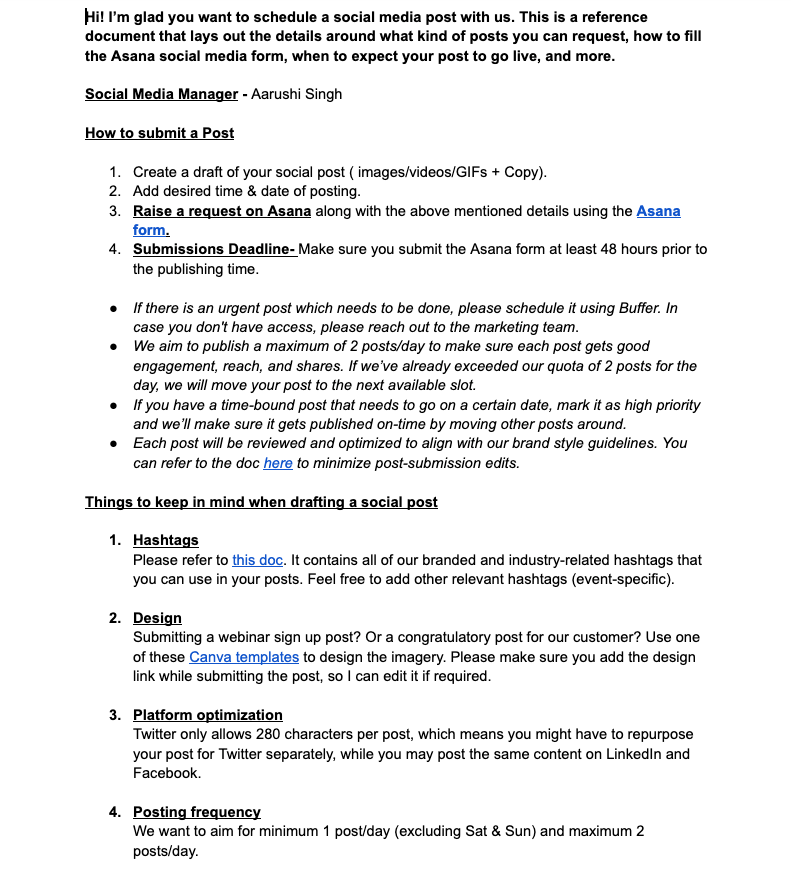
Once I set up these automations, I shared the Asana form internally via Slack and email to ensure everyone was updated on the new social media publishing process. I also created a reference doc that outlined the dos and don’ts of the new process. Having guidelines like this will help your team properly fill out the submission form and tell them what to expect once they’ve submitted it.
Here’s a peek:
Automate the process even more
Your Asana database will act as a strong source of truth that will bring information from fragmented sources into a single place. You’ll have a complete picture of which posts have already been scheduled, on what platforms, its content and design, as well as visibility into upcoming social posts. If you want to level up this automation even further, you can use Zapier to integrate Asana with the social media scheduling tool you use.
Zapier has plenty of pre-built templates that you can quickly use to get started. For example, you might create an automated workflow that automatically schedules posts in your scheduling tool once you’ve approved them in Asana.
Zapier is a no-code automation tool that lets you connect your apps into automated workflows, so that every person and every business can move forward at growth speed. Learn more about how it works.
Related content:
This was a guest post from Aarushi Singh, a freelance B2B SaaS marketer and writer. Want to see your work on the Zapier blog? Read our guidelines, and get in touch.
[adsanity_group align=’alignnone’ num_ads=1 num_columns=1 group_ids=’15192′]
Need Any Technology Assistance? Call Pursho @ 0731-6725516


