Footers are located at the bottom margin of a document and help showcase information like the date, titles, page numbers, and much more. Using footers, a presenter can communicate extra details to the viewers without distracting them from their slideshow’s content.
However, Google Slides doesn’t offer a preformatted footer feature like Microsoft PowerPoint. Therefore, we have come up with this step-by-step tutorial to help you manually include a footer in your Google Slides. Here we go!
Adding a Footer in Individual Slides
Step 1: Open your Google Slides presentation.
Step 2: Pick the slide where you want to add a footer.
Step 3: Select the Text Box from the toolbar and drag it to create a text box in the slide. This will be a footer.
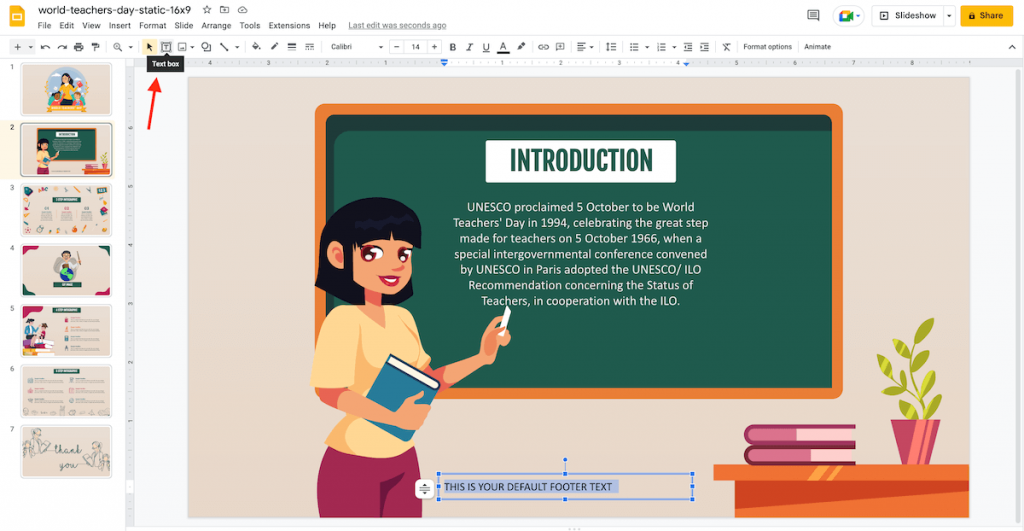
Step 4: Put your desired content in the footer.
Adding the Same Footer to Multiple Slides
Step 1: If you have various slides with similar layouts and you want to add a footer to all of them, you can do it effortlessly by :
- Selecting the slide you want to add a footer.
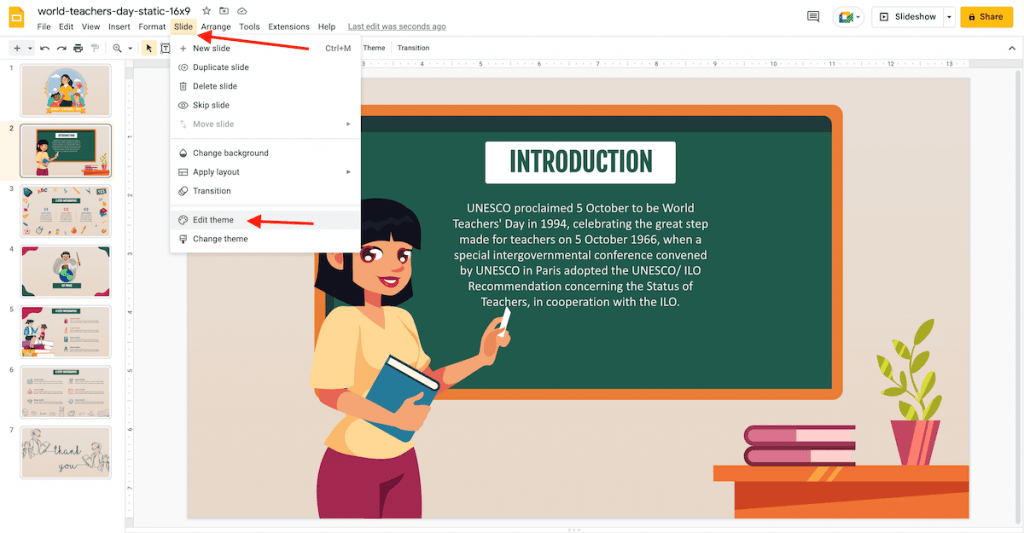
- Accessing the master slides by navigating Slide > Edit Theme.
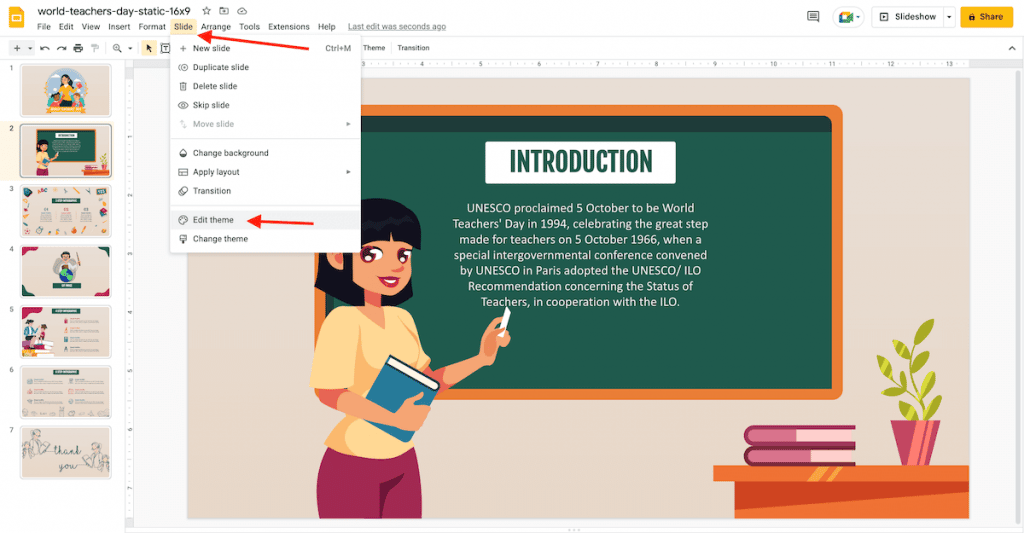
- It will open the master editor, and by default, the layout master from your chosen slide will be selected.
- Click the Insert placeholder drop-down arrow on the toolbar to select the Text Box.
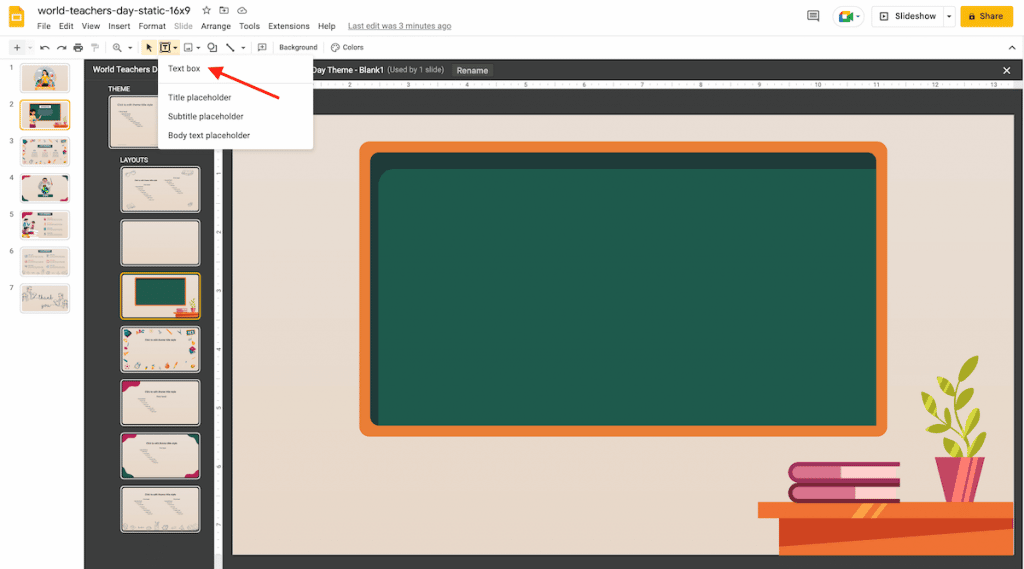
- Draw a text box and place it by dragging it to the bottom margin of the slide.
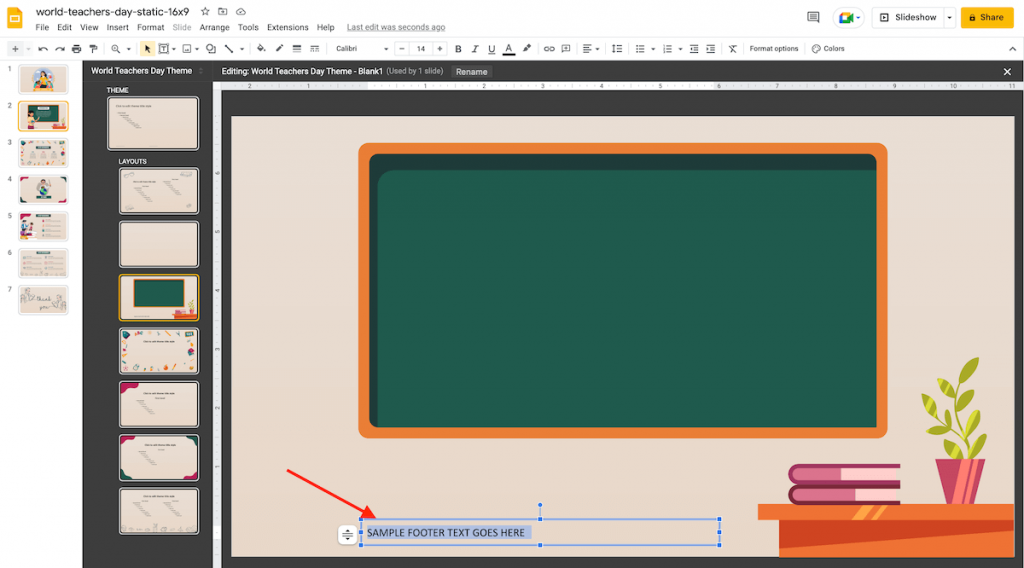
- Insert your desired information in the text box.
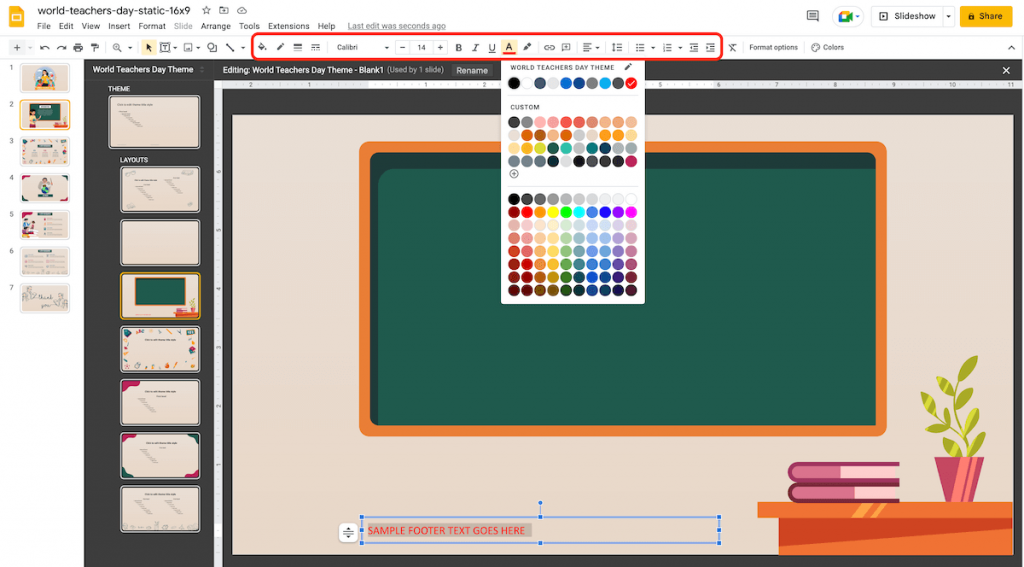
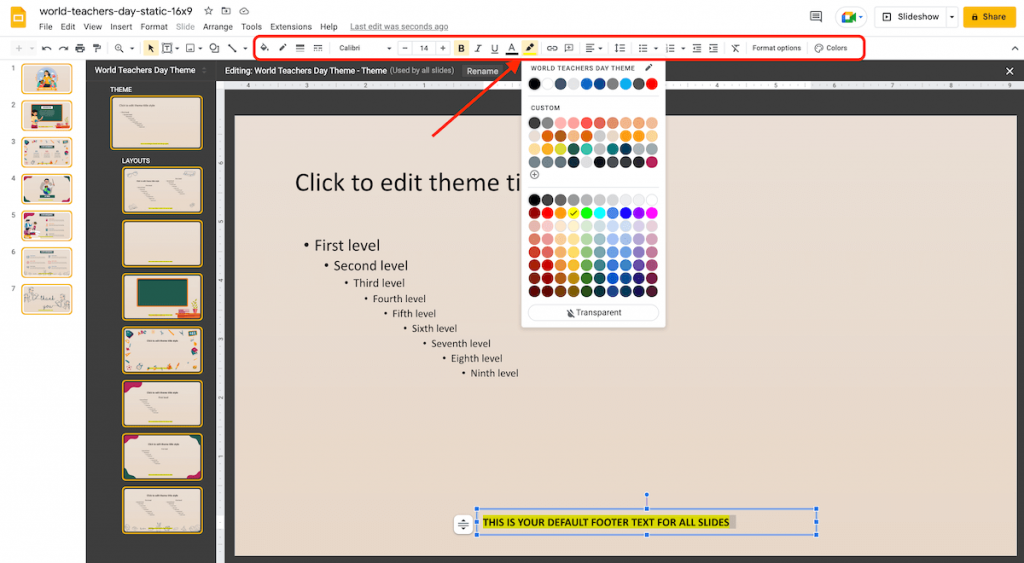
- Change the font type, size, color, and alignment of the text using the options available in the toolbar.
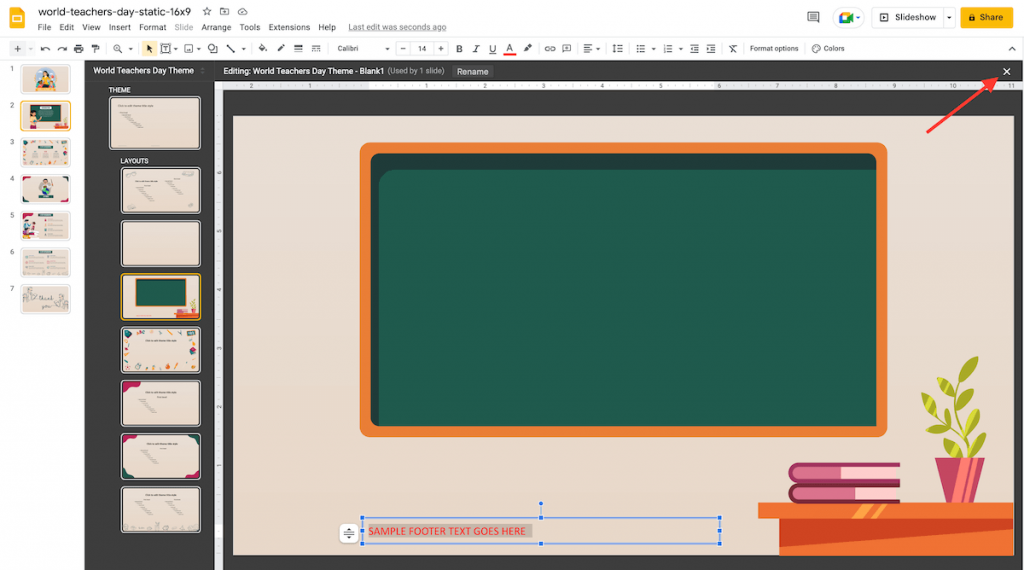
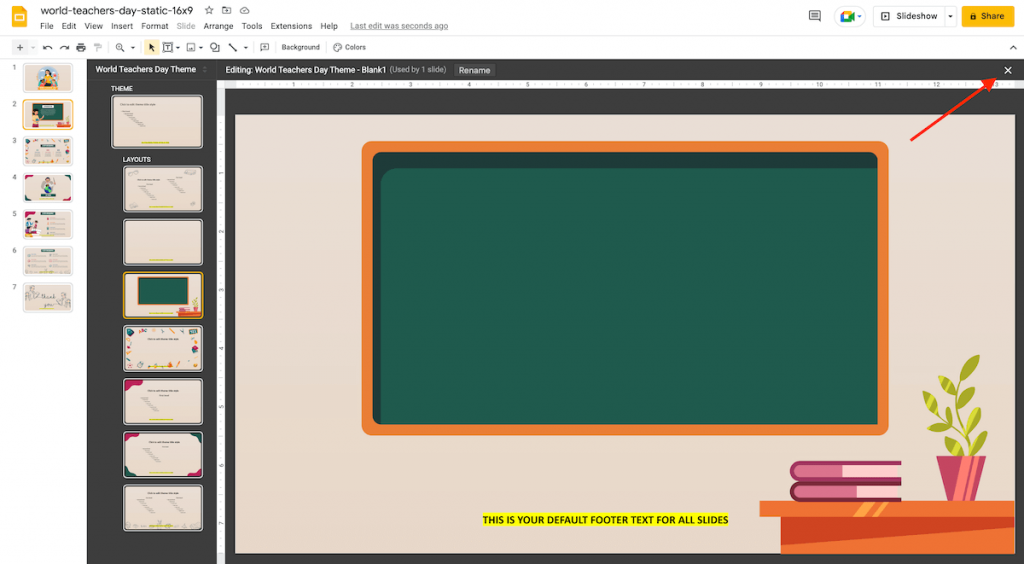
- Exit the master editor by clicking the ‘X’ button at the top-right. You will get the footer on all slides derived from this layout master.
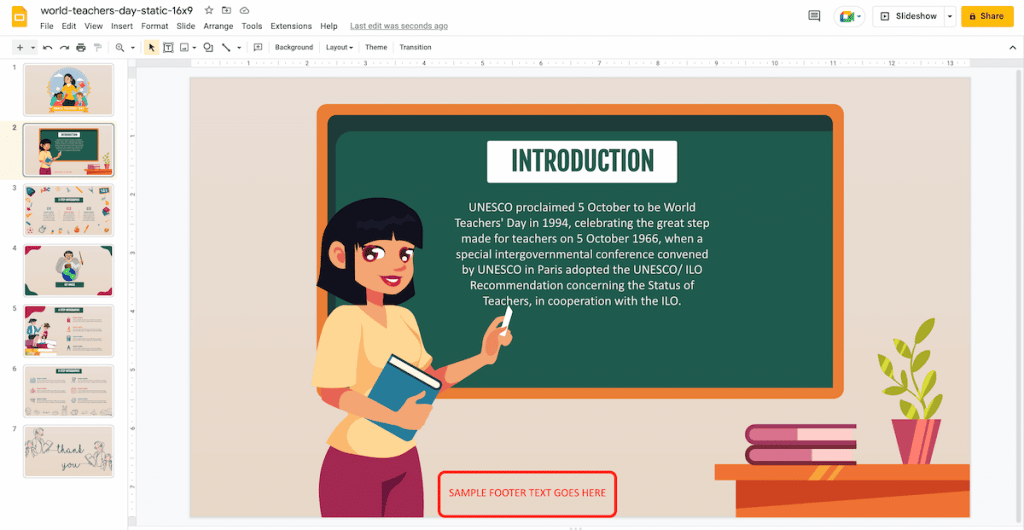
Adding the Same Footer to All the Slides
Step 1: Open your Google Slides presentation.
Step 2: Go to the master slides by navigating Slide > Edit Theme.
Step 3: Pick the master slide (the parent theme slide).
Step 4: Click the Insert placeholder drop-down arrow on the toolbar and select the Text Box.
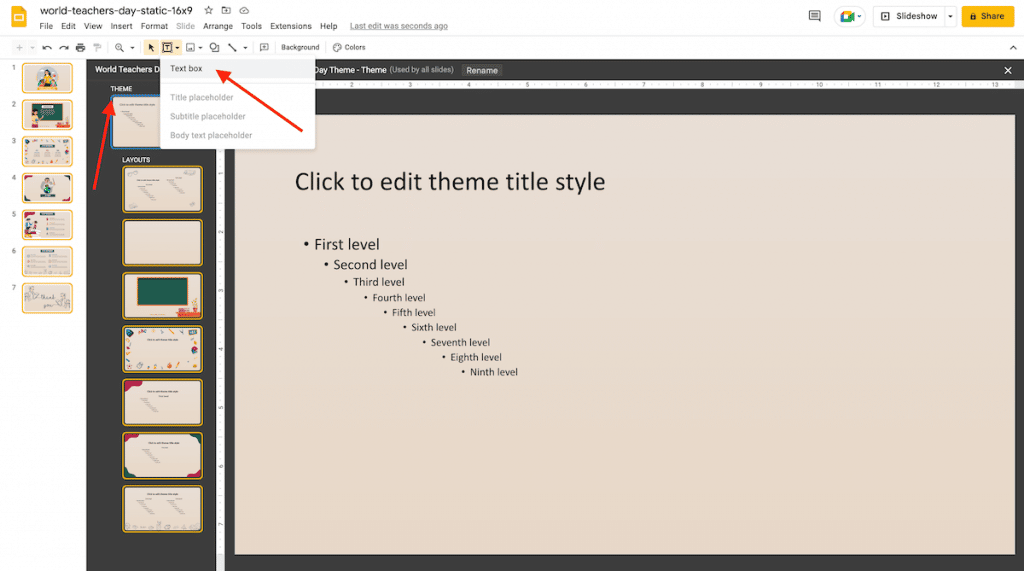
Step 5: Draw a text box, resize it, and drag it to where you want it in the slide.
Step 6: Enter the text in the footer.
Step 7: Modify the content font, size, color, and style using the options in the toolbar.
Step 8: Click on the ‘X’ button at the top-right to exit the master editor view. This command will bring the footer to all the slides in your presentation, including the cover slide. Follow the command ‘Adding a Footer to Multiple Slides’ to add a footer to all slides except the cover slide.
This brings us to the end of this guide for adding a footer in Google Slides! Keep following for more such helpful tips and guides to make your presentations more appealing!
Looking For Powerpoint Design Agency?
Call Pursho @ 0731-6725516
Telegram Group One Must Follow :
For Startups: https://t.me/daily_business_reads
#Add #Footers #Google #Slides


