Life and work are filled with decisions, the forks in the road that add up to your destination. One order gets shipped immediately, while another needs to be customized. Some emails can get an automated answer, others need a custom reply with a detailed solution. It all depends on tiny factors and what you want to accomplish.
Zapier’s Paths tool is built to navigate those twists and turns with conditional workflows. Building on multi-step Zaps, Paths let one Zap (our word for automated workflows) do different tasks depending on the data you provide. It’s a choose-your-own-adventure story for your work.
A single Zap with Paths could automatically reply to routine messages, assign tough tickets to specific team members, or prioritize the most urgent messages depending on the message’s details. It could print shipping labels for most orders while emailing customers if they didn’t include their full address. It can figure out the best thing to do, based on data, then do it automatically.
Here’s how you can skip the hardest part and build the conditional workflows for your critical tasks with Paths.
What are Paths?
Zapier’s an app automation platform that connects thousands of apps—tools like Asana, Google Sheets, and Salesforce that businesses around the world rely on to get work done. When something happens in one app—say, a new contact is added to Salesforce—Zapier can then do tasks in other apps for you, perhaps checking for that contact in a Google Sheets spreadsheet then adding a new task for your team in Asana.
That works great when everything needs the same results. But what if, as Felix and Fingers’ pianist Greg Percifield says, you have “similar tasks with slightly different outcomes”?
At first, it might look like you’d need to build multiple Zaps to achieve this. Instead, you can use Paths to do it in one Zap. Paths let you split your Zap into the different outcomes your data needs. Your Zap starts with a trigger app that tells Zapier something happened: Someone bought your product, emailed your team, created a new project, or found a bug to fix.
Zapier watches for that new thing. Then when it comes in, every purchase, email, project, and bug has its own set of characteristics. So a Path tells your Zap what to do based on the specific rules you choose. It’s a conditional workflow that lets you plan for multiple outcomes.
Felix and Fingers, for example, needed to send different order amounts to QuickBooks, depending on what customers entered in a form. Little differences that add up to a big difference. Paths solved it with one Zap. “Rather than creating 3 unique zaps, we are able to create 1 Zap with 3 scenarios,” says Percifield.
How to create a Zap with Paths
Start with a little planning. “Write down your flows on paper and simply copy it in Zapier,” suggests Expedia’s Johannes Ganter, who uses Paths to run different workflows based on languages, partners, employees, and more.
Use that time to think through what you need to automate. Maybe you have an order form with three products, and each one needs to be handled slightly differently. One means your customer needs an email, another means your team needs a notification so they can make the custom order and a task on the to-do list, so they don’t forget, and the last needs custom data looked up in a database before shipping it. Or something like that. Think through what starts your workflow, what your team needs to do depending on each variation, and the apps you use in each step.
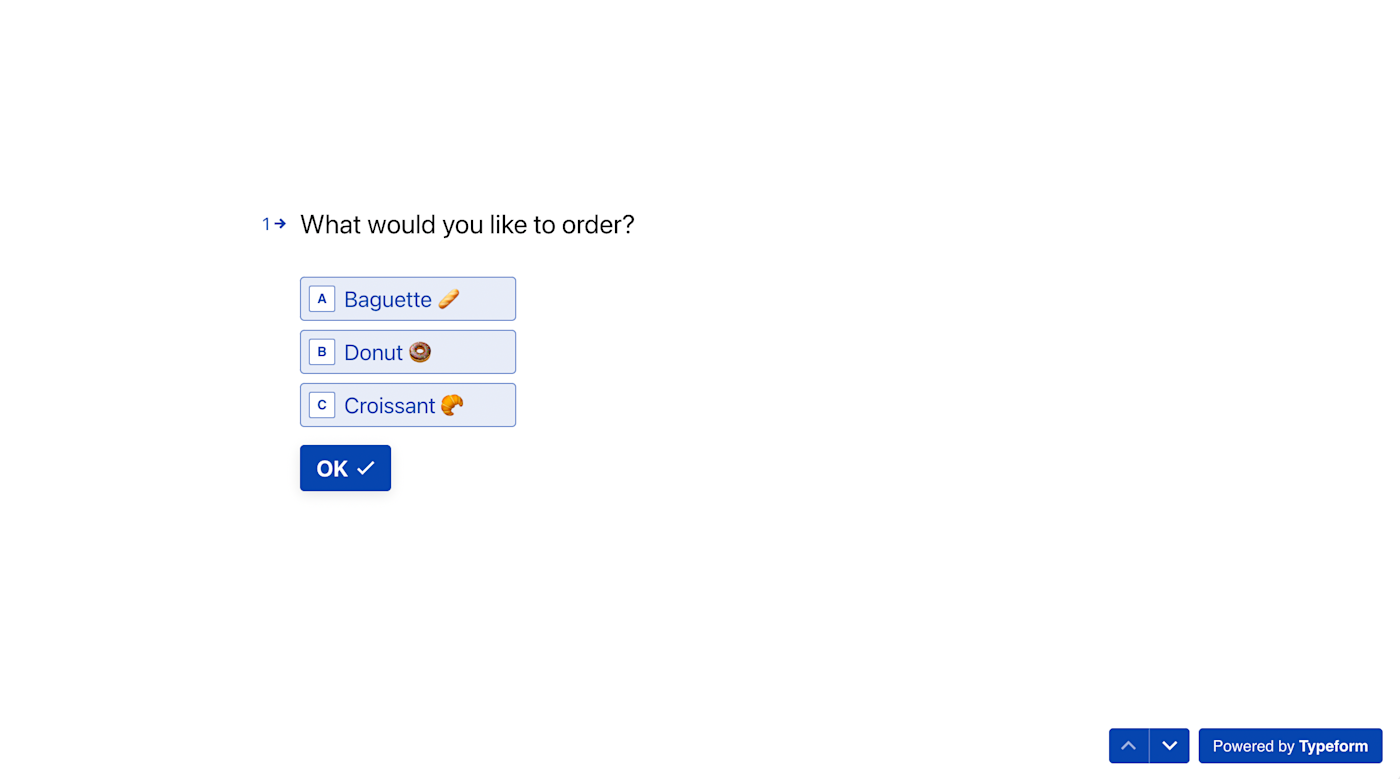
Then start building. With our order form example, we might have a form in Typeform that lets customers choose a baguette, donut, or croissant. Simple enough. Just make sure your trigger app’s new items include the options you need Zapier to track.
Tip: Depending on your app, Zapier may be able to pull in three samples automatically—if not, the steps below will make sure you have enough samples to build your Paths Zap easily.
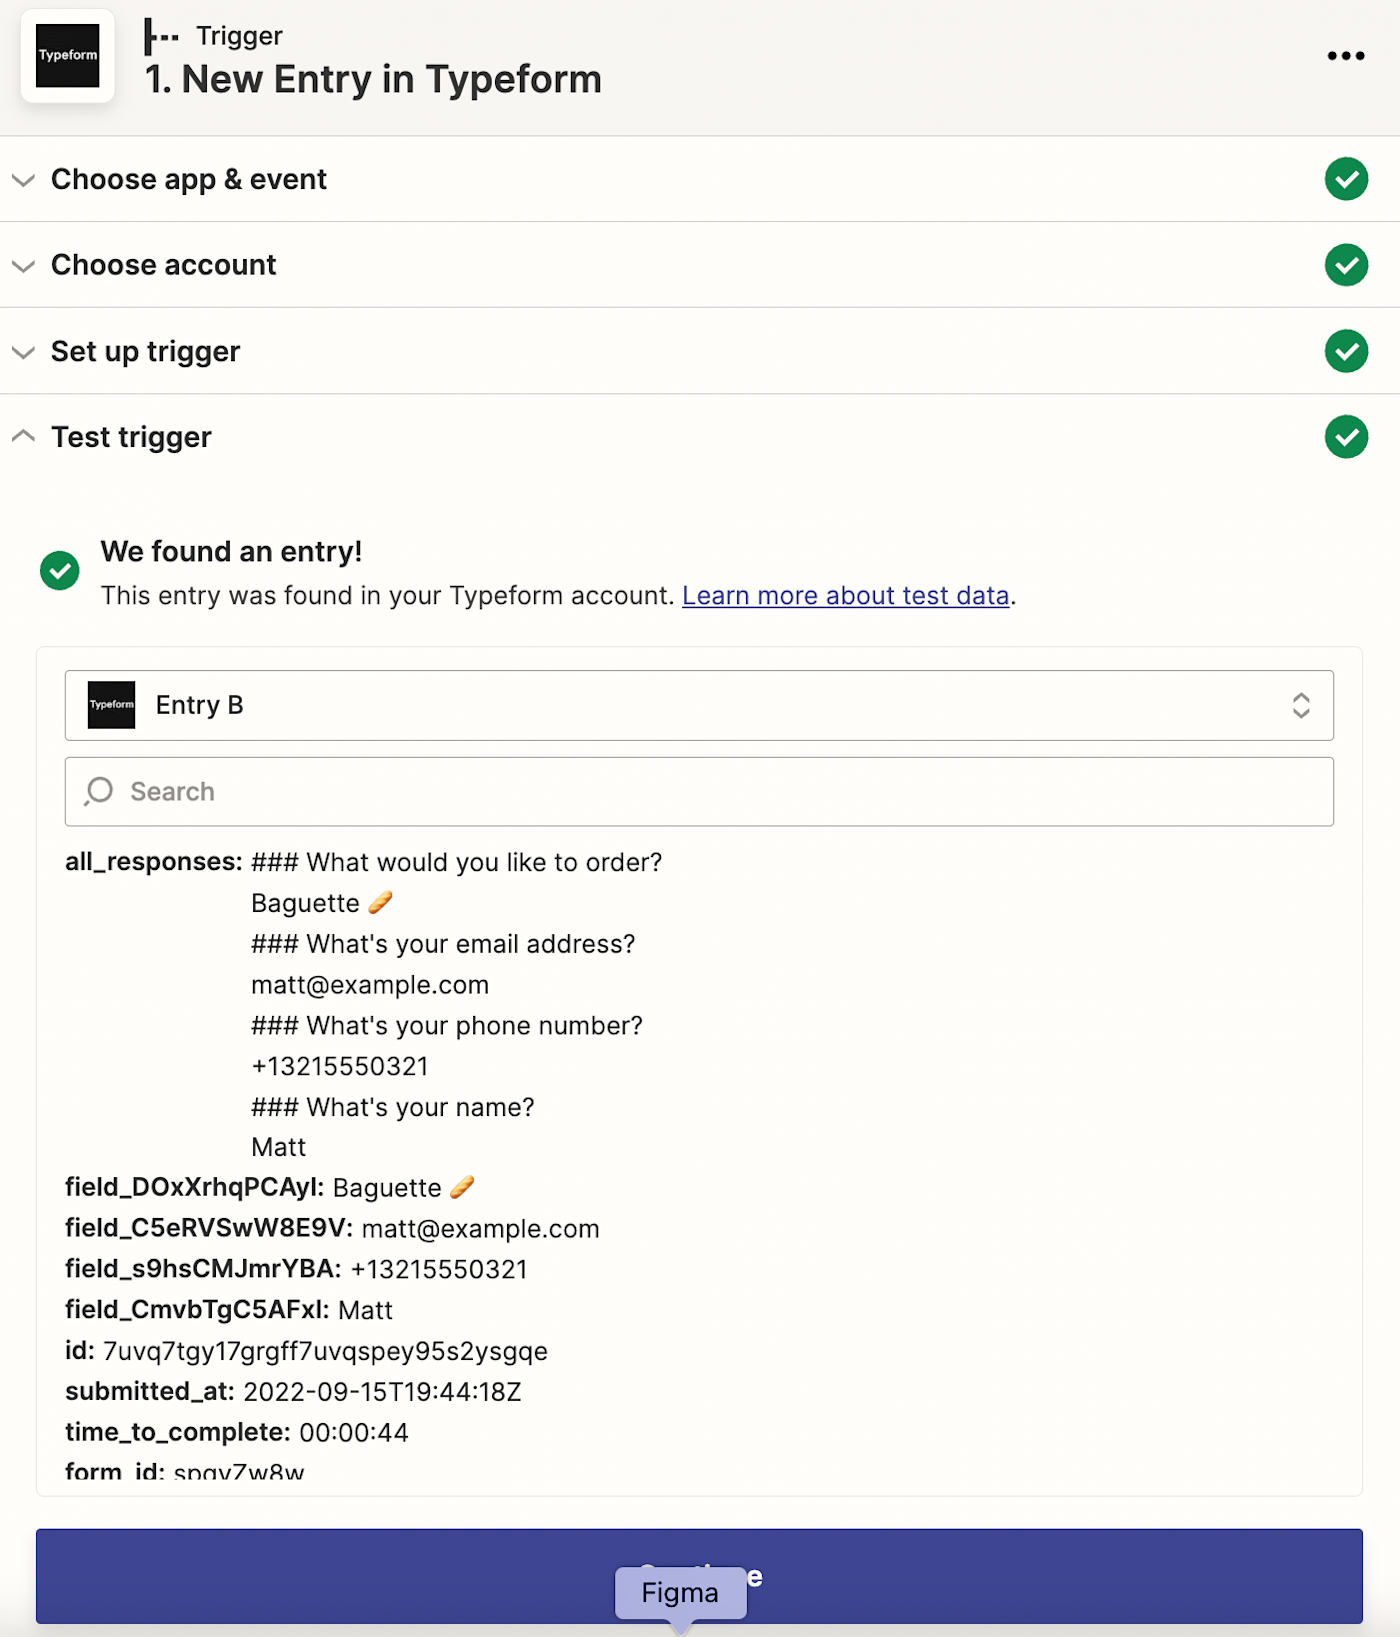
Now open Zapier, and make a Zap with your trigger app. We’ll select Typeform’s New Entry trigger, connect our Typeform account to Zapier, and select the order form. Then, when Zapier tries to pull in a sample form entry, open your Typeform form in a new tab, fill it out with your first order option and the other form details, and submit the entry. Zapier will pull in that form entry to help build your Zap.
You’re building multiple workflows, though, and one sample entry isn’t enough. Click the Get More Samples button, then go fill out your order form again, this time selecting a different product. Repeat that to get samples of each variation you need.
Then, if you want, you could add action steps to your Zap. If you want to log every new order to a Google Sheets spreadsheet, say, add a Google Sheets Create Spreadsheet Row step right after your form trigger. You only need the path once your Zap is doing steps that differ based on the form entry.
Now you’re ready to build a Path. Click the + sign below your trigger step, and select Paths.
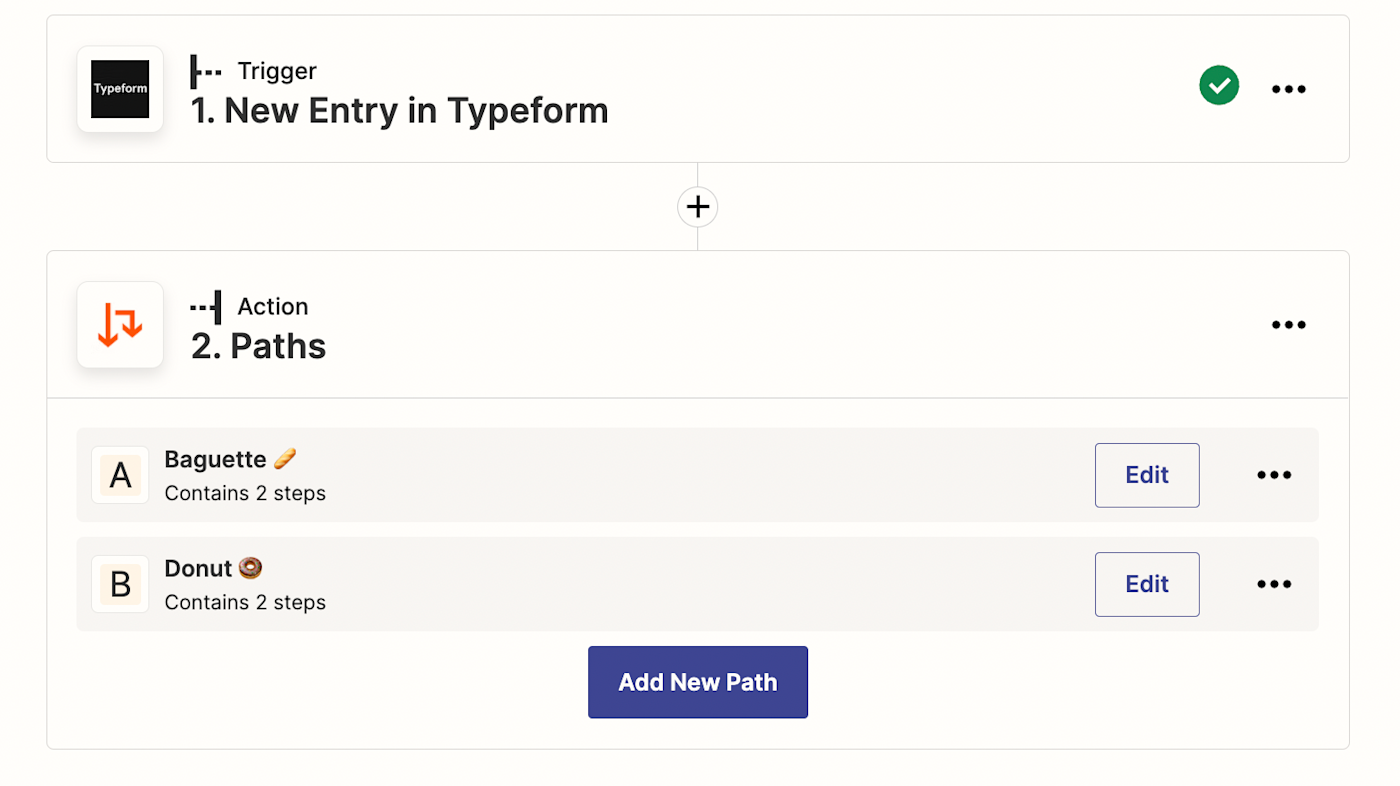
Paths aren’t your standard Zap steps. Add a Path to your Zap, and you’ll get a description of Paths in the main editor, along with new A and B options. Select Edit on one of the options to edit the first part of your Path—and your Zapier editor will change to reveal the Path’s settings, starting with the name, then its customizable Rules, and finally any steps you want your Path to follow with this data.
When finished, click Save and Close in the top right corner—or click the menu on the top left to jump between steps and go back to your core Zap.
Starting with the A path, select Edit and give it a name—something that will help you remember what this workflow does and why it’s different from the other paths in your Zaps.

Then, select Continue and add Rules for this Path. When will it run? Say we’re watching for people who order baguettes, and we want to email them about their order. We’ll have Zapier watch the order form for a baguette, and make sure they included their email address.
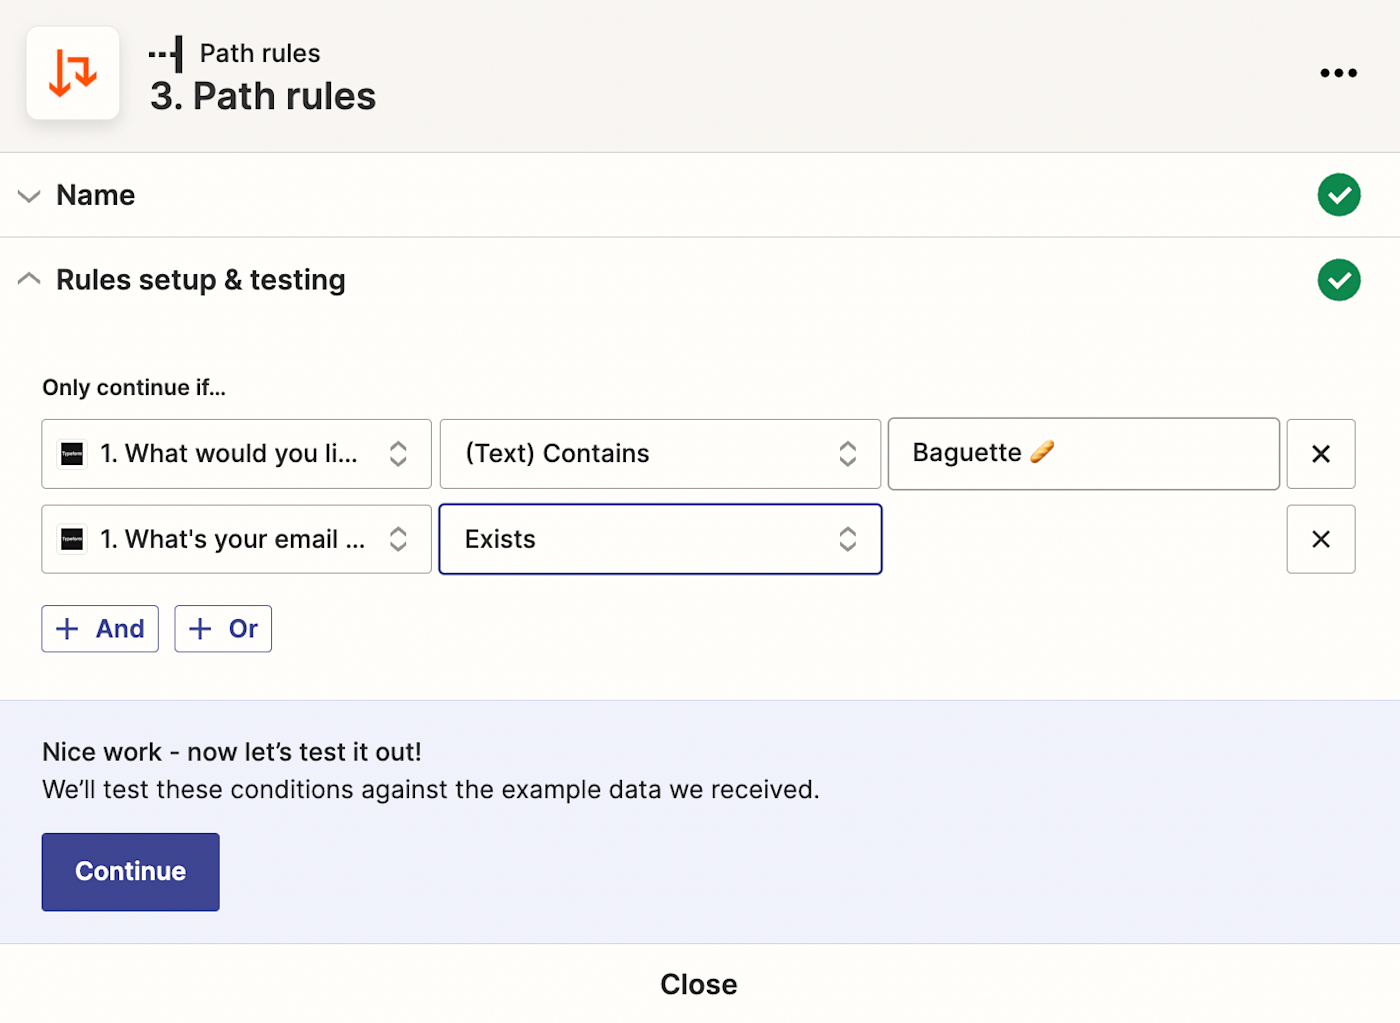
Path rules work exactly like Zapier’s filters. They’re conditions for why your Zap should run. Only here, you’re setting why this Path should run. The other parts of your Path get their own rules that set when they run.
With Path rules added, it’s worth making sure they work the way you expect. Click Continue, and Zapier will show if this Path would have run with the data. Either way, you can continue setting up your path—though it’s easiest to make sure your Zap will work correctly if your sample data matches this Path’s rules.
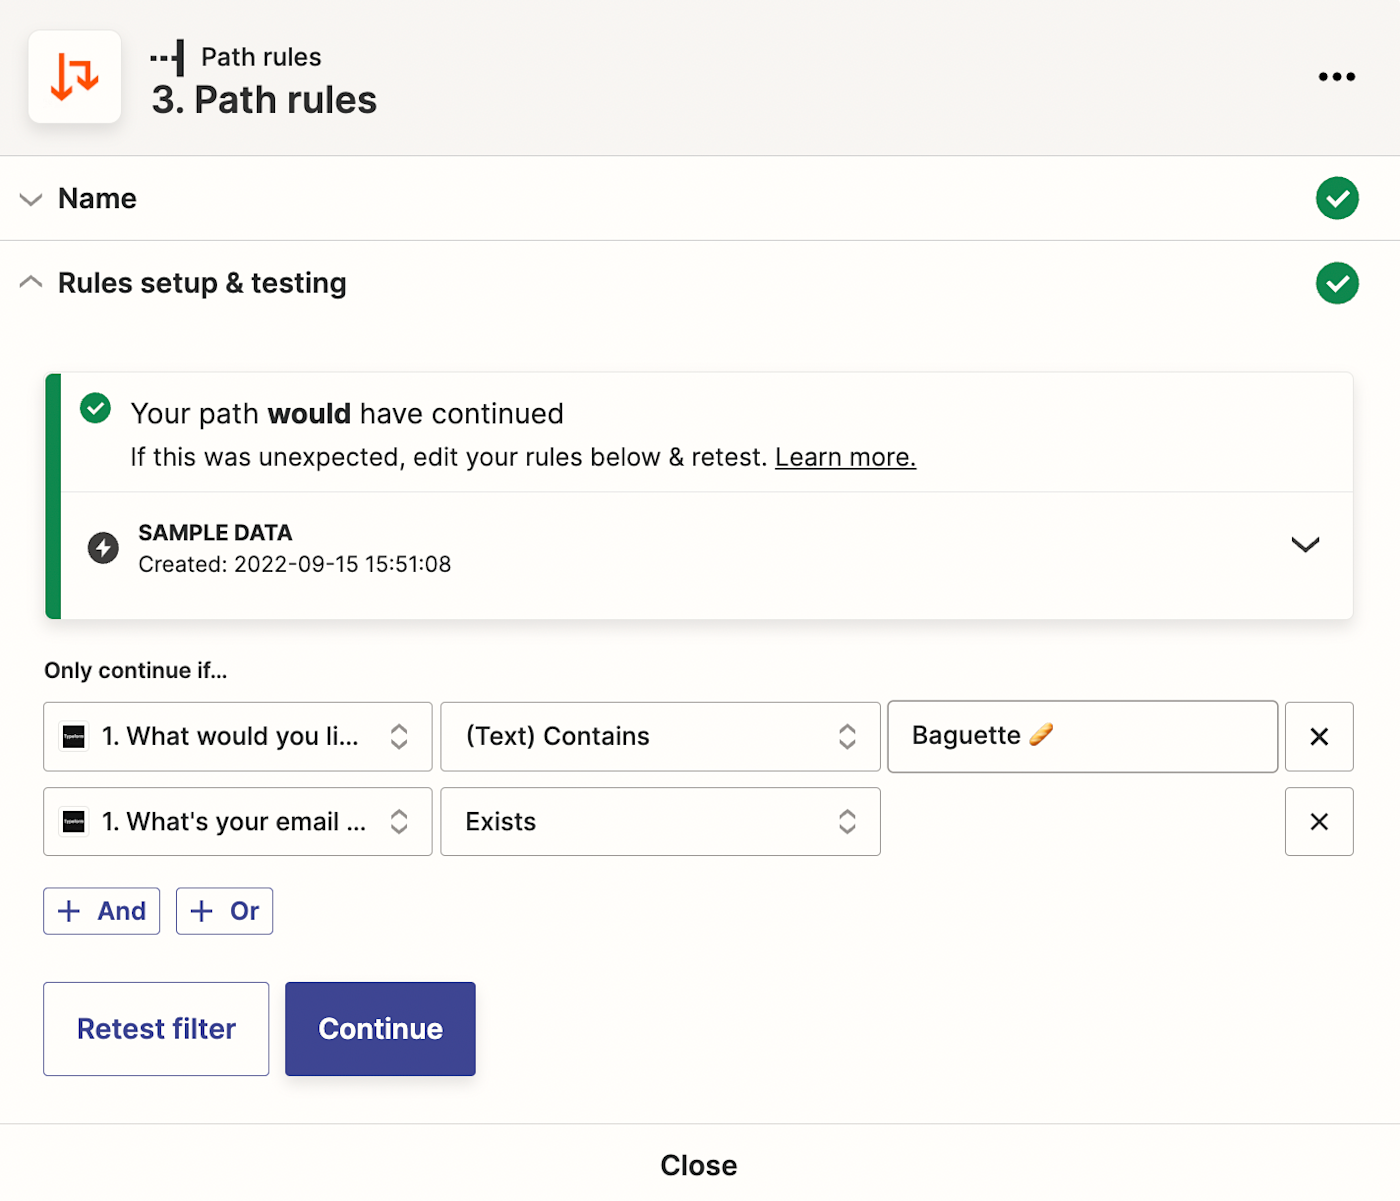
Tip: You can go back to your trigger step and select a different test result, then open your path again and re-test the rule to see how that result would have worked.
What’s your Zap going to do now? There are thousands of options. You can now add any other action steps to your Zap to do anything you want. Say you want to send your team a Slack message about the donut order. Add a Slack action step, and fill in the details as normal by clicking anywhere in an input field to select the order details you want to send to your team.

You can add as many additional steps to your path as you need to handle the donut order. When finished, click the X button in the corner of the window to close the Path, and move on to build out Path B.
Adding your second path works exactly like adding your first. You’ll add the steps you want as part of this path—like adding the donut customer to an ActiveCampaign email list to get latte recipe ideas to go along with their breakfast treat—and follow the same steps to complete your path.
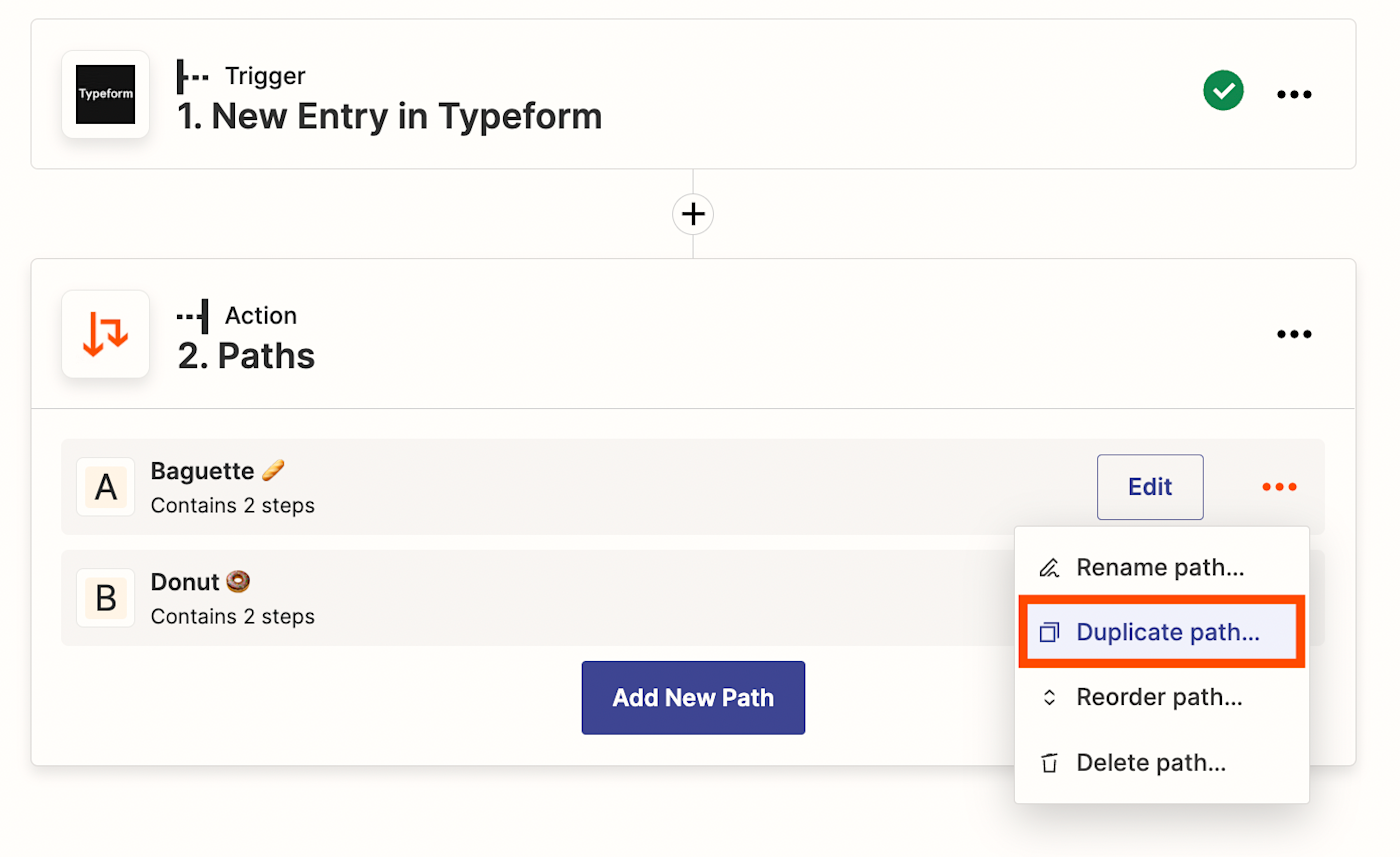
Also worth noting, if your second path has the same action as your first—say, you just want to send a message to someone different in Slack—you can duplicate the first step, rather than starting from scratch. To do so, click the three-dot icon to the right of the path you’d like to duplicate, and click Duplicate path…
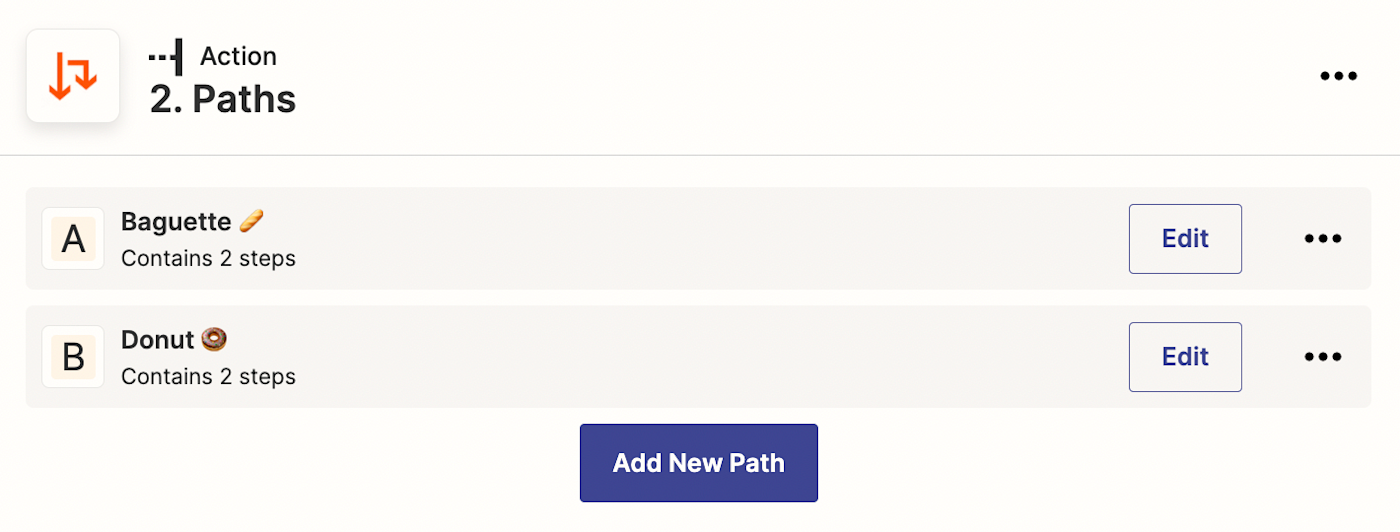
Two Paths aren’t enough? Don’t worry. Go back to your main Zap screen, and click the Add New Path button below your A and B steps. Zapier will another Path to the Path Group to build the detailed workflows you need.
Paths inside Paths work, too—you can also add a Nested Path as a step inside your steps to build workflows that cover all the possibilities.
And then, you’re done. When your workflow’s entirely built out in your Zap, test and turn it on. Then sit back, and the next time an order comes in, or a new contact signs up for your email list, or a new project starts, Zapier will figure out what to do—then do it all for you in one Zap.
What can you do with Paths?
Paths are incredibly logical for any process manager and will simplify your setup by miles.
Johannes Ganter, Expedia
No one’s an expert at everything. That’s where org charts are a helpful thing. If you know this person’s great at this, and that person’s great at that, you can assign tasks to the right person, and everyone will do better work.
Dell’s social business manager Omkar Mishra needed a better way to handle intake requests. “We were trying to resolve request assignments within our process flow based on different selections by our audiences, and assign things the best way,” says Mishra. He’d halfway solved it with Zaps—though previously, he needed one Zap for every different intake request.
“Paths helped us solve that scenario perfectly,” says Mishra. It let him build out unique workflows for every different request, each with an action step that assigned work to the right people automatically.
Expedia uses Zapier Paths to run a wide range of workflows, with different steps depending on the team, language, or partner involved. “Paths are incredibly logical for any process manager, says Expedia senior process manager Johannes Ganter, “and will simplify your setup by miles.”
Get started with Paths
If you’re already on a paid Zapier plan, you can begin using Paths today in new Zaps—or you can add them to any Zaps you’ve already made.
If you’re not a Zapier user yet,sign up for a free Zapier account to try out all of Zapier’s features, including Paths, for free for two weeks.
Paths might be that thing you’ve been looking for to make your work more efficient. As Dell’s Omkar Mishra found, Paths “helps my team automate the manual process of workflow management and saves around 3-4 hours per week.” It could do that or more for you, too.
Learn more about Zapier
New to Zapier? Here are resources to help you get started:
This article was originally published in October 2018, and updated in 2020 by Tyler Robertson. It was most recently updated in September 2022 by Will Harris with new screenshots and product features.
[adsanity_group align=’alignnone’ num_ads=1 num_columns=1 group_ids=’15192′]
Need Any Technology Assistance? Call Pursho @ 0731-6725516

