Retaining clients after an initial sale often depends on how well you nurture them. This can be tricky to do manually because it’s easy to forget about customers or let them slip through the cracks. That’s why automatically adding your CRM contacts straight to your email lists lets you create a consistent nurture journey that works better for your marketing.
Instead of manually adding new CRM contacts to your email lists, we’ll show you how to create a Zap—our word for the automated workflows you create with Zapier—that automatically adds new Microsoft Dynamics contacts to your Mailchimp lists. That way, your reps can easily nurture their client base, foster customer loyalty, and generate even more sales without extra tasks.
Microsoft Dynamics CRM is a premium app—available on Zapier’s paid plans. Learn more about premium apps.
Push new Microsoft Dynamics CRM contacts to a Mailchimp list
Zapier lets you create automated workflows called Zaps, which send your information from one app to another. You can create your own Zap from scratch without any coding knowledge, but we also offer quick templates to get you started.
If you’d like to start with a template, click the button below, and you’ll be taken to the Zapier editor. You’ll need to create a Zapier account if you don’t already have one. Then, follow the directions below to set up your Zap.
Set up your Microsoft Dynamics CRM trigger
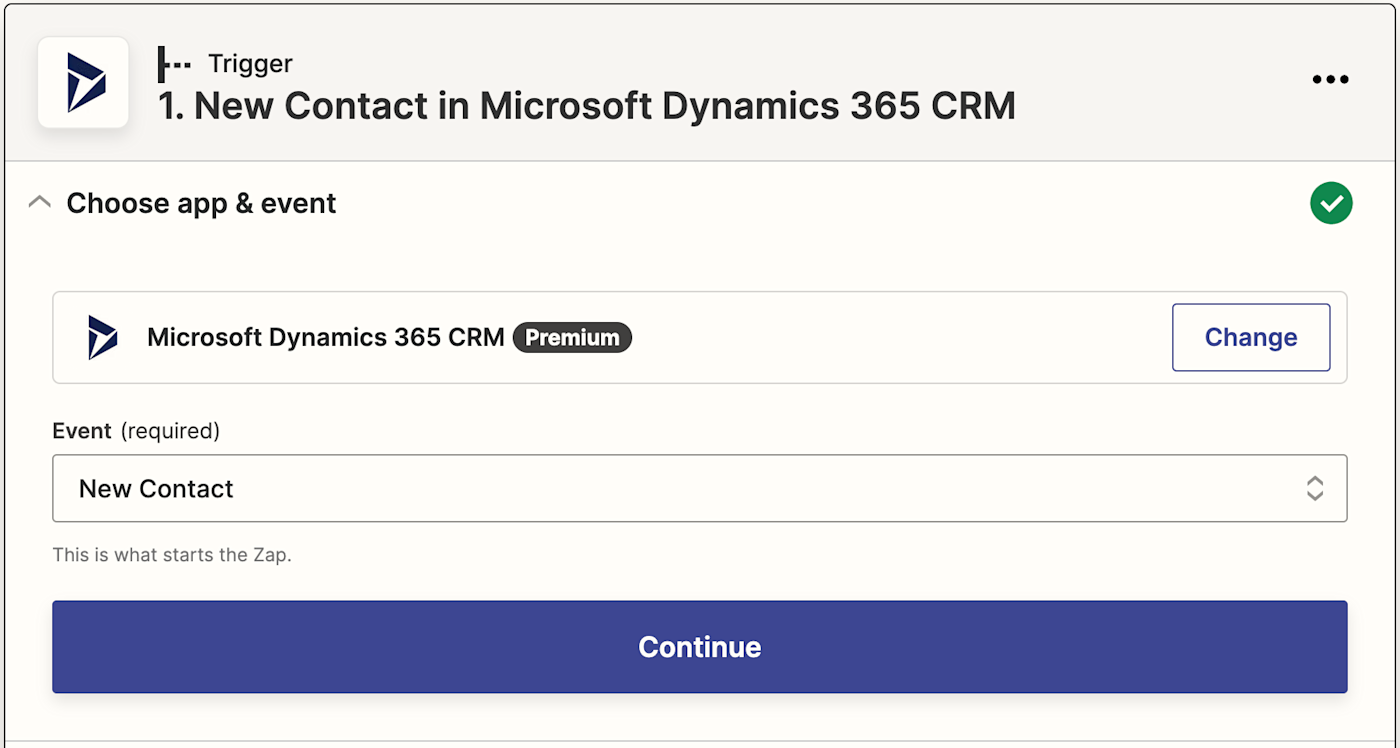
First, set up your trigger—the event that starts your Zap. Search for and select Microsoft Dynamics CRM as the trigger app and New Contact as the trigger event. Click Continue.
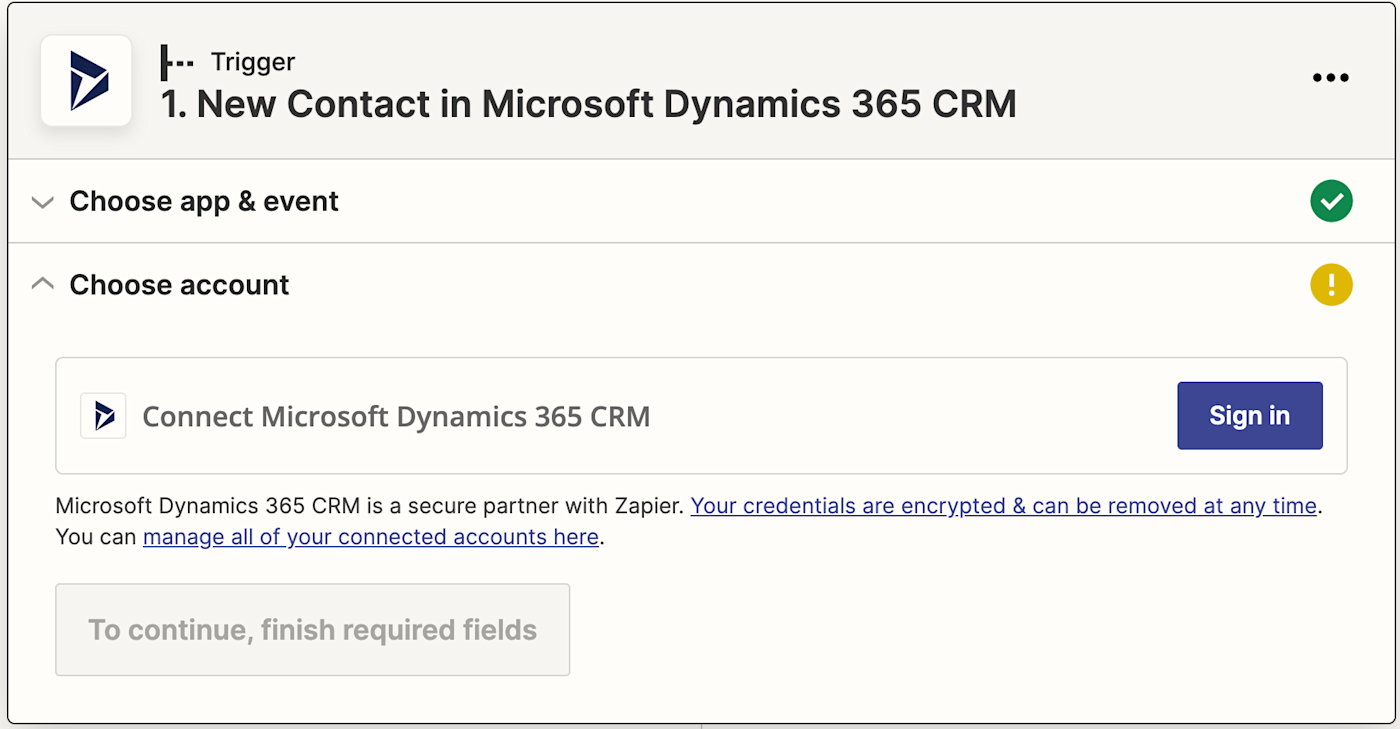
Next, connect your Microsoft Dynamics CRM account. Click on Choose an account… and either select an account from the dropdown menu (if you’ve connected Microsoft to Zapier before) or click + Connect a new account.
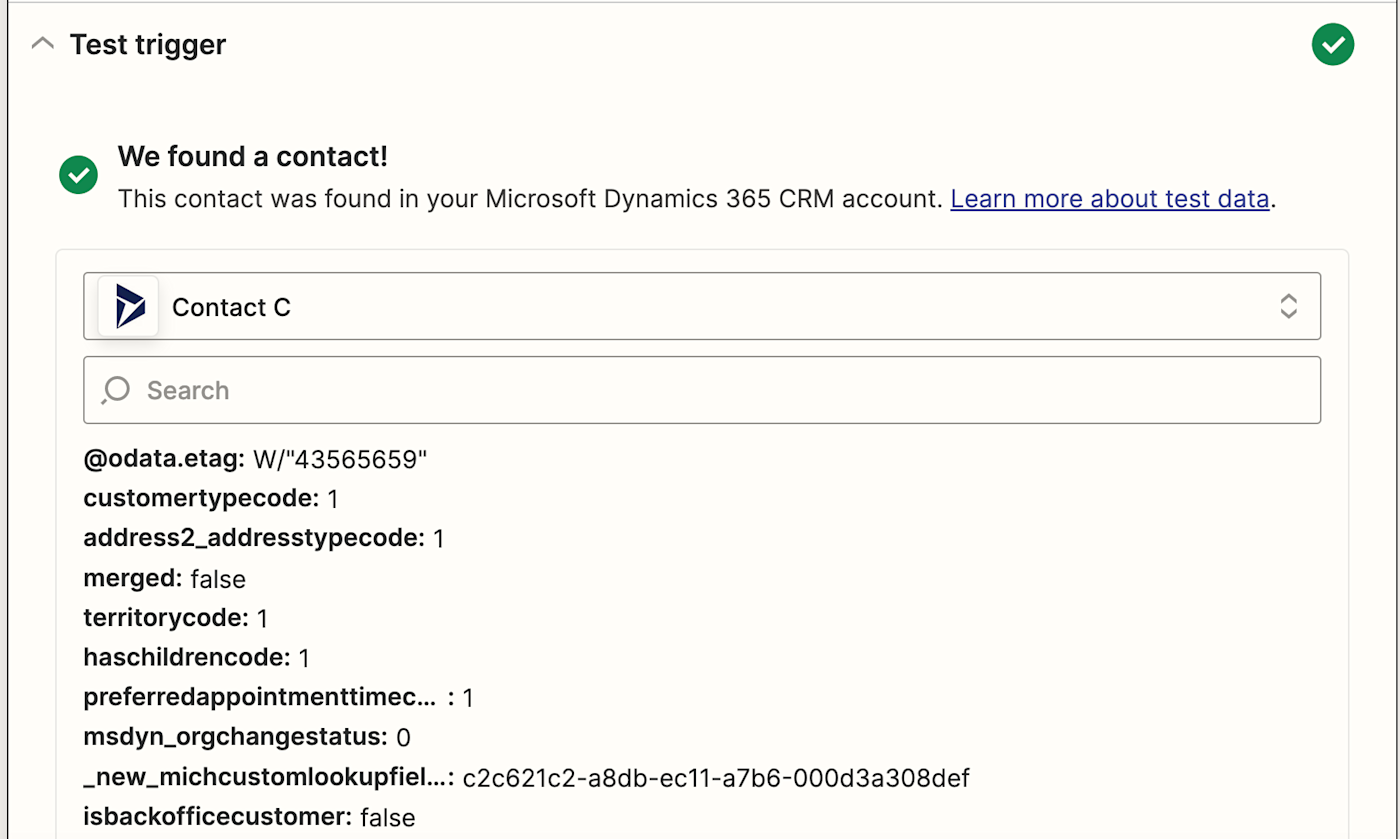
Next, you’ll be prompted to test your trigger. Click Test trigger. Zapier will find a recent contact in your Microsoft Dynamics CRM account to confirm. Once you see that your trigger is working properly, click Continue.
Set up your Mailchimp action
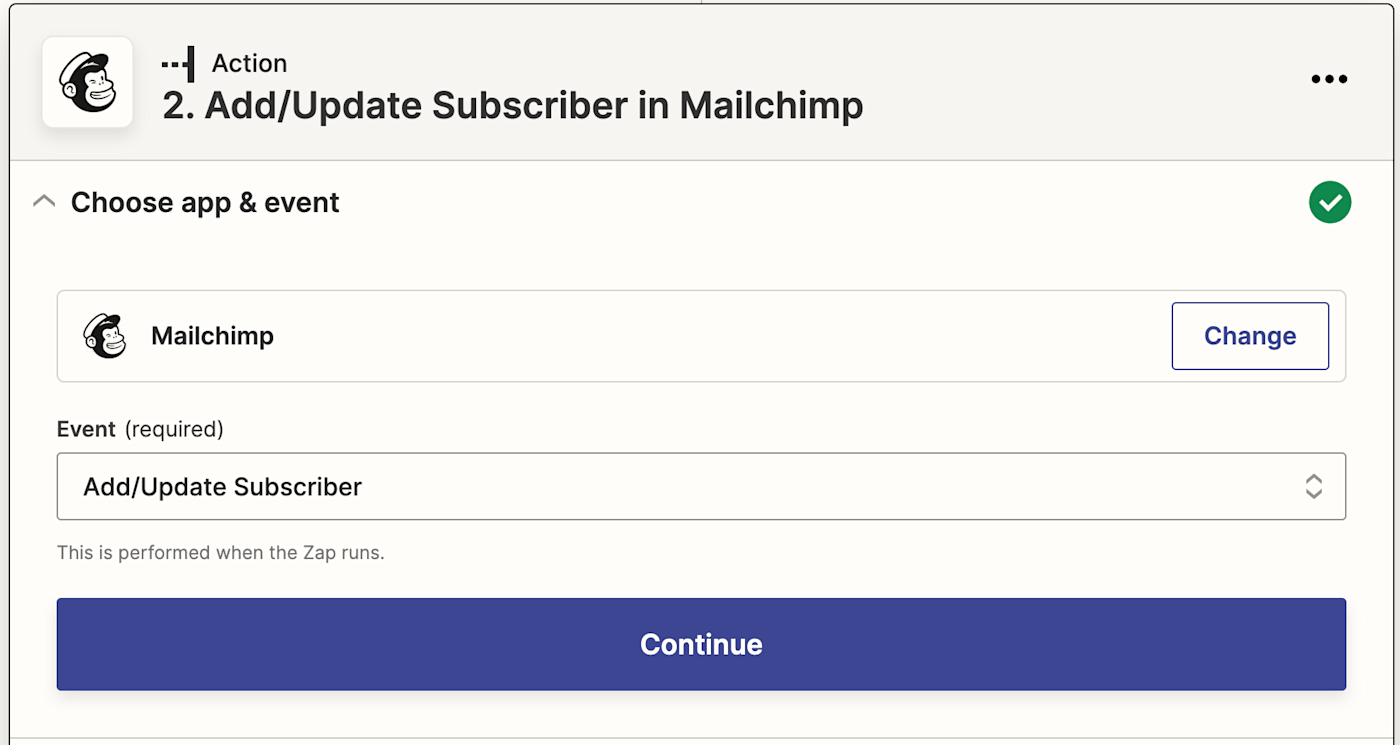
Now let’s set up the action—the event your Zap will perform once it’s triggered. Select Mailchimp as your action app and Add/Update Subscriber as your action event. Click Continue.
Connect your Mailchimp account to Zapier and click Continue.
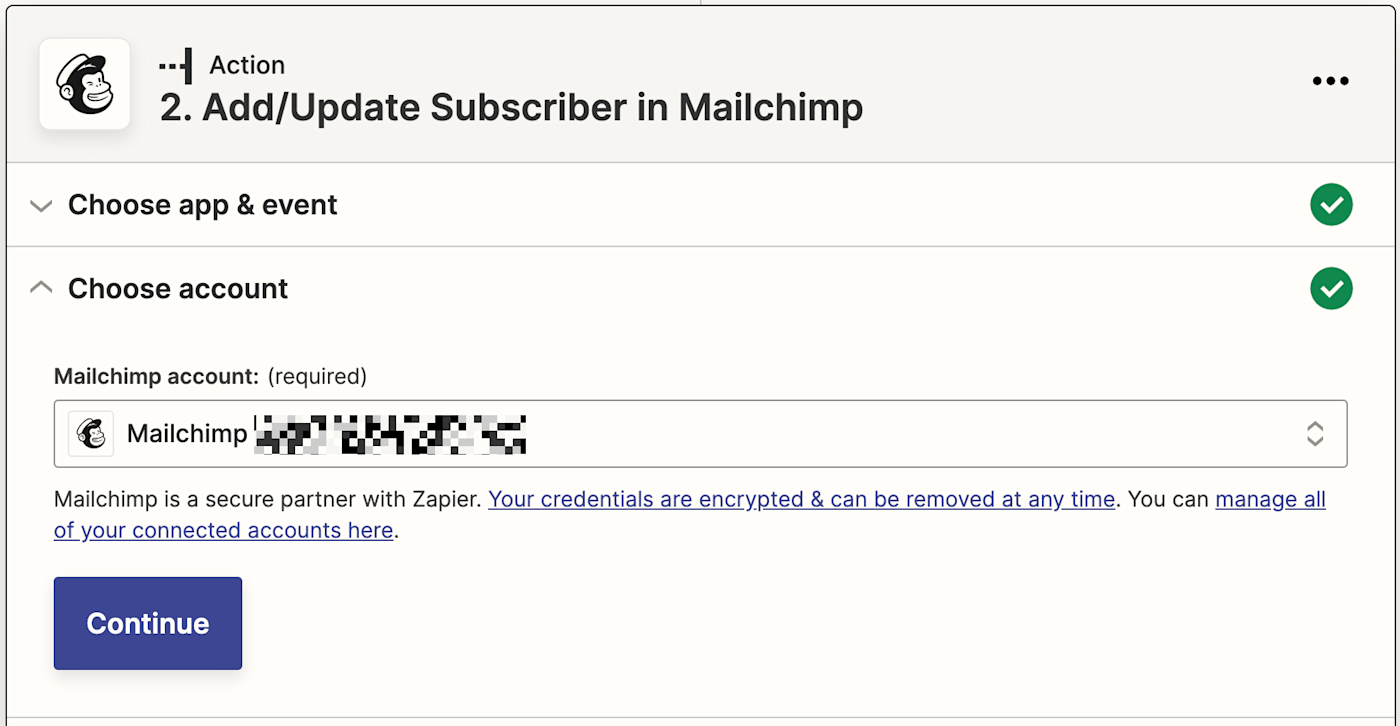
After signing into Mailchimp, select Continue again, and you’ll be prompted to map data from Microsoft Dynamics to the Mailchimp action. This is how Mailchimp knows what audience to subscribe new contacts to and which email address to use.
To map your data, just click in the field you want to add that data to, such as the Subscriber Email field. You can then select data from Microsoft Dynamics from the dropdown to add to that field. Now each time the Zap is triggered by a new Microsoft Dynamics contact, the Zap will send their email address to Mailchimp in the Subscriber Email field.
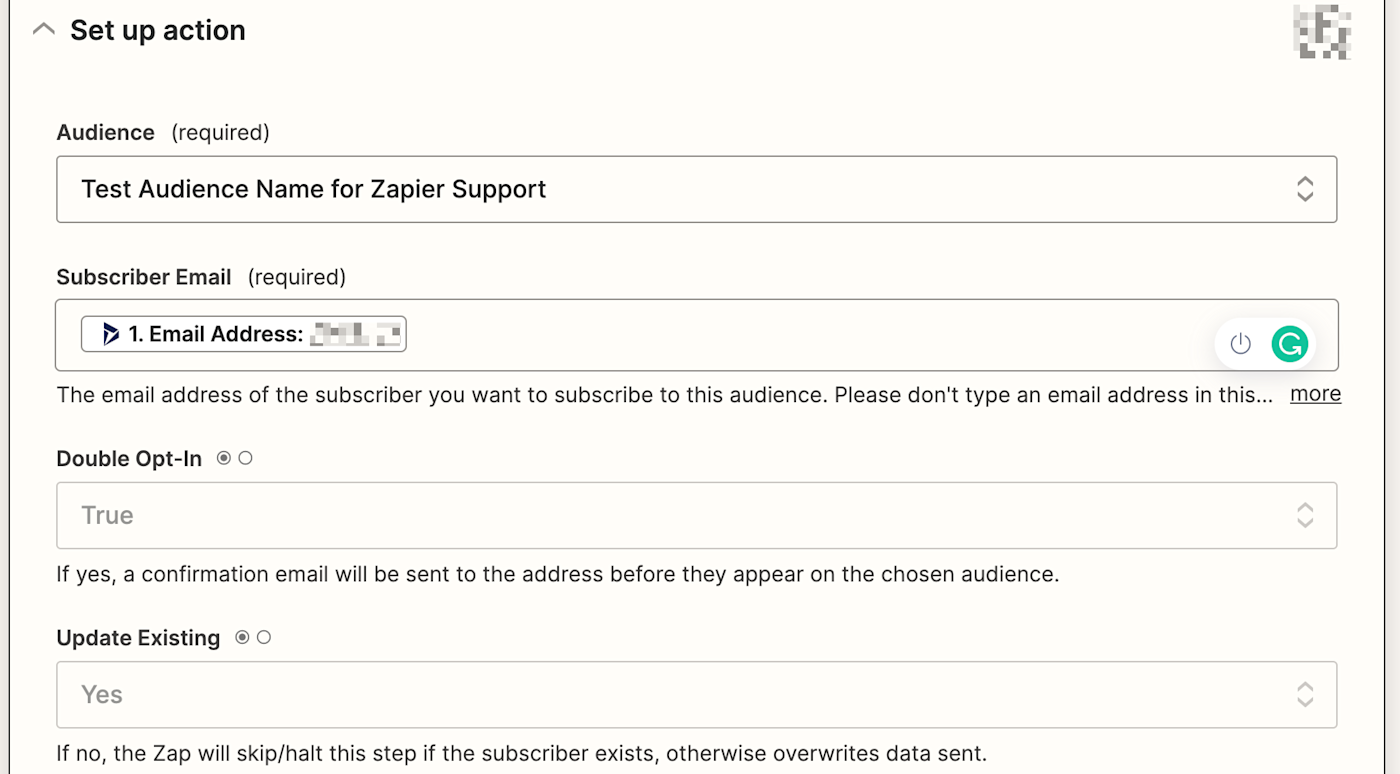
You can also select whether to send a confirmation email to the subscriber email by clicking True under Double Opt-In. You can also choose to update an existing subscriber with the new email address if it’s new under Update Existing.
There are several other optional fields that can be filled in using that same method, such as the subscriber’s first and last names (these are required), phone number, and birthday. Review these fields to see if you’ll want to save that information to Mailchimp as well.
Once you’ve finished reviewing these fields, click Continue.
Test and turn on your Zap
Now it’s time to test your action. When you click Test & Review or Test & Continue, Zapier will add the subscriber to the Mailchimp audience list you selected.
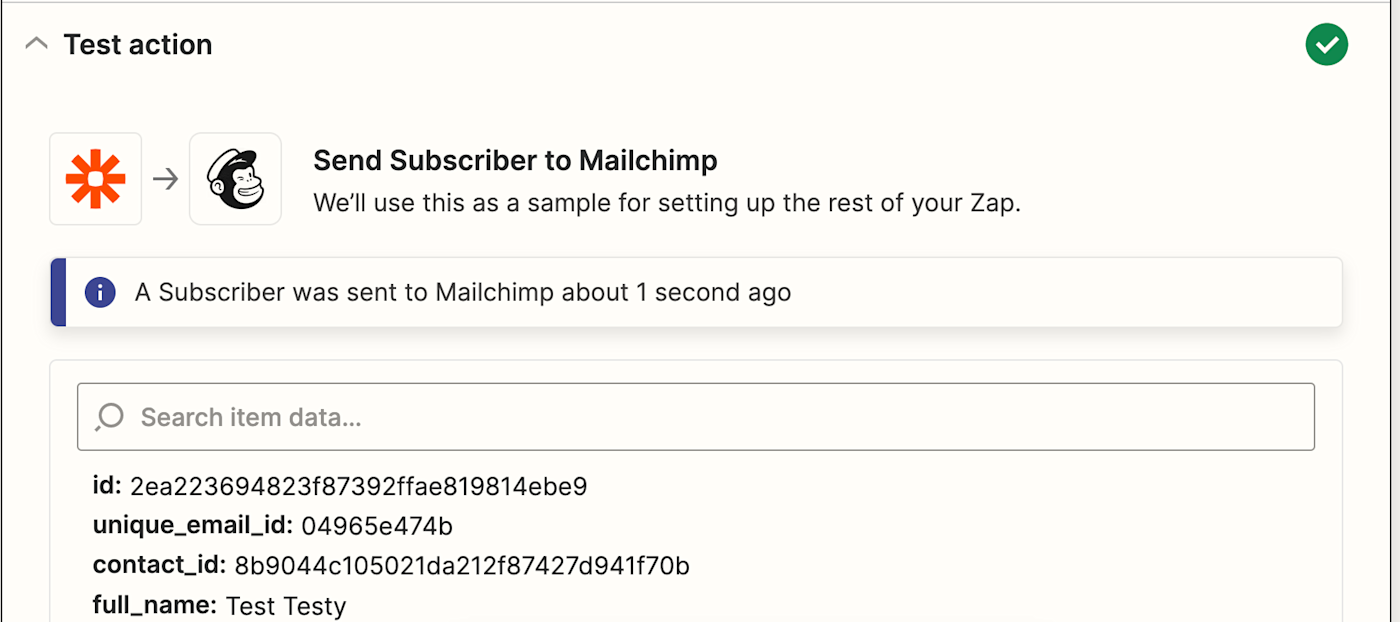
If your test looks good, you’re now ready to use your Zap. If something looks off, go back and tweak things until you get it just right.
Forget about copying and pasting email addresses—every time a new contact is created inside Microsoft Dynamics CRM, that contact will be added as a subscriber to your Mailchimp audience.
New to Zapier? It’s a tool that helps anyone connect apps and automate workflows—without any complicated code. Sign up for free.
[adsanity_group align=’alignnone’ num_ads=1 num_columns=1 group_ids=’15192′]
Need Any Technology Assistance? Call Pursho @ 0731-6725516

