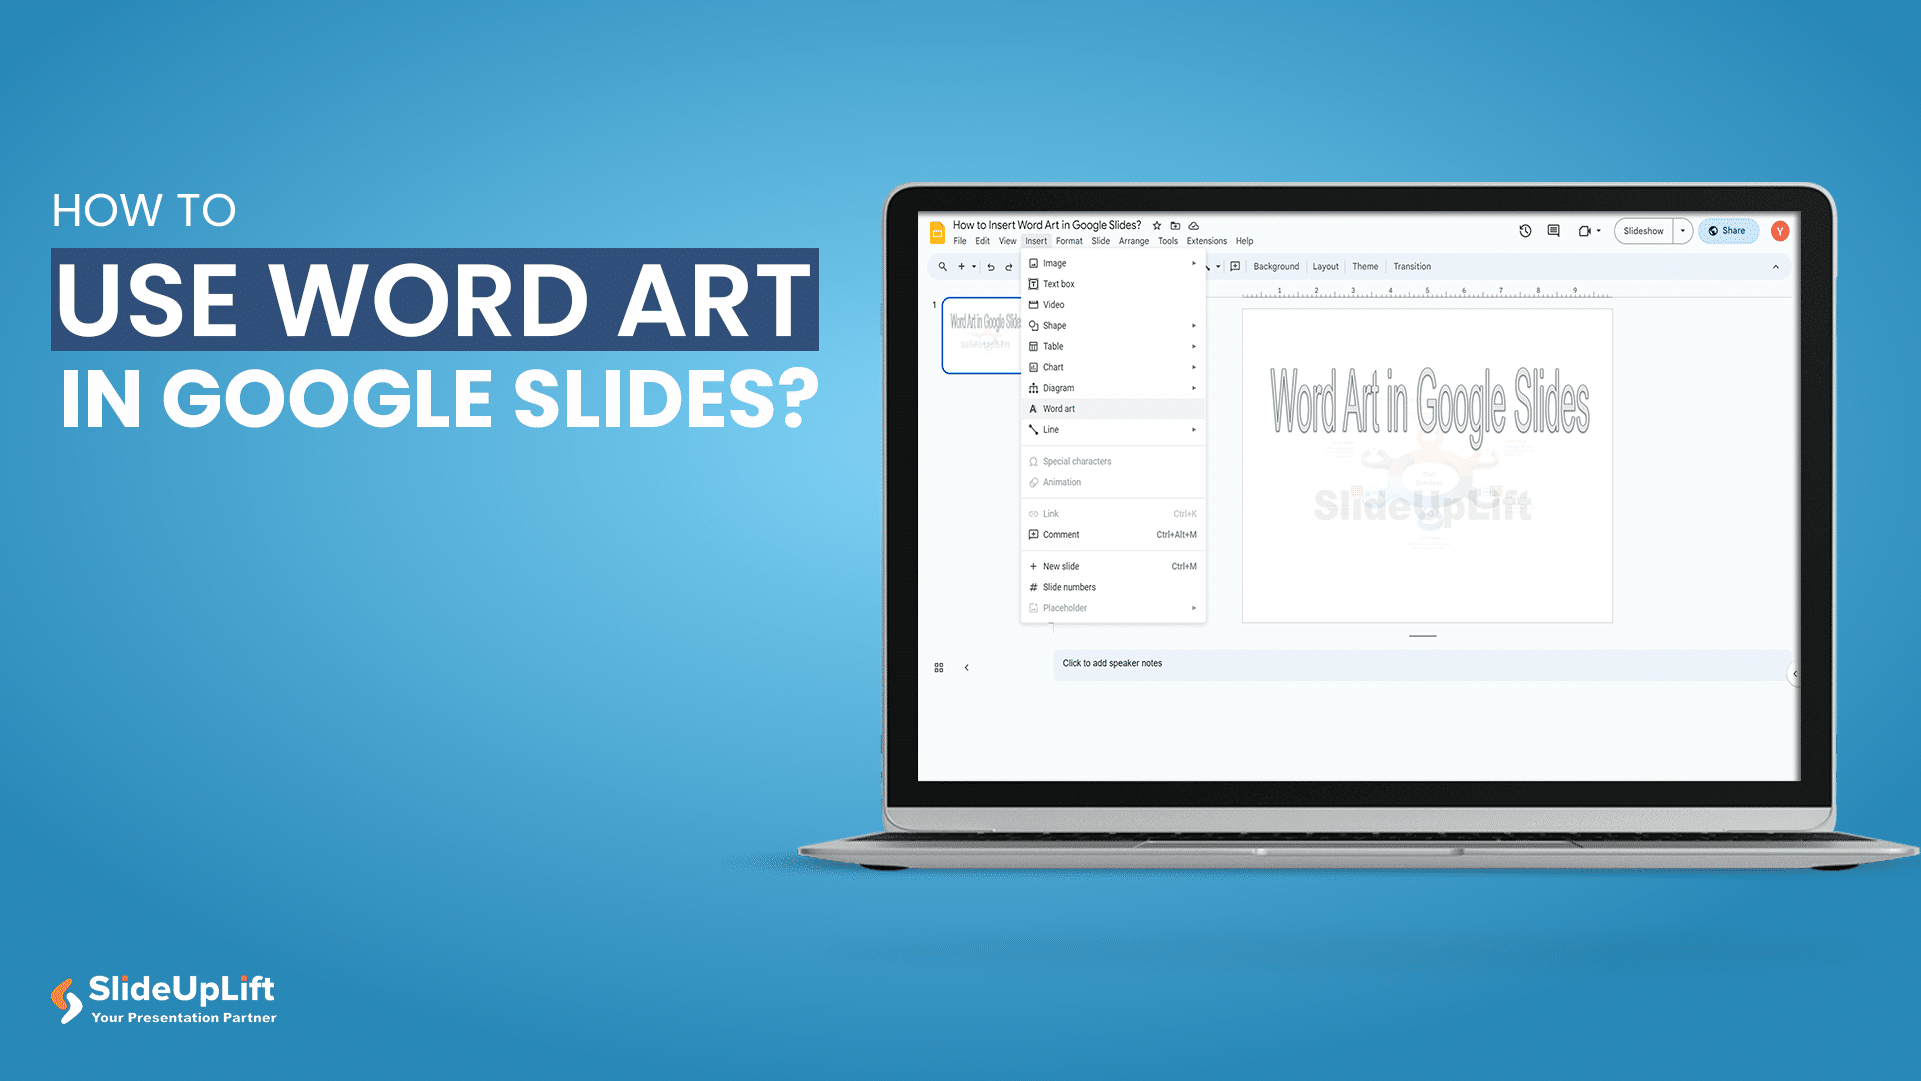
Google Slides has proven to be a dynamic platform. It enables you to easily create powerful presentations due to its seamless collaboration capabilities and variety of creative tools. Word Art is one of the best ways to take your presentations to the next level, but have you ever wondered how to use Word Art in Google Slides?
If you want elegant-looking text on your slide, you should learn how to utilize Word Art in Google Slides. Using Word Art feature is helpful to play around with catchy titles, headings, captions, and other forms of text you wish to emphasize. We will dwell into methods to find out how to insert and edit Word Art in Google Slides to add layers to your presentations.
What is Word Art in Google Slides?
The WordArt in Google Slides allows you to create and edit texts with various unique effects, including textures, fonts, colors, sizes, alignments, and more. It can be added to any slide in your Google Slides presentation.
Adding Word Art in Google Slides has multiple advantages especially in professional meetings. Let’s look deep into the importance of Word Art in Google Slides to enhance your presentation value.
Importance of WordArt in Google Slides
There is so much potential for Word Art in Google Slides presentation that helps you enhance your engagement and turn dull slides to visually appealing presentations. Below are a few points of significance of WordArt in Google Slides.
- Visual Appeal: Add WordArt in Google Slides for captivating designs from plain phrases. Customize with fonts, styles, and effects for instant attention.
- Precision in Focus: WordArt in Google Slides allows you to draw attention to particular words or phrases and direct your audience’s focus to important details.
- Branding and Identity: Mold Word Art in Google Slides to mirror your brand identity, reinforcing your company’s image and recognition seamlessly.
- Storytelling: Transform titles, headings, and quotes into visual storytelling gems, enhancing memorability and elevating your narrative. You can look for the topmost storytelling tips while presenting in front of your peers to have a real time impact.
- Emotion: Adding Word Art in Google Slides presentation facilitates emotional engagement with your audience.
How to Use Word Art in Google Slides?
In this comprehensive Word Art guide, we will look into multiple things you can do with Word Art in Google Slides presentation. The following things also help us understand the use of Word Art in Google Slides:
- Insert Word Art in Google Slides
- Edit the Text in Word Art in Google Slides
- Customize Word Art in Google Slides
- Add Word Art Effects in Google Slides
How to Insert Word Art in Google Slides?
You can insert Word Art in Google Slides presentation by following these steps:
- Open the Google Slides presentation where you wish to insert Word Art.
- Click the “Insert” menu and choose “Word Art” from the drop-down menu.
- After clicking the “Word Art” option, a text box will show up at the top of your Google Slides presentation. You should type the text that you want as your Word Art.
- Finally, click “Enter.” Your “Word Art” text box will now be visible on that specific presentation slide.
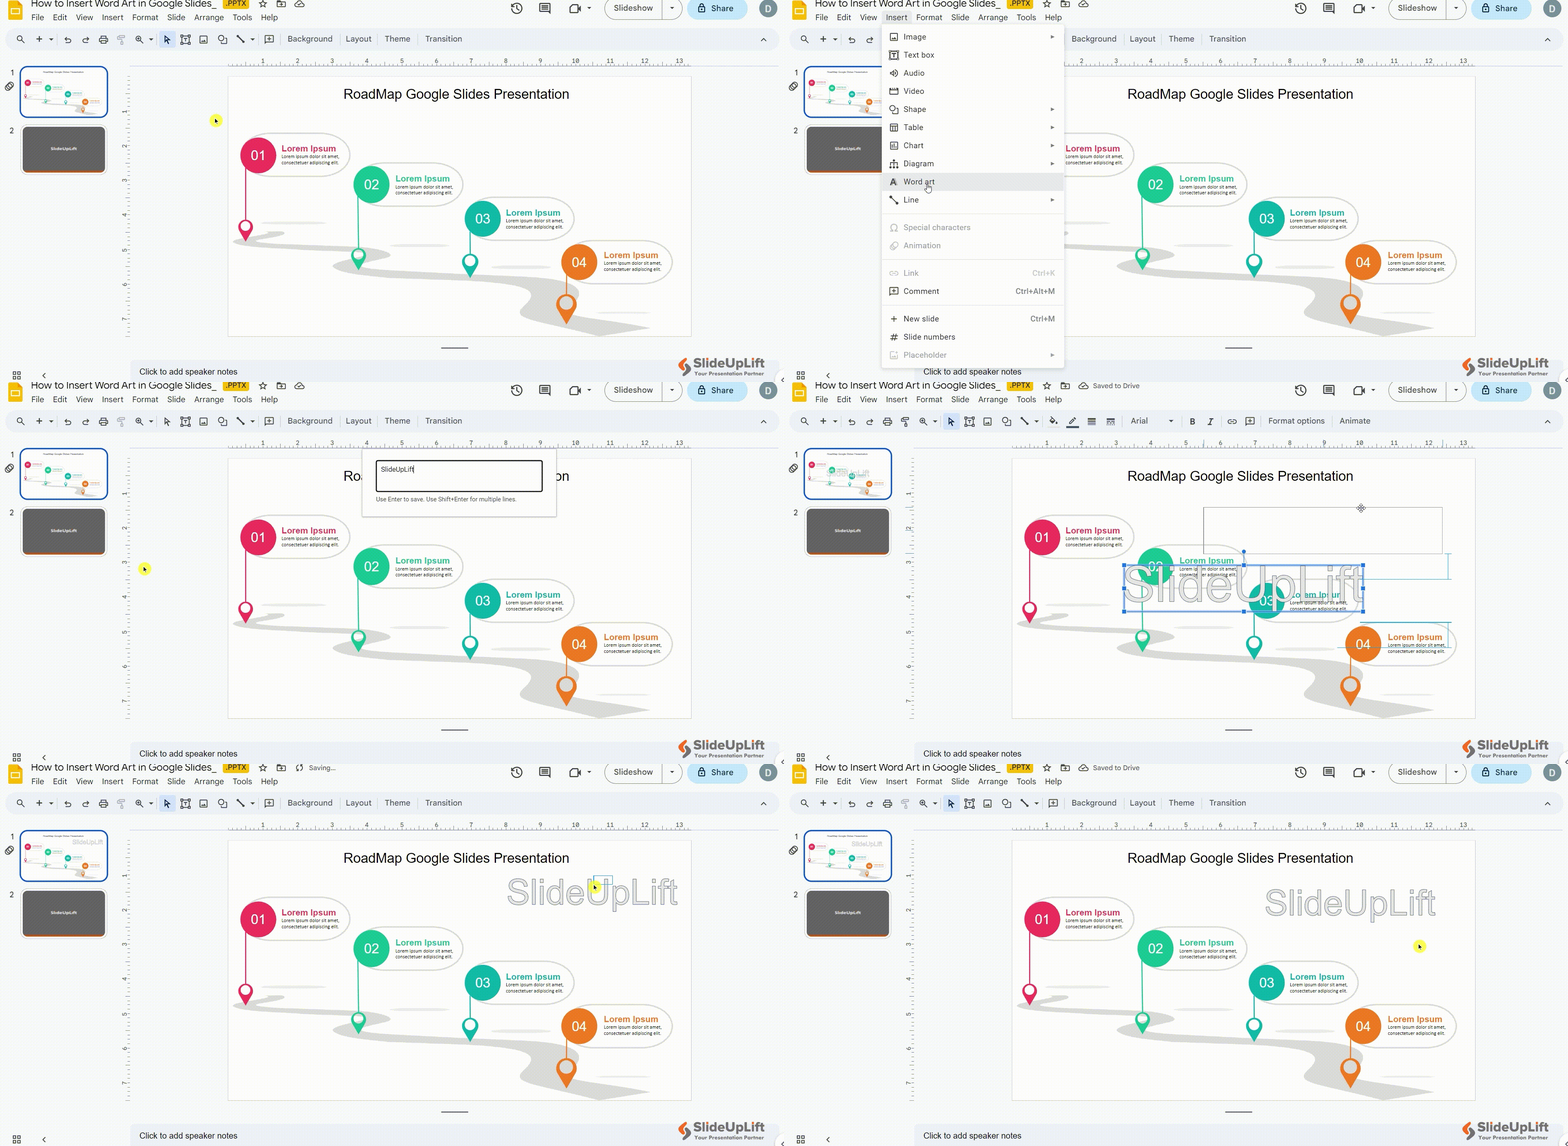
How to Insert Word Art in Google Slides?
How to Edit the Text in Word Art in Google Slides?
If you accidentally typed the wrong word in the WordArt text box, you can also edit the text in your presentation. And this how you can edit Word Art in Google Slides:
- Double-click the text in your Word Art.
- When a text box surrounds your “Word Art,” you can edit the text inside.
- Press “Enter” to save your revised content after entering and changing it in the WordArt text box. Your Word Art content or text is now edited.
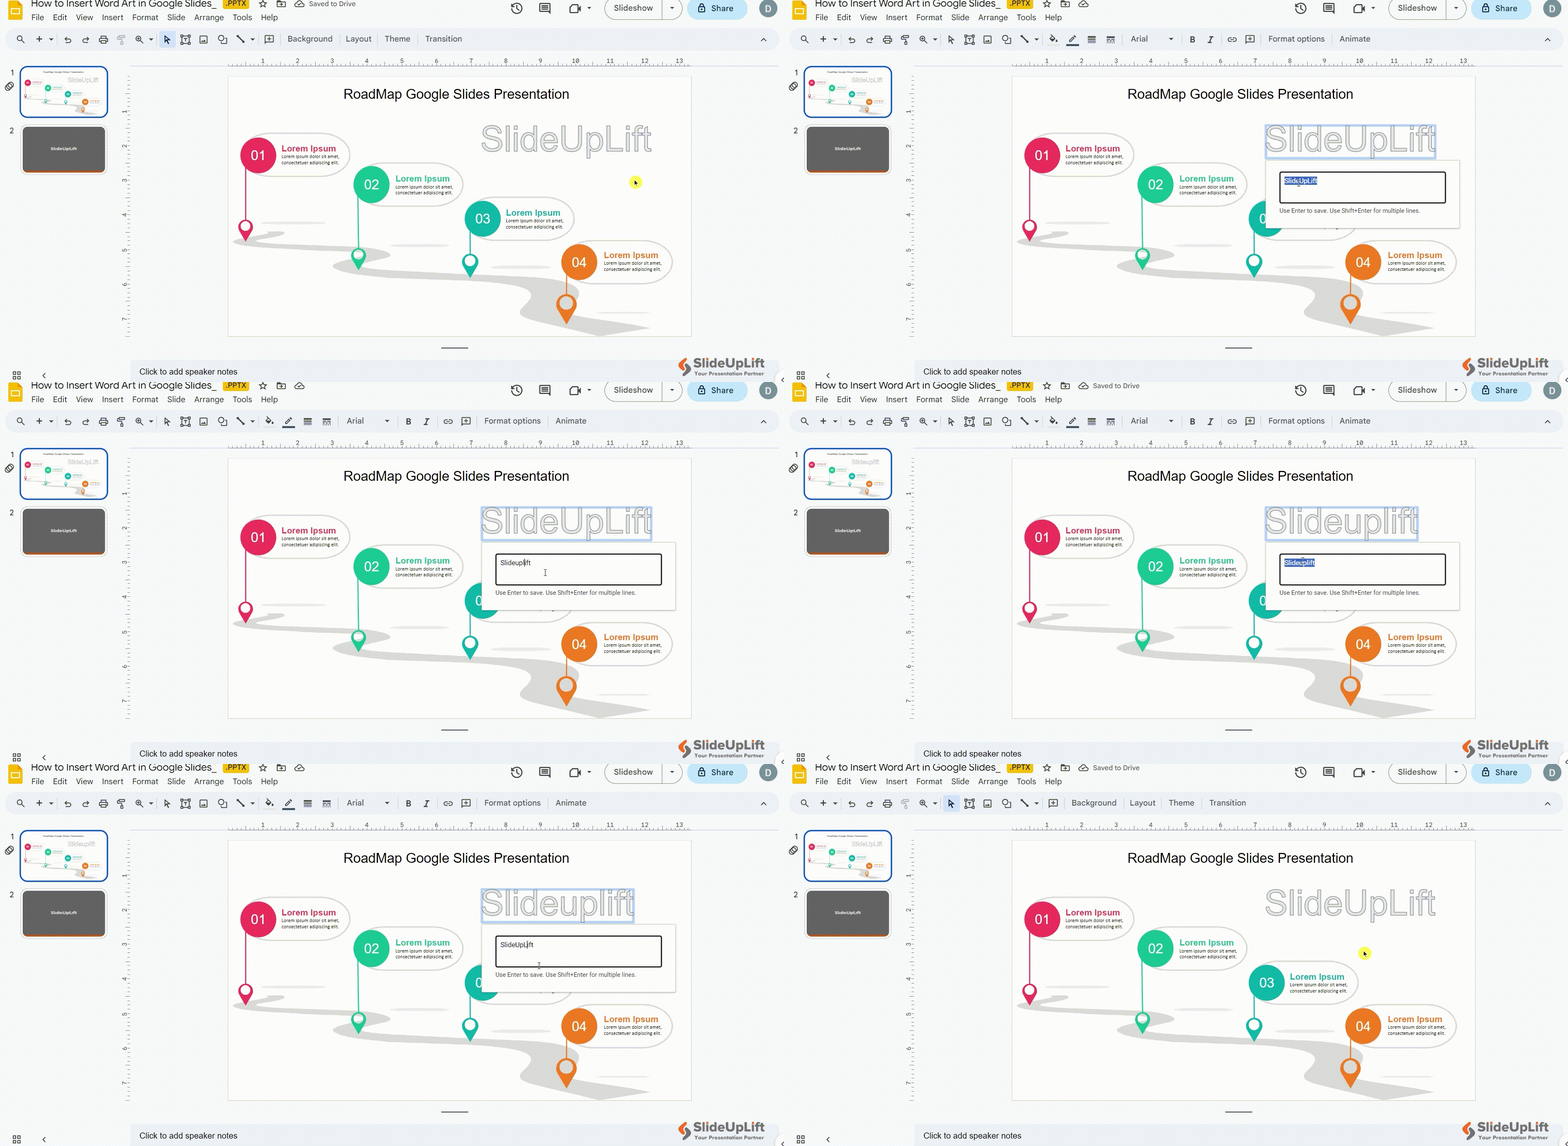
How to Edit the Text in Word Art in Google Slides?
How to Customize Word Art in Google Slides?
To customize Word Art in Google Slides presentation, follow these steps:
- On Google Slides, choose the “Word Art” option for a specific slide.
- You can customize the font style, border weight, and line thickness of the “Word Art” text box.
- For instance, to change the font color in your Word Art text, click “Fill Color” o from the toolbar. You can select from Solid or Gradient colors for your Word Art in the drop-down menu.
- To change the border and background colors of your Word Art, select “Border color.”
- The border and fill colors you choose will appear immediately on your “Word Art.”
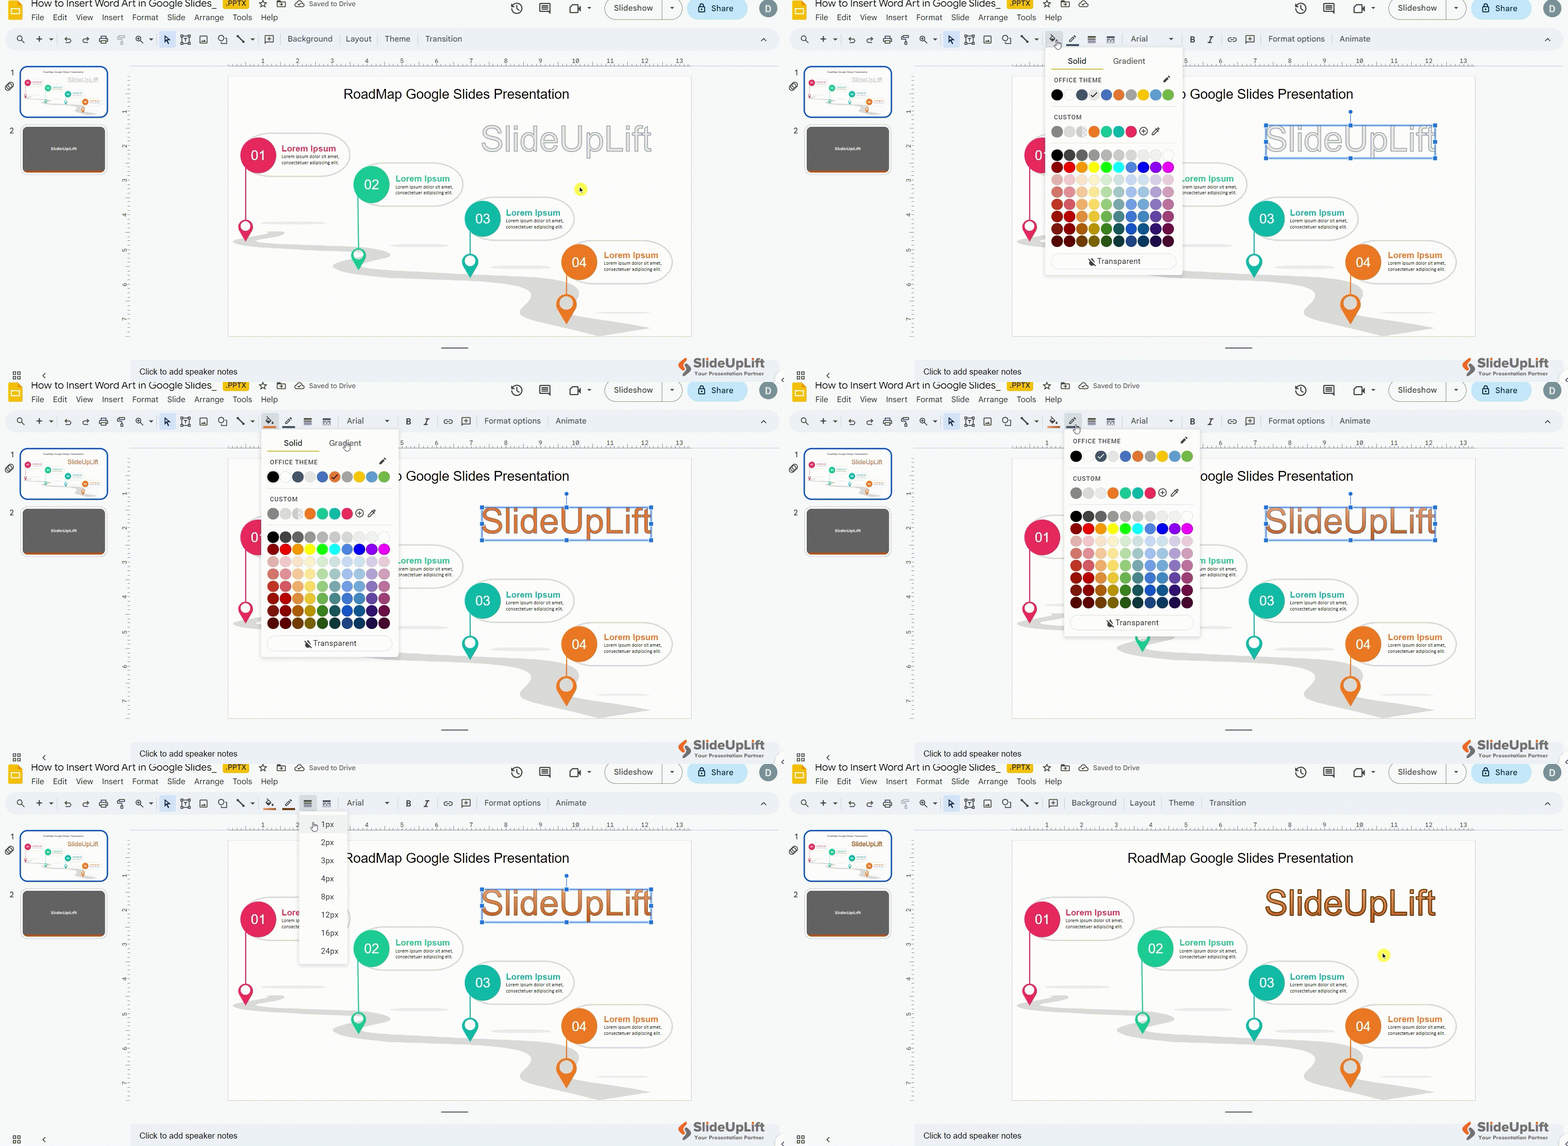
How to Customize Word Art in Google Slides?
READ MORE: How to Add Fonts to Google Slides?
How to Add Word Art Effects in Google Slides?
If you wish to give your “Word Art” text more effects like creating or adding zoom animation to your Word Art , follow the steps below:
- In your Google Slides presentation, select the “Word Art” text box.
- Navigate to your presentation’s toolbar and choose “Format options.”
- When the format menu appears on the right side of your Google Slides, select “Drop Shadow.”
- You can move and drag the Word-Art text’s transparency, angle, distance, and blur radius choices under the “Drop Shadow” menu.
- Click the handle in the top-middle of the text box if you want to tilt your WordArt.
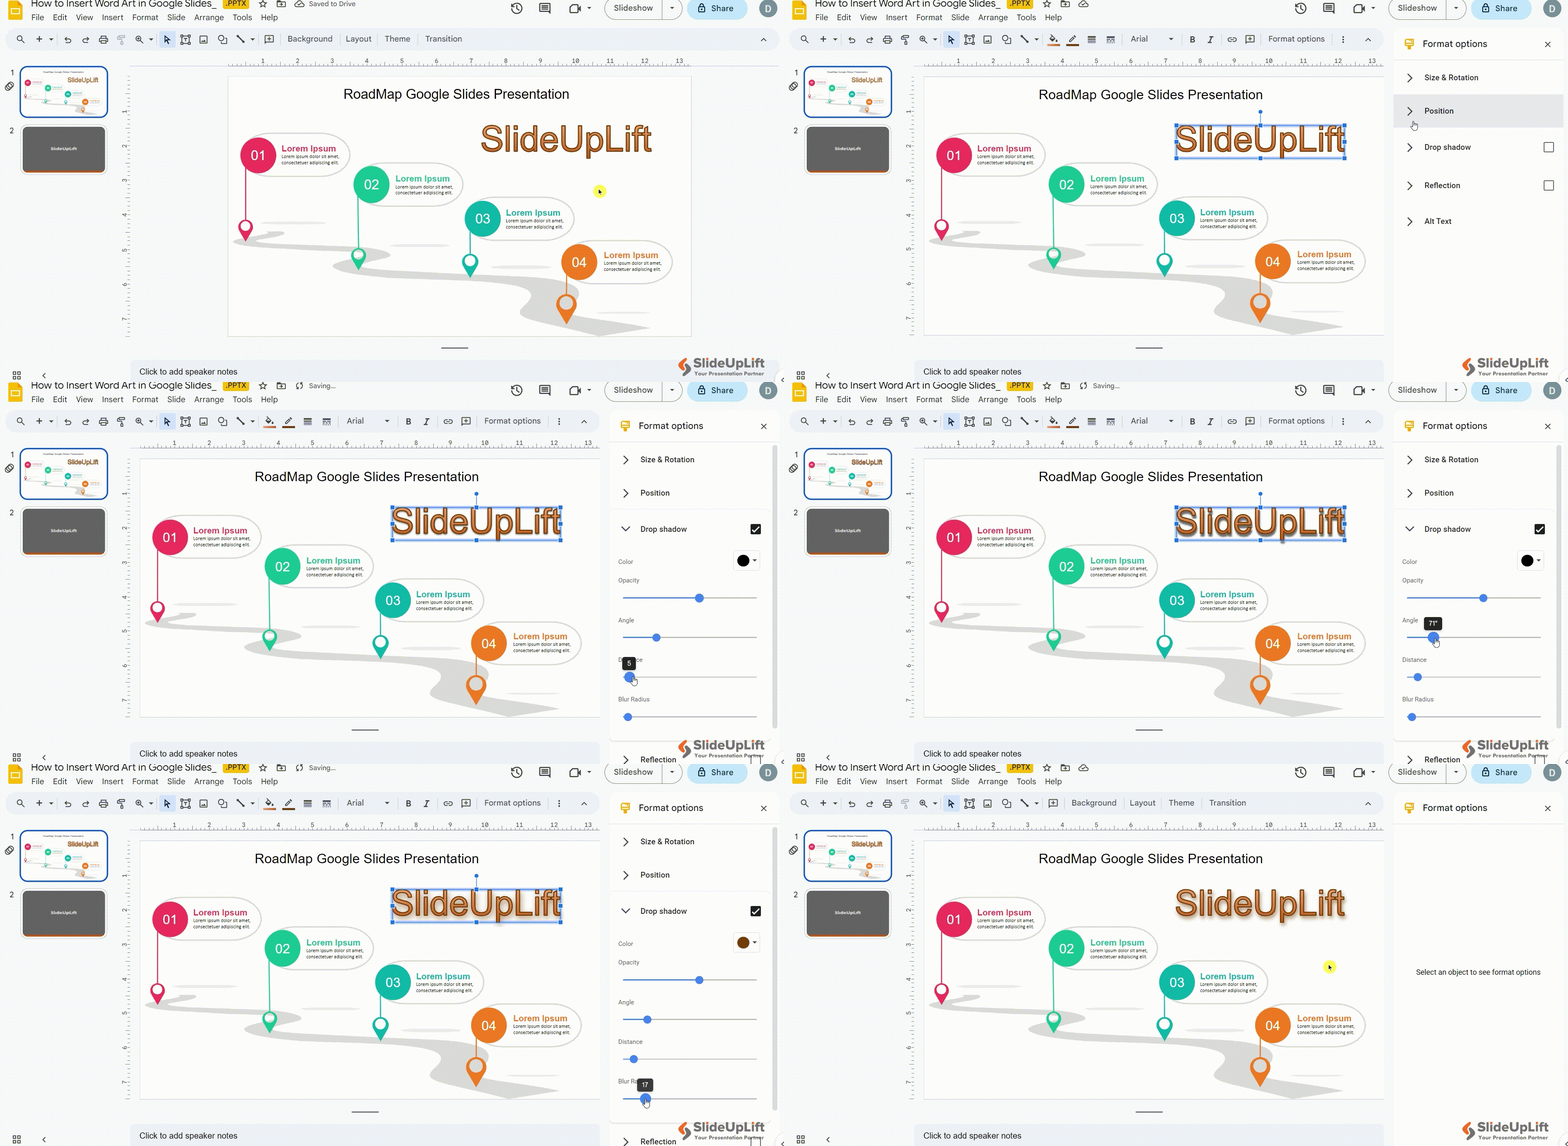
How to Add Word Art Effects in Google Slides?
It is so easy and convenient to customize and add visual effects to your Word Art in Google Slides presentation.
READ MORE: How to Add Drop Shadows in Google Slides?
Word Art in Google Slides is the secret component that elevates presentations from ordinary to exceptional. Making use of this feature is a great way to highlight certain parts of your presentation. You can consider Word Art as your creative partner who works behind the scenes to make your words memorable and your messages impactful. By directing your audience’s attention, highlighting important facts, and expressing emotions through artistic design, Word Art enables you to communicate stories visually.
Now that you have learnt how to insert Word Art in Google Slides presentations, it’s time to put your skills to test and boast in front of your peers by exploring our vast gallery of Google Slides templates. If you wish to learn more of such tips and hacks to master the art of Google Slides presentation, check out our Google Slides tutorials.
FAQ’s
-
Where is Word Art in Google Slides?
In Google Slides, you can find Word Art under the “Insert” menu. Just click on “Word Art” to add stylish and creative text to your presentation.
-
How to Change WordArt Font in Google Slides?
Click the Word Art, open the “Font” dropdown in the toolbar, and select a font from the list to change the text’s appearance.
-
How to Fill Word Art with a Picture in Google Slides?
Choose Word Art, access “Format Options” in the toolbar, under “Text fill,” pick “Image,” and upload a picture to fill the text with an image.
-
Can I use Word Art for titles and headings?
Yes, you can use Word Art for titles and headings in your Google Slides presentations. It helps make them visually appealing and attention-catching.
-
How Do I Delete Word Art in Google Slides?
To delete Word Art, select the Word Art box and press “Delete.”
Looking For Powerpoint Design Agency?
Call Pursho @ 0731-6725516
Telegram Group One Must Follow :
For Startups: https://t.me/daily_business_reads
#Word #Art #Google #Slides

