A timeline diagram is the best pick to display a brand’s journey, a chronological list of events, project progress, and much more. Inserting a timeline diagram into your presentation is a great way to improve the delivery of your message and offer your audience a better understanding.
Using Google Slides, you can make a timeline with just a few clicks and make it accessible to your teams and stakeholders easily. This tutorial will help you with step-by-step instructions to create a timeline in Google Slides.
Let’s begin!
Use a Timeline Template
Don’t have enough time to create your own timeline diagram from scratch? No worries! Google Slides provides a solution for that too. You can use any of the available pre-designed templates and customize them as per your presentation’s needs.
Below are some simple steps for inserting a timeline into your Google Slides presentation –
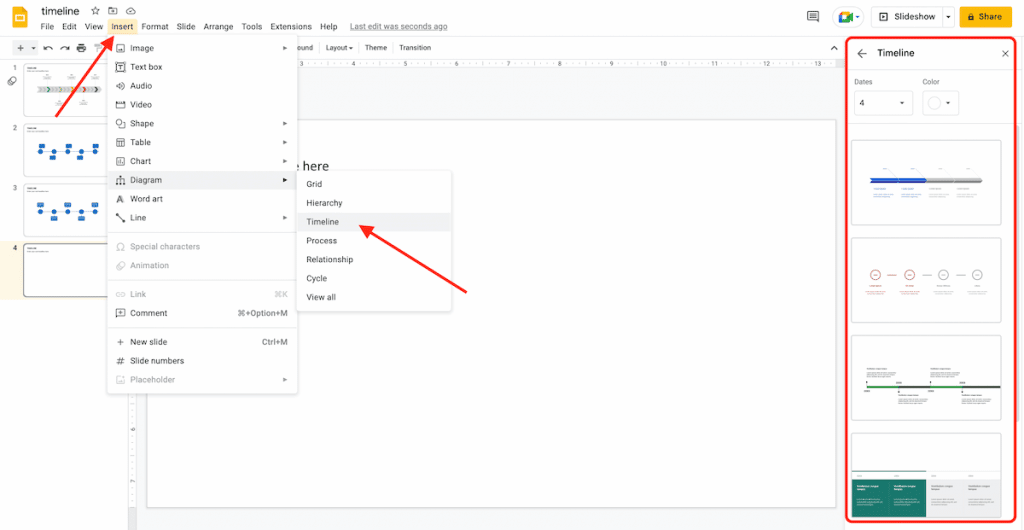
Step 1: Select the slide where you want to insert the timeline. Then choose Insert > Diagram.
Step 2: Select the Timeline template from the right sidebar.
Step 3: Configure your diagram by using the Dates and Color drop-down menus. When you change the number of dates and colors, Google Slides will adjust the previews to let you visualize the design of the timeline.
Step 4: Click any of the timelines. Based on the template you choose, you will get different field texts such as project manager, project name, task details, and more. Double-click the text fields to add information to the timeline.
Step 5: To showcase progress through time, you can use various colors. Select the element to change its color and then click on the Fill color option from the toolbar. The colors that you are already using for your timeline are given under Custom.
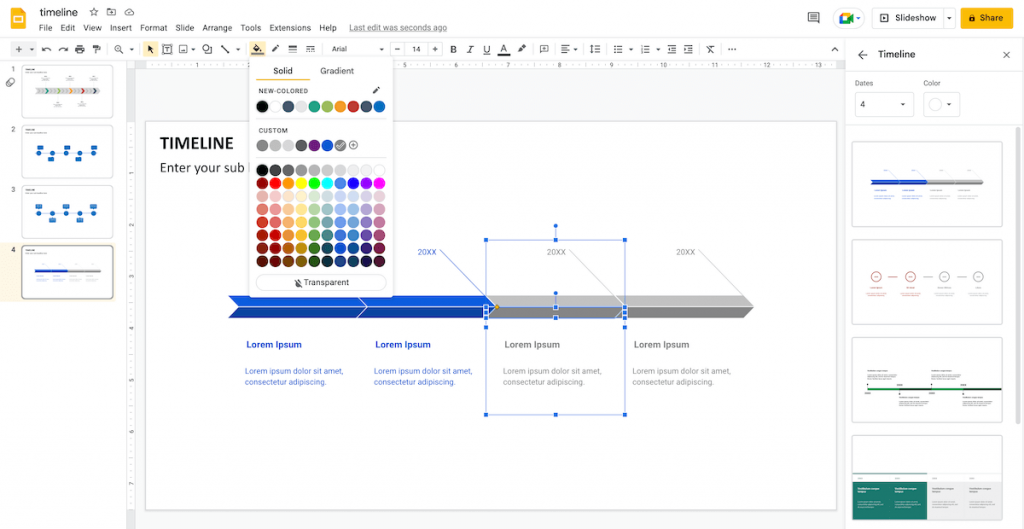
To copy this timeline diagram to another slide, just select the complete diagram, copy it using the command, go to the other slide, and paste it there.
Create a Timeline from Scratch
Creating the Outline
Step 1: Open your Google Slides presentation.
Step: 2 Pick the slide where you want to insert the timeline diagram.
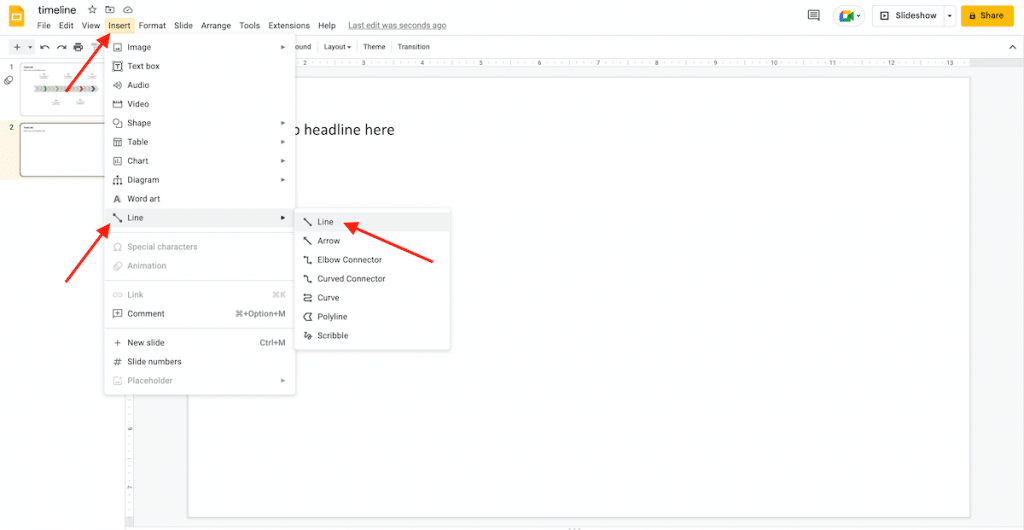
Step 3: In the toolbar section, click Select Line > Line to draw a horizontal line in the center of the slide.
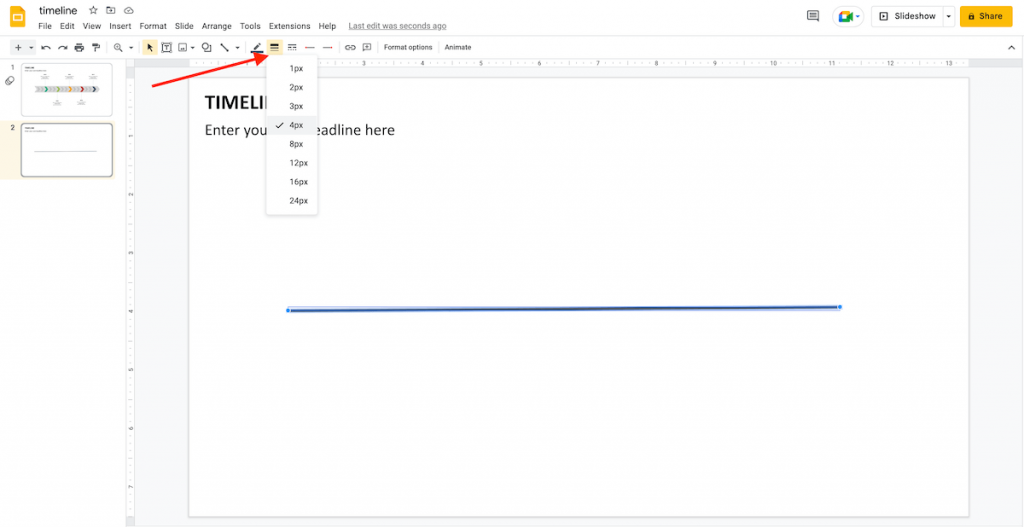
Step 4: Change the line color and thickness from the toolbar. We recommend you keep the same color used in the other slides.
Step 5: In the toolbar section, click on Shape > Shapes. Select the oval shape to create a circle over the line. We are using five circles in this timeline. You can use circles, rounded rectangles, hexagons, and so on.
Step 6: Click on the Fill color option in the toolbar to change the color of the circles and Border weight, color, and dash to style the circle’s border. Ensure your circle’s style goes with the master slides.
Step 7: To make your timeline diagram appealing, color the circle with the same color palette as the line and select the Transparent option under Fill color to make its border invisible.
Step 8: Create four more copies of the circle for a timeline diagram with five milestones. Select the circle and use the command Ctrl C + Ctrl V in Windows and Cmd C + Cmd V in Mac to copy and paste.
Step 9: Place all circles over the line maintaining the equidistant between them.
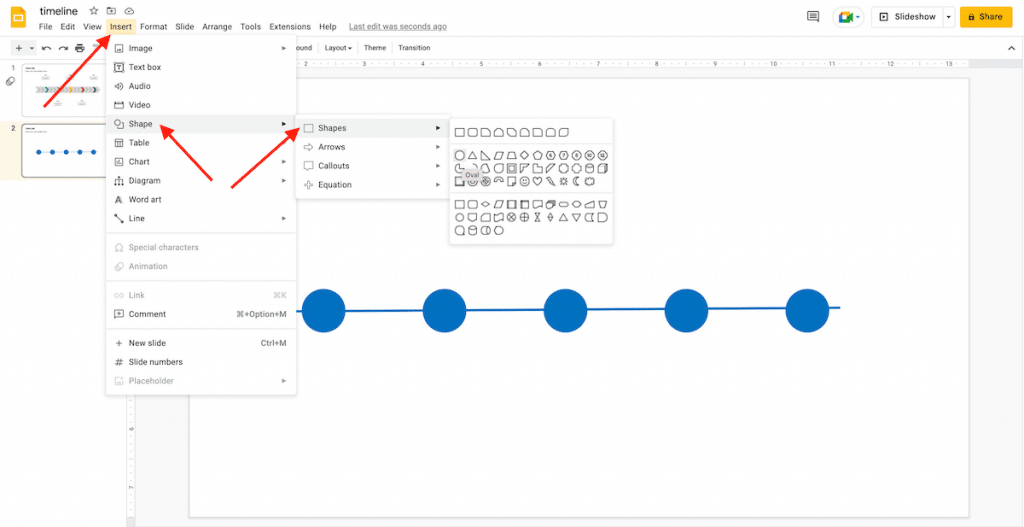
Creating Callouts for Your Text
Step 1: Select Shape > Shapes > Callouts in the toolbar and place it on the top of the first circle. With this step, you will be completing the timeline outline.
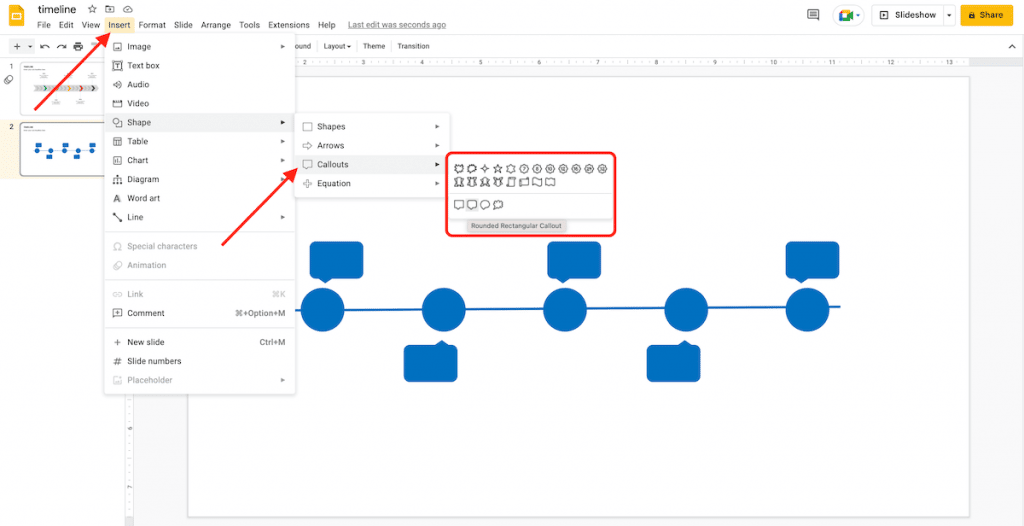
Step 2: You can use the pre-formatted callouts with tails to one side available in the Google Slides’ library or create a customized box by inserting a square or rectangular shape from the toolbar. Style the shapes with the same borderline style and color to maintain uniformity.
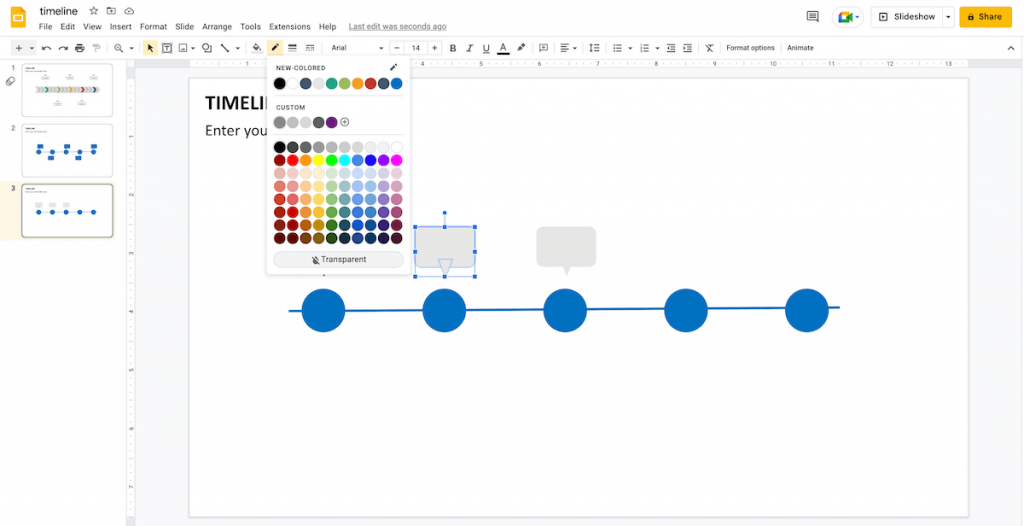
Step 3: For the personalized callout shapes, select the entire area of the callout and group the elements by Arrange > Group.
Step 4: Create copies of the callout shapes with Ctrl C + Ctrl V in Windows and Cmd C + Cmd V in Mac.
Step 5: Place each callout box above each circle and keep the consistent design and size of the boxes with the template’s design.
Step 6: To give a dynamic look to your design and create extra space on the slide, place one callout box above the circle and the other one underneath it.
Step 7: Select the callout shape and use the command Arrange > Rotate > Flip Vertically to point the callout box towards the circle. You can also use the shortcut to flip and rotate the object by selecting the callout to bring up blue dots. Click on the farthest away dot and drag it to rotate while holding the ‘Shift’ key and turn it in 15-degree increments.
Step 8: Adjust the callouts to ensure they all are properly aligned and equally distant from their subsequent circles.

Creating Text Boxes
Step 1: Select text boxes in the toolbar.
Step 2: Click and drag the box in the callout box and insert your desired text. Keep the text short to help your audience easily read and interpret.
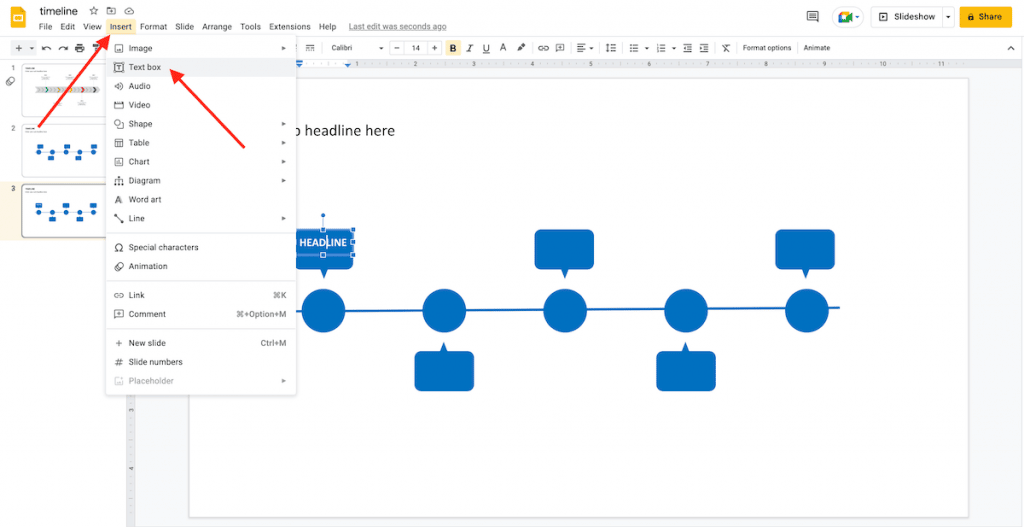
Step 3: Style the text as needed using different options in the toolbar while keeping the master slides’ design in mind.
Step 4: Copy and paste the text boxes in all callouts and insert the text as needed.
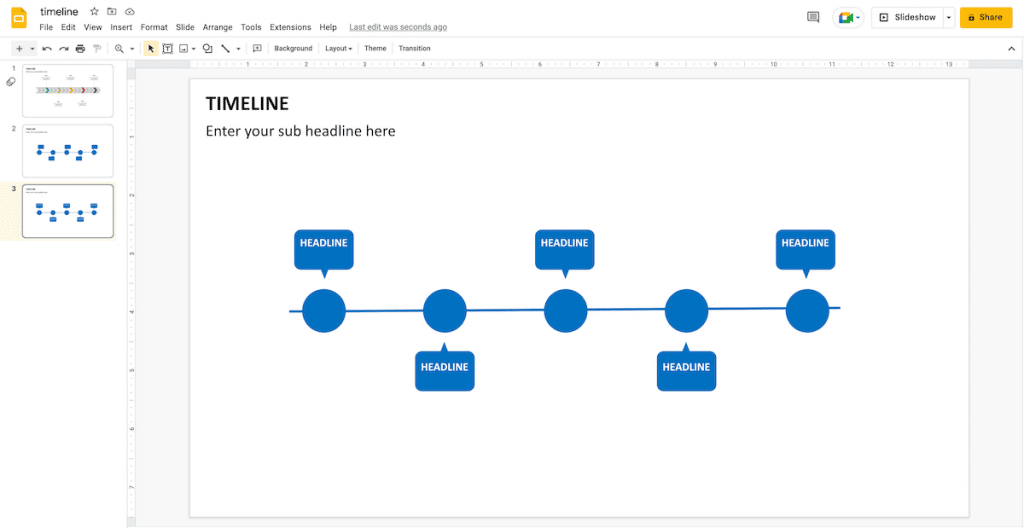
Step 5: Click on the text box to insert your text.
Step 6: Write a brief overview of each milestone.
Step 7: Format the text to maintain uniformity with the other slides’ font type and size.
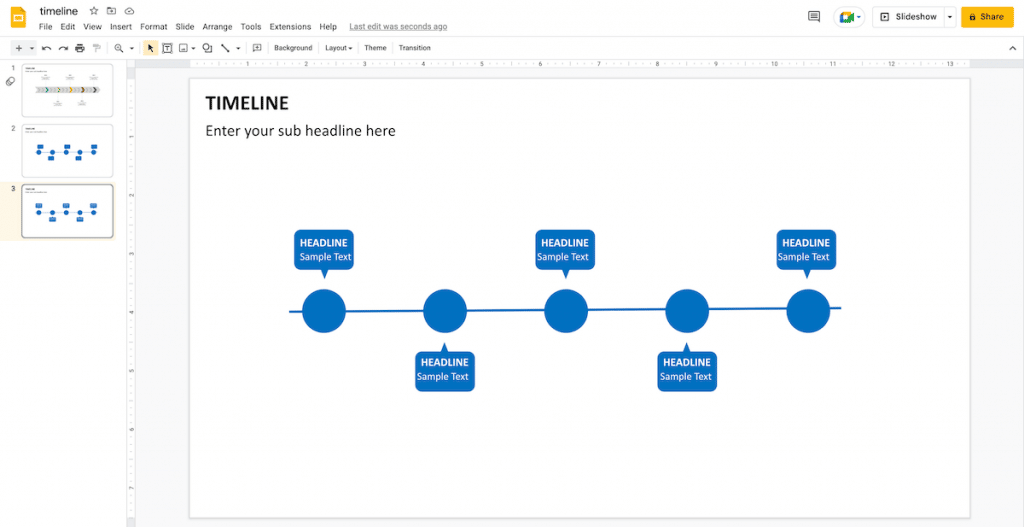
You’ve done learning the easiest way to create a timeline in Google Slides! Leverage it to simplify your slides’ content and maximize audience engagement.
Keep following us for more such guides!
Looking For Powerpoint Design Agency?
Call Pursho @ 0731-6725516
Telegram Group One Must Follow :
For Startups: https://t.me/daily_business_reads
#Create #Timeline #Google #Slides #Step #Step


