For almost a year into freelancing, I used a notebook to keep track of my clients, article topics, deadlines, and invoice amounts—it was a disorganized, pen-scribbled client database.
It led to self-inflicted confusion, especially while managing deadlines, anticipating submission timelines in advance, and knowing how much work I was doing for each client every month. Add subcontractors to the mix, and I was pulling my hair out, figuring out who I had to assign which assignment, when it was due, which articles I was writing, and the status of each client project.
Turn your Notion workspace into an information hub
Around the same time, I started using Notion to manage my to-do list. I was still new to the app, but seeing how many dashboard views and organization templates it had, I decided to try creating a streamlined database on Notion—and it worked.
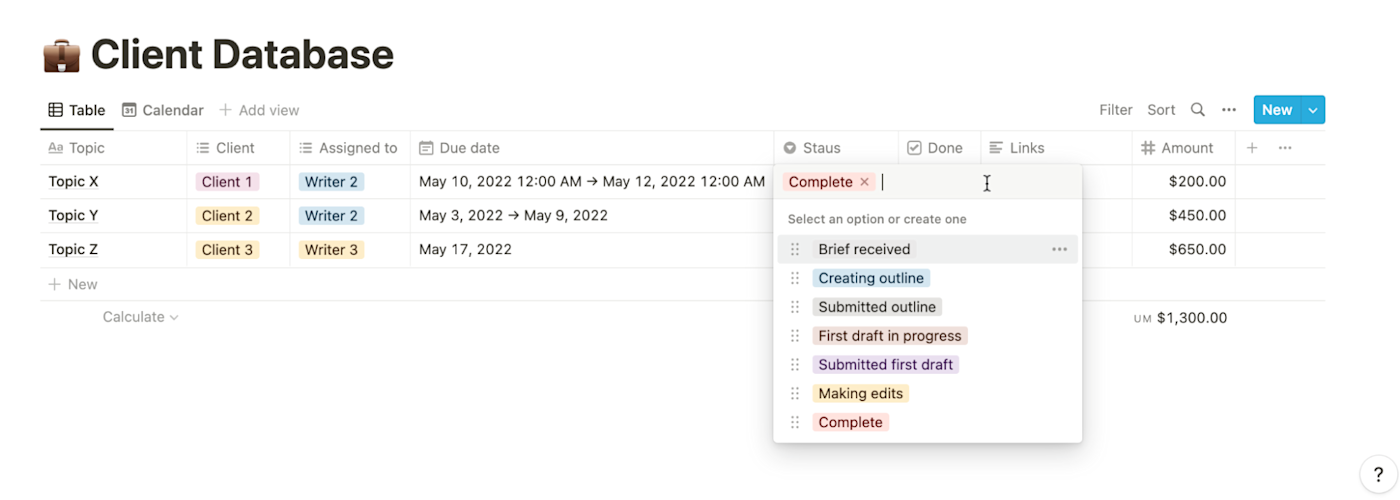
Here’s a peek.
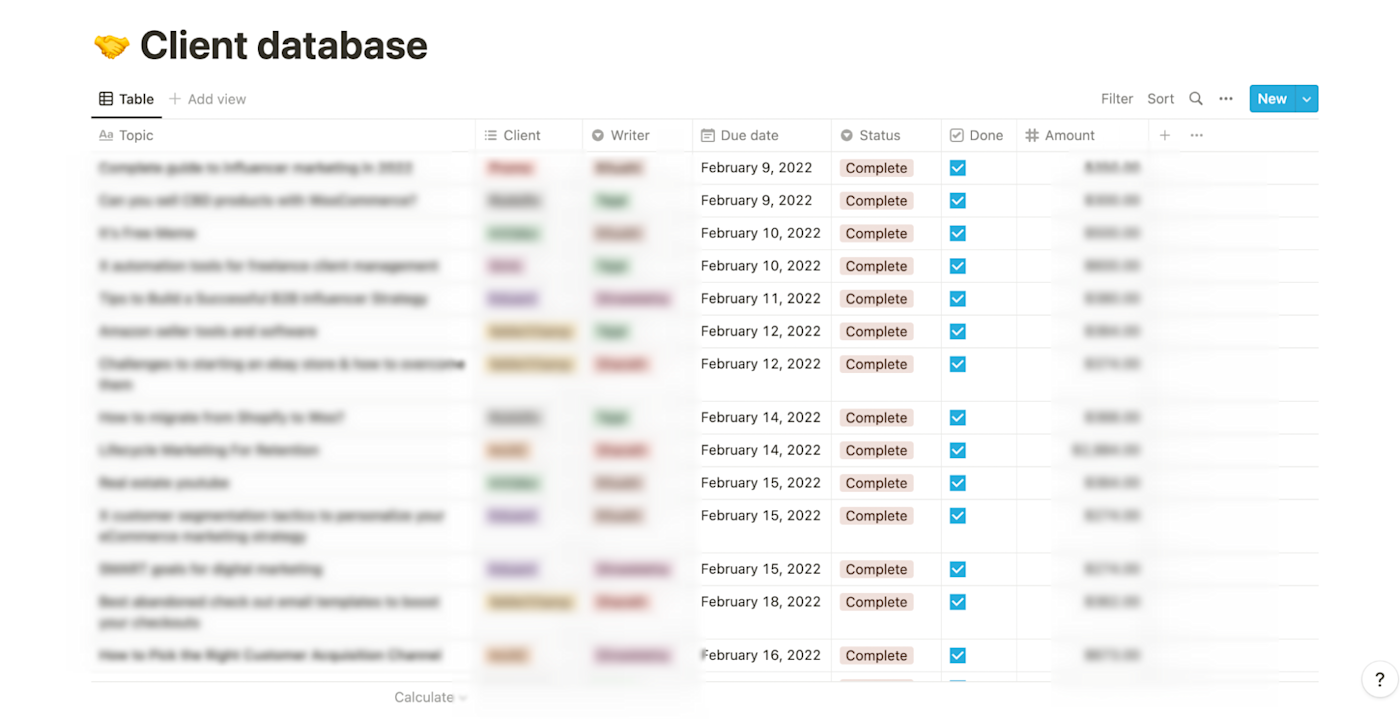
It gives me a bird’s eye view of all my client assignments every month and a sense of direction with all the to-dos and dates laid out in front of me. It’s a client database, yes, but it’s also a guiding tool for scheduling and prioritizing my tasks for the week, saving hours of back and forth, and solidifying my processes—for good.
How to build your own project and client database on Notion
If you want to build a database for your freelance projects using my method, here’s the link to my Notion template. Open it, click Duplicate at the top-right corner, and you can instantly start using it in your Notion workspace and even tweak it to better suit your management priorities. Before you do, here are some tips.
Know your database views
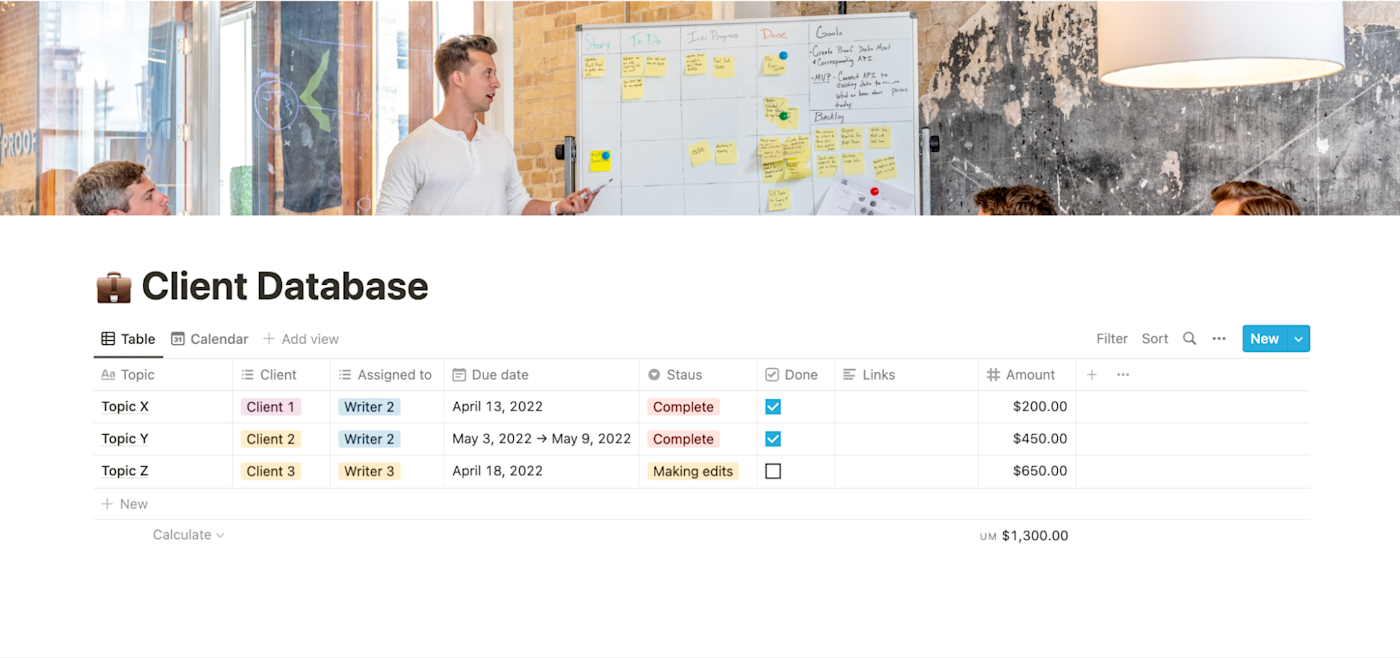
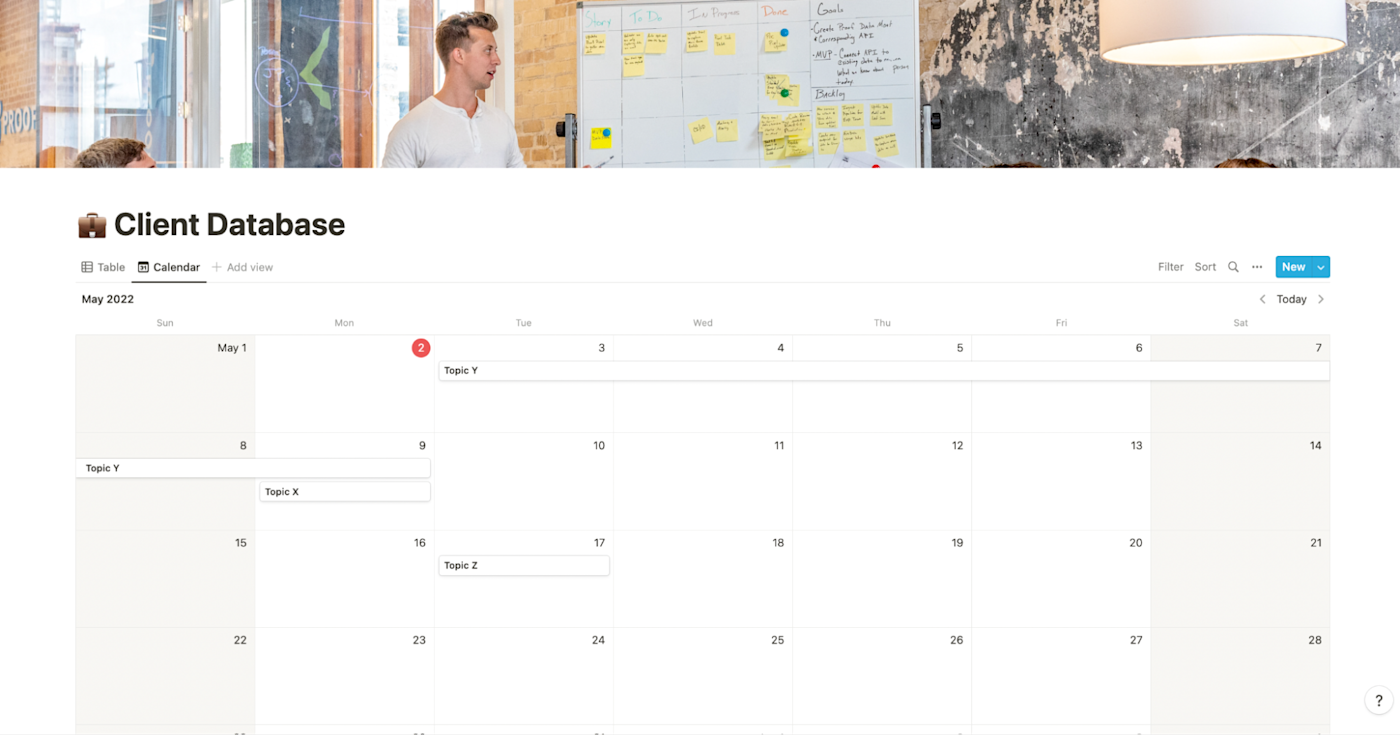
Notion offers a diverse range of views, like a Kanban-style board and a gallery, but my preferred views for this database are table and calendar. You can toggle between them by simply clicking on the options below the page title.
-
List view: This one gives you a more granular look at projects with the client name, due date, progress, and cost. This is usually my default view, which I keep updating as projects progress.
-
Calendar view: This gives you an overview of your work each month to help you prioritize your tasks and manage your days/weeks accordingly, so the timelines don’t get compromised. The calendar view automatically gets updated as you add due dates to your projects in the table view.
Adjust your columns based on what you want to track
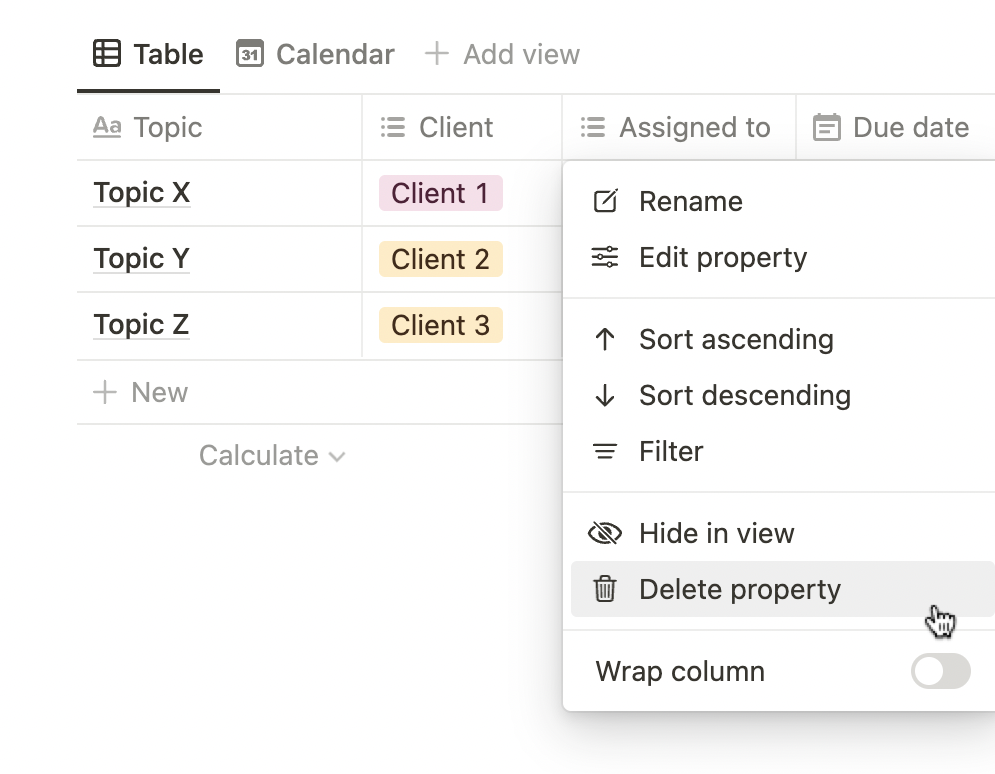
You can create as many columns as you want to manage your client database. I’ve limited it to the eight fields I think are most essential to track. If you don’t need one of these columns, remove it by clicking on the column title and selecting Delete property.
-
Topic: Sometimes, it’s difficult for me to recall the topics I’ve written about before and for whom, especially when sending relevant samples to potential clients. This column helps me keep track of what I wrote for which client and quickly search for it when sharing work or referring to the invoice.
-
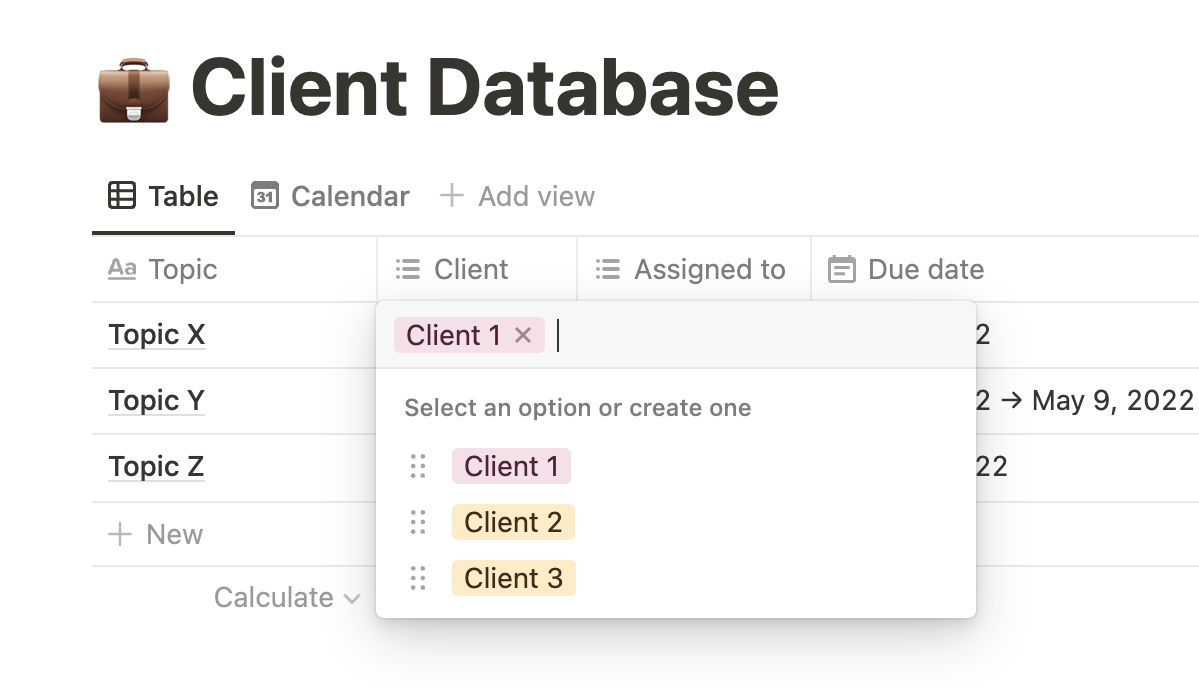
Client: You can add new clients to the database as part of your onboarding process. Click on the box, type in the name, and hit Create. Then, when you start a project for them, you can easily choose from the dropdown box.
-
Assigned to: Since I work with subcontractors, this column makes it easier for me to see who’s working on what at a glance. Similar to the client column, you can add your team members’ names and choose from the dropdown for every project.
-
Due date: You can choose a due date for each project and even choose to attach a time and a reminder to ensure you send the deliverable on time. The table view is automatically sorted by the due date in ascending order. If you want to track a project’s full duration, you can also add a start and end date to the project.

-
Done: The satisfaction of checking an item off a list is real. That’s why I’ve kept a simple checkbox to indicate which articles are done.
-
Links: This is a clickable column to include the live link to the project for easy tracking and sharing.
-
Amount: You likely track your payments through billing or invoicing software, but including it in your database makes it easy to see your monthly income (with the Sum row at the bottom of the database) without switching apps. You can change the currency by clicking Amount > Edit property > Number format, and then choosing currency from the dropdown.
Use integrations to automate tasks
Your database will act as a north star for your to-do list and project management. To make the process easier, you can use Zapier to integrate Notion with other tools you use.
For example, you might create a Zap—an automated workflow—so that whenever you add a due date to your project, Zapier will automatically add it to your calendar to help you manage your days and prioritize brilliantly.
Zapier is an automation tool that connects your apps and moves information between them, so you can focus on what matters most. Check out this Zapier demo to learn more about how it works.
Why Notion?
I also use Notion for my to-do list, finance planning, social media content planning, and as a swipe file. And that’s why I love having my project database in there too—instead of switching back and forth between an app like Airtable and the rest of my work, everything lives in one place.
[adsanity_group align=’alignnone’ num_ads=1 num_columns=1 group_ids=’15192′]
Need Any Technology Assistance? Call Pursho @ 0731-6725516

