When working with multiple apps, marketers know it’s not always easy for them to talk to each other. It’s like when a New Yorker says they’re “getting ready” to do something while an Alabamian says they’re “fixin'” to do it. Both mean the same thing—they’re just expressed differently. It’s the same with the date and time formats in the apps you use.
Say your lead form captures the date and time as 2022-2-2.18:36 and sends it to your CRM. But your company prefers February 2, 2022 6:30PM EST because that’s how all its other data is collected.
Keeping your date/time formats uniform avoids potential app scheduling conflicts and keeps your entire team on the same page. By adding a formatter step to your Zaps, you can make sure your data is formatted the right way.
Table of contents
This workflow requires you to use Formatter, a built-in Zapier app available to users on a paid plan or during a trial period.
How can you change dates and times with a formatter step?
Formatter is one of Zapier’s built-in tools for Zaps. When the information from an app isn’t in the format you need, a formatter step can transform it into something you can use in later Zap steps.
We’re just going to focus on one Formatter function for now—Format Date / Time—though there’s a lot more you can do with it, like change capitalization, split blocks of text into different pieces, or remove characters.
By selecting the Date / Time action in a formatter step, you can make a few different kinds of changes to date or time data you receive from your trigger app. You can add or subtract time, compare dates, or transform the format of your date or time. Right now we’re just going to change the format of a timestamp received in one app to make sure it sends it to another app in the right format.
Once you’ve set it up, your formatter step will do this for you automatically every time your Zap runs.
Before you begin
We’ll assume that you’re a little familiar with how Zapier works. And if you aren’t, don’t worry: It’s free to sign up for a Zapier account. We also have a guide to help you get up to speed on Zap basics. You’ll need to be in the Zap editor for this tutorial, where you can create Zaps from scratch.
In this example, we’re going to update the format of the submit date for a Typeform submission so it’s compatible with a HubSpot contact entry. If you’re using another form app, that’s fine. Just set up your Zap to the point where you need to change your time format, then jump to how to set up your formatter step.
We’re going to put our formatter step right after our trigger—the event starting our Zap.

Note: You can add a formatter step right after a trigger or an action—the event your Zap performs once it’s triggered.
How to update date and time formats with a formatter step
First, set up your trigger—the event that starts your Zap. Search for and select your trigger app—in our example, we’ll use Typeform—and your trigger event—we’ll use New Entry. Click Continue.
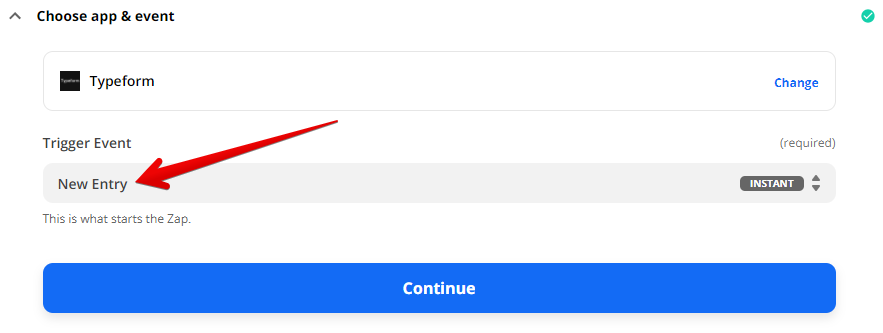
You’ll now be asked to connect your app to Zapier, if you haven’t already. Once you’ve connected your account, click Continue.
For each app you connect, Zapier will ask for a general set of permissions which allows you to be flexible with your Zaps. The only actions Zapier takes on your app accounts are those a given Zap needs to accomplish what you’ve set up.
Now it’s time to set up your trigger. Click in the field under Form, and select the form you’d like to use from the dropdown. This is where the data will be pulled from to complete the Zap.
Click Continue.
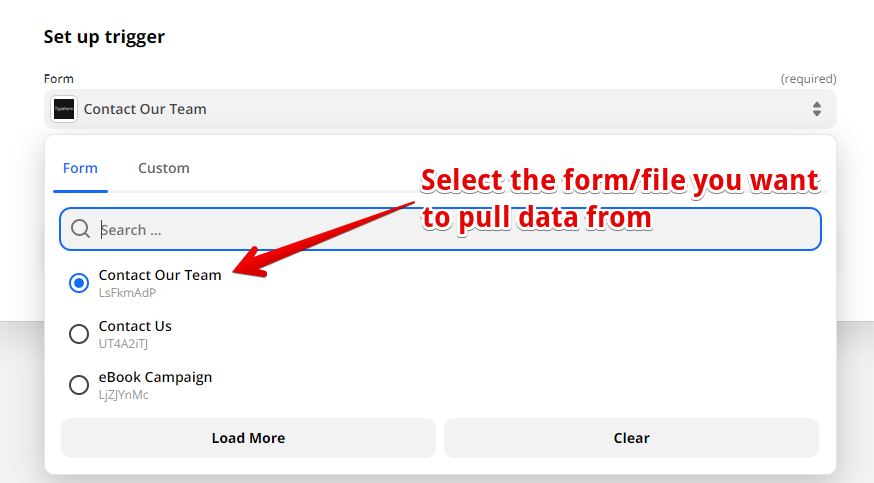
Now it’s time to test your trigger step. You’ll need to have a completed form entry to test your step properly. If you haven’t received any results for your form, send one through now so your Zap has something to pull from.
Next, click Test Trigger. The test will display an entry such as a completed form or name on a spreadsheet. Click Continue.
Now it’s time to add a formatter step to your Zap with the Date/Time action. First, click the plus symbol below the trigger.

In the Action box, select Format for your action app.
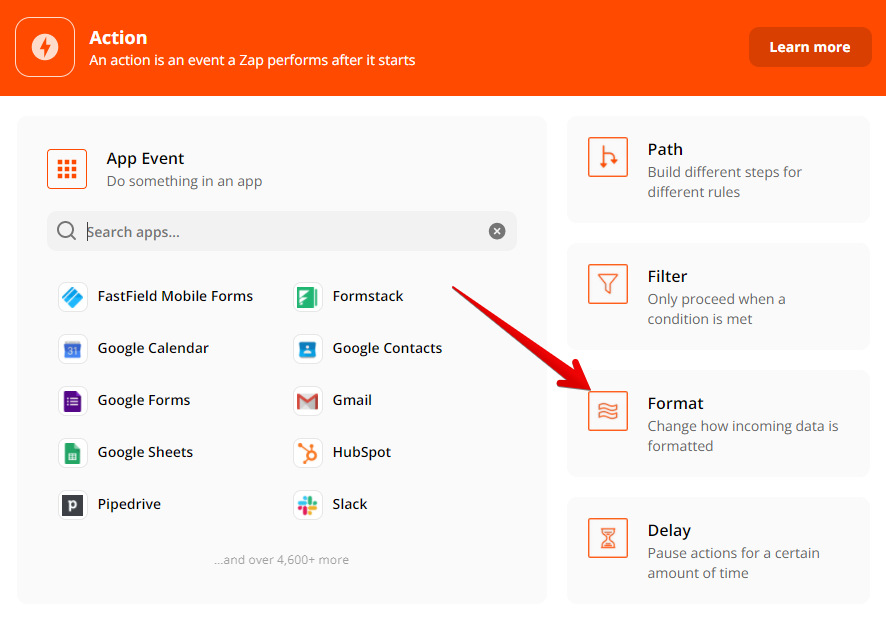
Click in the Action Event field and select Date/Time from the dropdown. Click Continue.
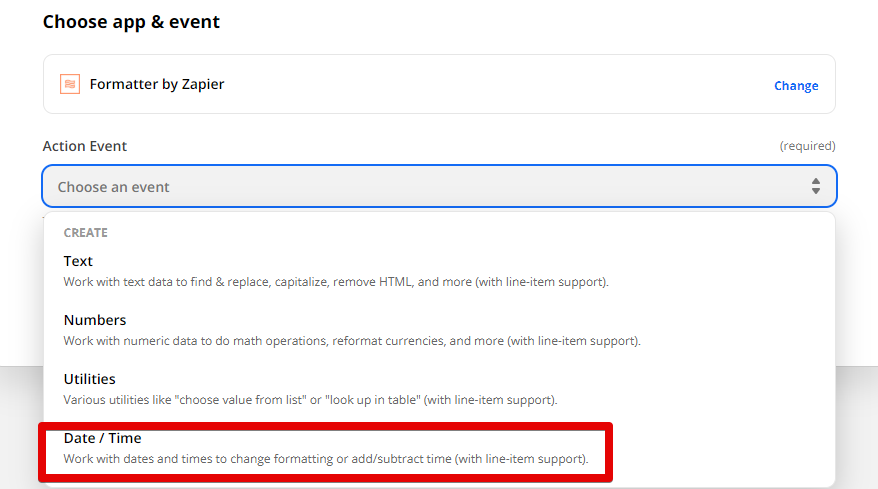
Under Set up action, select Format in the Transform menu. Click Continue.
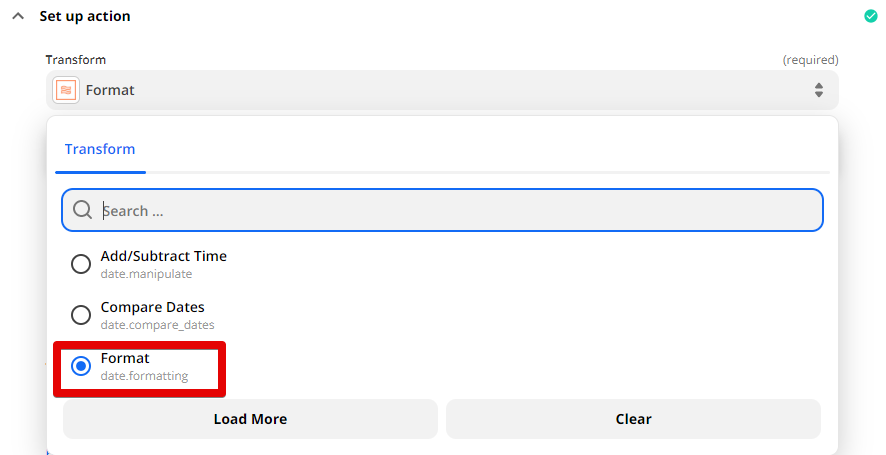
This is where the real magic starts. Click in the Input field to get a dropdown of data pulled from your previous trigger step. Select the data that captures the date/time you want to format. In our example, we selected the time an entry in our Typeform was submitted.

Under To Format, click inside the Search field and select the date/time format you want. This will be the format that appears in the app you’re sending data to—in our case, HubSpot.
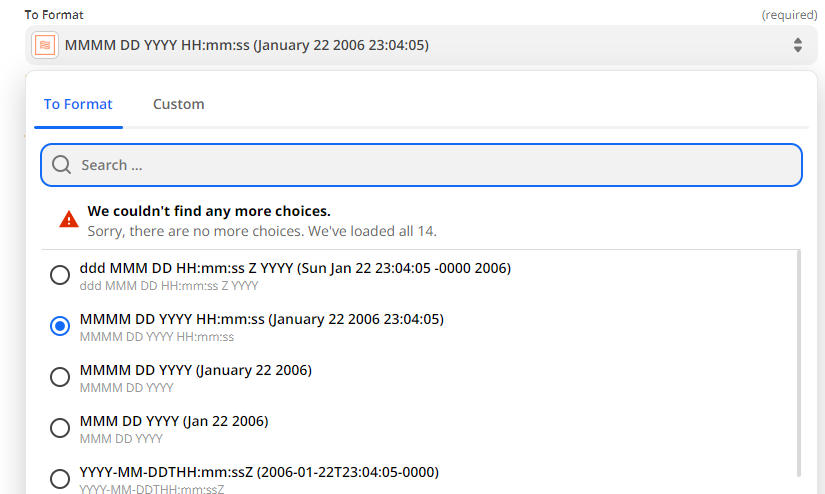
Under From Format, select the original format that was used in your Typeform step.
If you need the date and time to appear in a new timezone, select the new time zone you want to use under To Timezone and select the original timezone format from your Typeform step under From Timezone. If you leave these fields blank, the time zone will default to UTC.
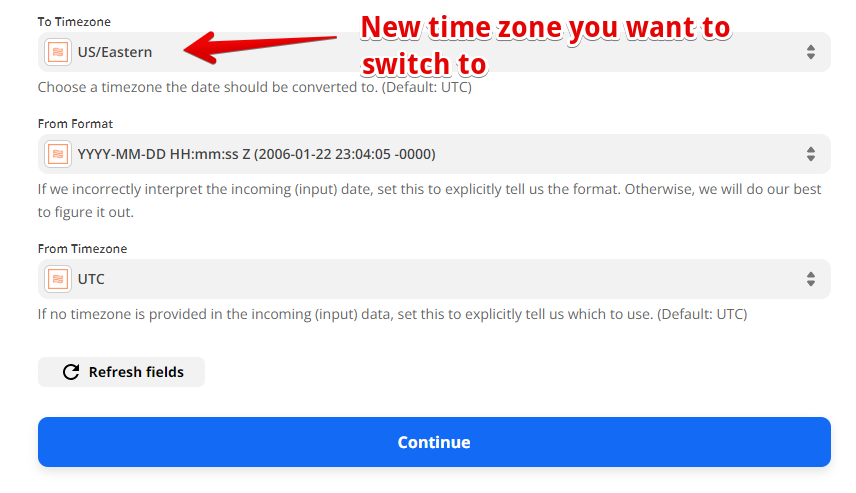
Click Continue.
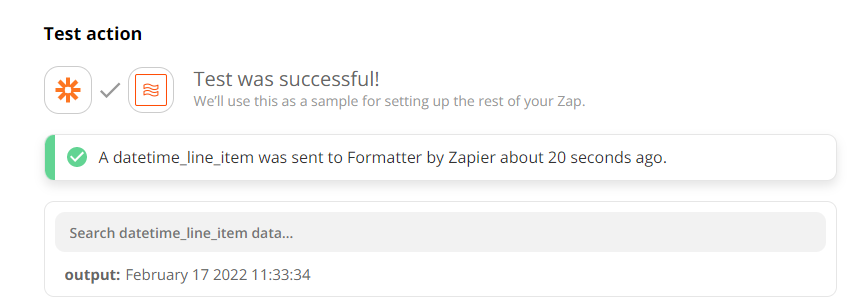
Now it’s time to test your step. Click Test and Review.
If your test was successful, you’ll get a message similar to this. See the output line to make sure your date/time was converted properly. Click Close.
Now you’re ready to set up where you want your new date format to go—in our example, HubSpot. Click the plus sign to add your second action step.

Select HubSpot for your action app. For our action event, we’re going to select Create Contact so we can create a contact inside HubSpot’s CRM from the Typeform lead we captured.
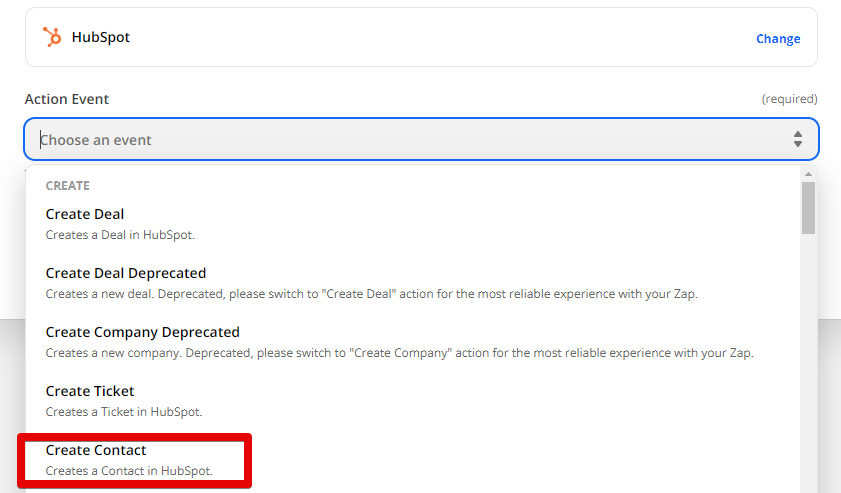
Click Continue.
Now select your HubSpot account under Choose account. If this app isn’t connected, click Connect a new account and follow the instructions.
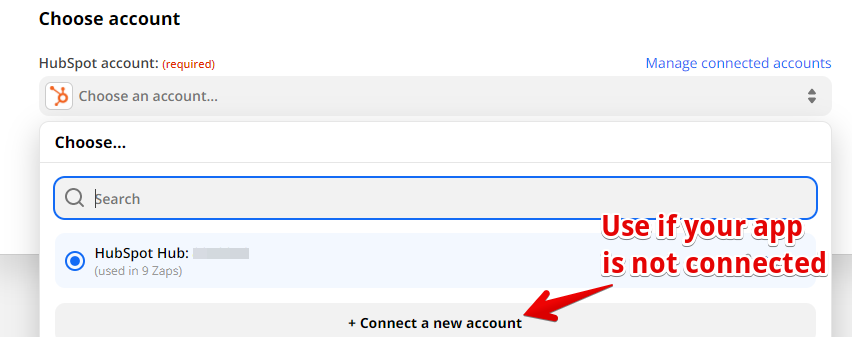
Once you’ve connected your app, click Continue.
Now it’s time to set up your action step. The Zap will pull in the fields from a new contact in HubSpot. Scroll down until you find the field where you want your new date/time format to go.
In our example, we want to add our Typeform submit date to a new field we created. Because HubSpot doesn’t let you modify the Create date field, we created a new contact property in HubSpot called Submit date, which shows up here.
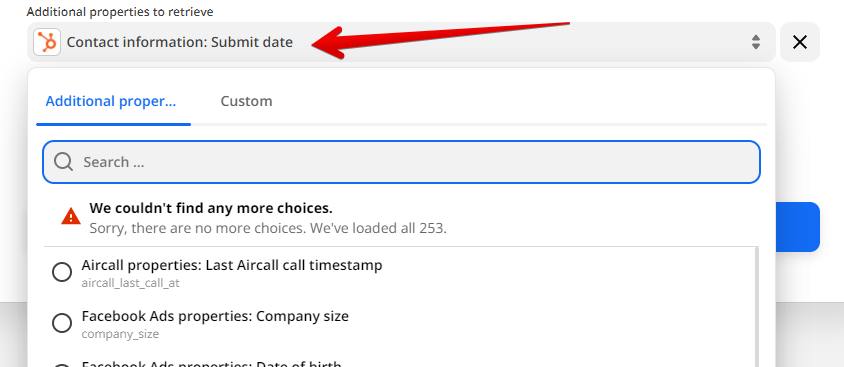
To map your Typeform data to your HubSpot step, click in the field where you want to add your date/time, then select the Output from your previous Formatter step.
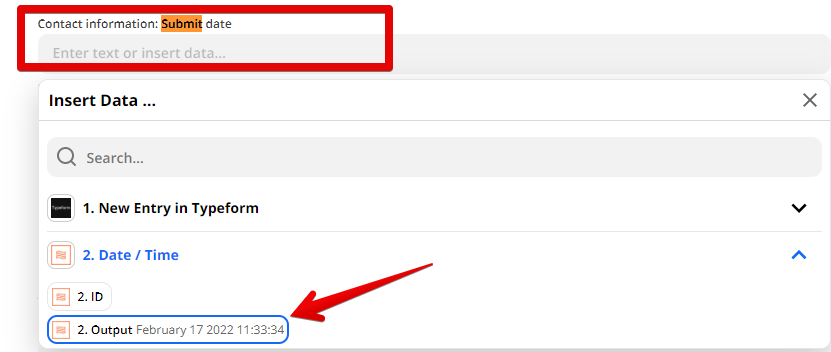
Click Continue, test it, and then turn on the Zap.
Sending the correctly formatted dates from one app to another keeps data management tidier. With Zapier’s Formatter, you can ensure your apps are always collecting the date/time just the way you want it.
Do more with Formatter by Zapier
Want to automate more of your work with text? Check out the other tutorials in this series for more ways to use Formatter.
This article was originally written in September 2017 by Matt Guay and was updated in February 2022 by Chris Hawkins.
[adsanity_group align=’alignnone’ num_ads=1 num_columns=1 group_ids=’15192′]
Need Any Technology Assistance? Call Pursho @ 0731-6725516

