As an agency owner, how much work can you get done in five minutes? If you’re thinking, “five minutes is such a short period, that’s barely enough time to even get coffee before starting an actual task,” let me show you what’s possible.
Onboarding is one of the most tiring tasks that agencies face. Having run Agency Rocket Fuel for years, I know exactly how demanding these tasks can get. From creating customer profiles to crafting service level agreements, plugging in customer data, and sending welcome packets, the work can be exhausting—even with some automation.
But what if I told you that onboarding work can be done in a grand total of five minutes?
Here’s the secret: rather than drown in all that work, I discovered a way to automate onboarding, drawing on my engineering experience to help me optimize processes.
Zapier was THE perfect tool for us. We went a little wild with our automations—but who doesn’t love things a little over-the-top sometimes? The result was a solid process that basically runs on its own, and pays off quickly.
We’ve used our experience to help other agencies. Agencies that, for the most part, were doing a lot of their processes manually and that could not scale because of how much time they spent on fulfillment.
Here, we’ll share what we do with one of the automations we created—a 60-step Zap that onboards clients in just five minutes. So, grab that cup of coffee and let’s get into it!
What does the onboarding process include?
The client onboarding process typically has one goal: to establish the foundations of a fruitful customer relationship. It’s a great opportunity to introduce a new client to your agency, services, and processes. Get it right, and you just might have a client for life. Roughly 86% of customers assert that businesses with engaging onboarding content are more likely to earn their loyalty.
But as is often the case, doing quality work takes a lot of time and effort. Here’s a breakdown of the different sections of the onboarding journey included within our Zap.
As HubSpot explains, a well-planned and -executed onboarding process will typically include the following:
-
Pre-enrollment: This includes positioning your sales process to help your new client slip seamlessly into onboarding. Tasks here revolve around knowing a prospect’s pain points and goals, and being clear on how you can meet these.
-
After closing: You’ll typically do two things here: (i) send the client a welcome packet, and (ii) jump on a call with them to say “thanks for choosing us” and identify where things will go from here.
-
Kickoff meeting: Here’s where you’ll set clear expectations for deliverables, communication frequency, action items, and milestones for satisfactory delivery.
-
Post-kickoff: At this point, you’ll likely turn to the mechanics of onboarding. Tasks here should include creating a client ID, plugging customer data into your CRM, setting up profiles, and a thousand and one other tasks.
-
Service agreement: A service agreement sets all of your client’s expectations and agreed deliverables down in writing. If it’s part of your process (and it should be), you might finalize onboarding with an agreement.
Depending on the nuts and bolts of your process, onboarding can take you anywhere from a few hours to several days. Maybe that’s acceptable if you only have a few clients. But when the signups are pouring in, every minute counts. Next up is how to cut manual work out of onboarding with our automated process.
The enrollment automation
This Zap sequence automates our pre-enrollment and enrollment steps. That’s everything from sending out forms, to creating folders and tasks, and sending out a welcome email.
What we’re about to show you is just an example of what’s possible. Our team connects several apps in this Zap, including GoHighLevel, PandaDocs, Google Drive, and Monday. You’re free to use whatever software you’re familiar with.
Visit the Zapier App Directory to see if your apps are on the platform or research tools you could use to automate your work.
Here are some of the onboarding process steps we automate with our Zap:
-
Segment clients by package purchased
-
Update our sales pipeline
-
Calculate discounts, total charges, and format data
-
Determine payment status
-
Send a customer service agreement
-
Credit the salesperson who closed the client
-
Generate a unique client ID
-
Create Google Drive folders
-
Create tasks for better project management
-
Add client information to data repositories
-
Send a welcome email
Segment clients by package
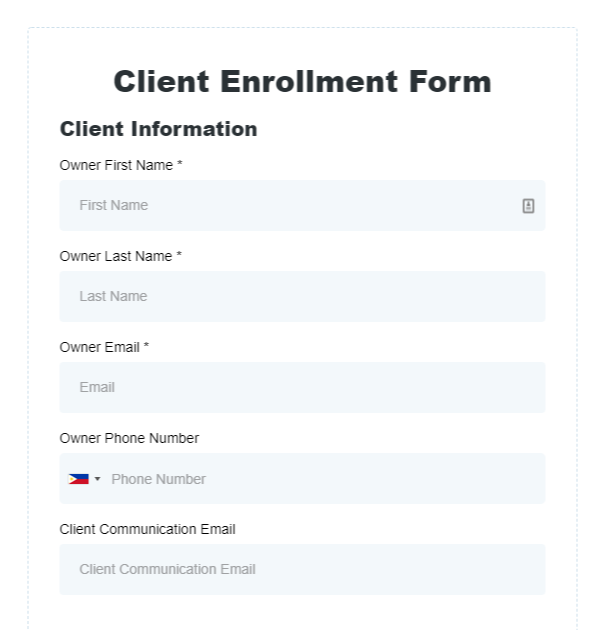
After a successful sale, you’re immediately planning how to deliver a stellar client experience. Using a client enrollment form makes it easier to design an engaging client journey and deliver in a big way.
We start by designing a client survey using GoHighLevel. Logic within the survey helps us determine which question will be relevant to the package the client chooses. This form asks for basic client information that will be used in the next part of the process. Our team fills this form out for closed clients.
To automate notifications about form responses, we also use webhooks to send a notification every time the survey is completed.
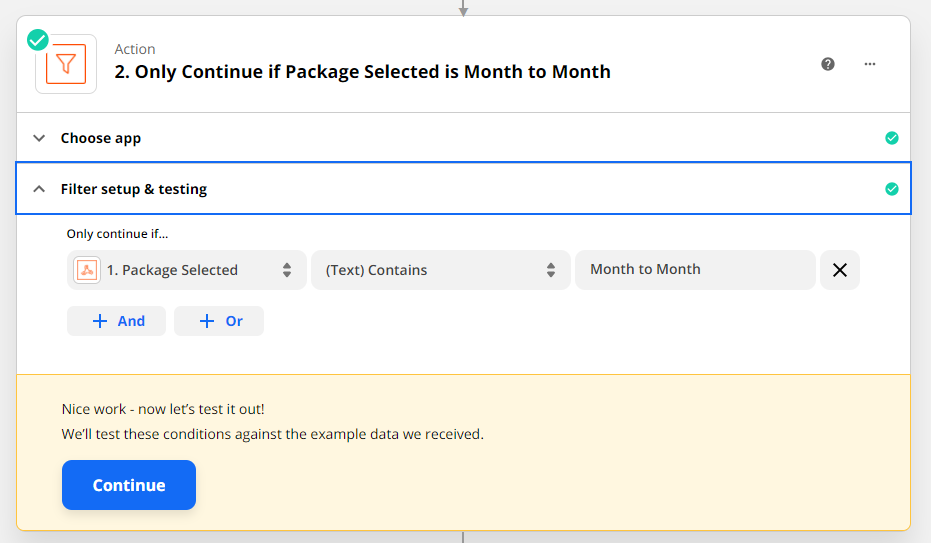
A critical part of onboarding automation is designing flows that are relevant and personalized. So, we use Zapier’s Filter tool to segment clients into automation groups based on their responses. Each of these groups has a personalized sequence that presents relevant information to the client. For instance, a client that selects a month-to-month package will receive different information from one that made a yearly purchase.
Note that we only use Filter when we have more than 100 steps and need to separate these processes, especially since Zapier supports a limited number of actions on each Zap.
Update pipeline in HighLevel
Another potentially time-intensive part of the onboarding process is updating client statuses within your lead gen software. But not with this Zap.
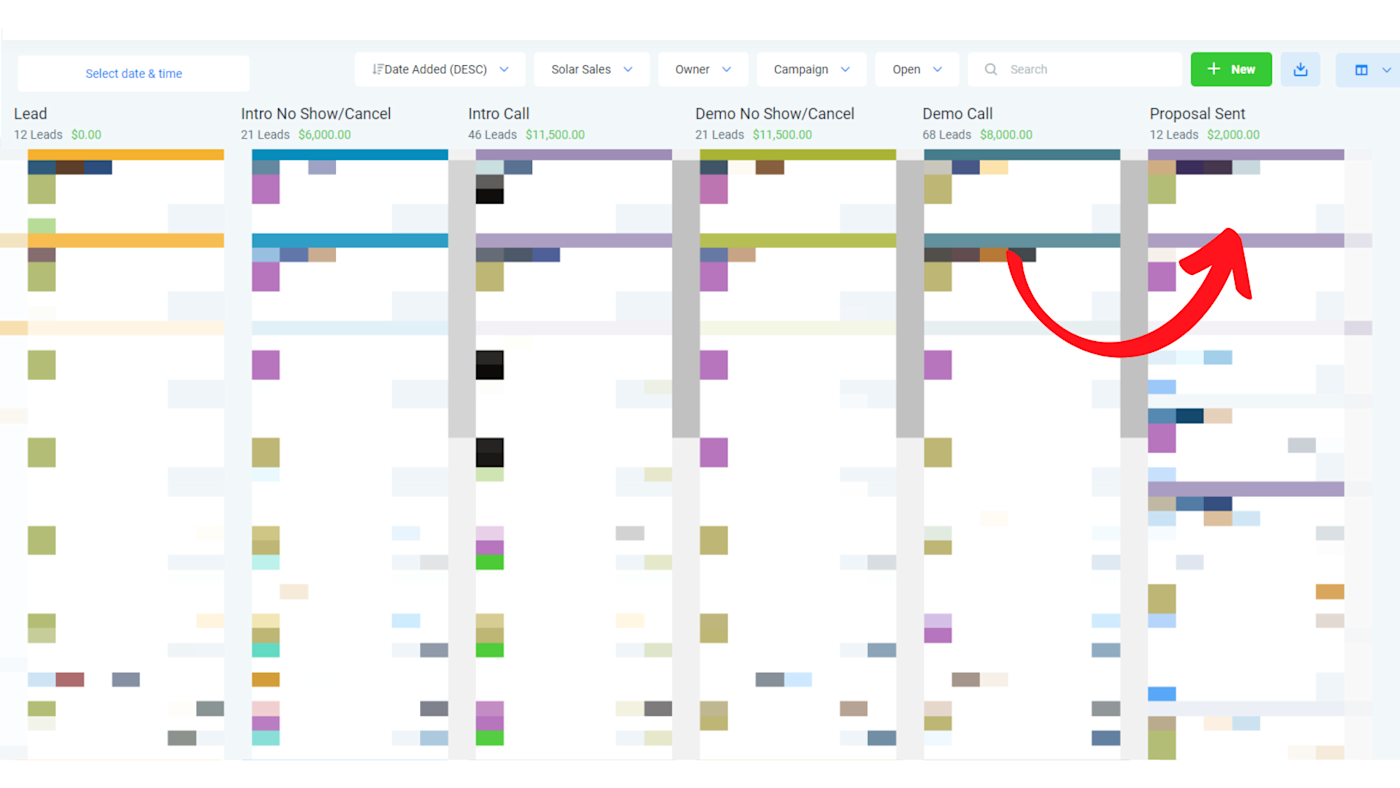
We use Zapier to update client status within our sales pipeline in HighLevel which helps save on the time and effort of making changes manually. This step of our Zap moves leads from Demo Call to Proposal Sent after the automated email has gone out with that information.
Compute discounts, total amounts, and more
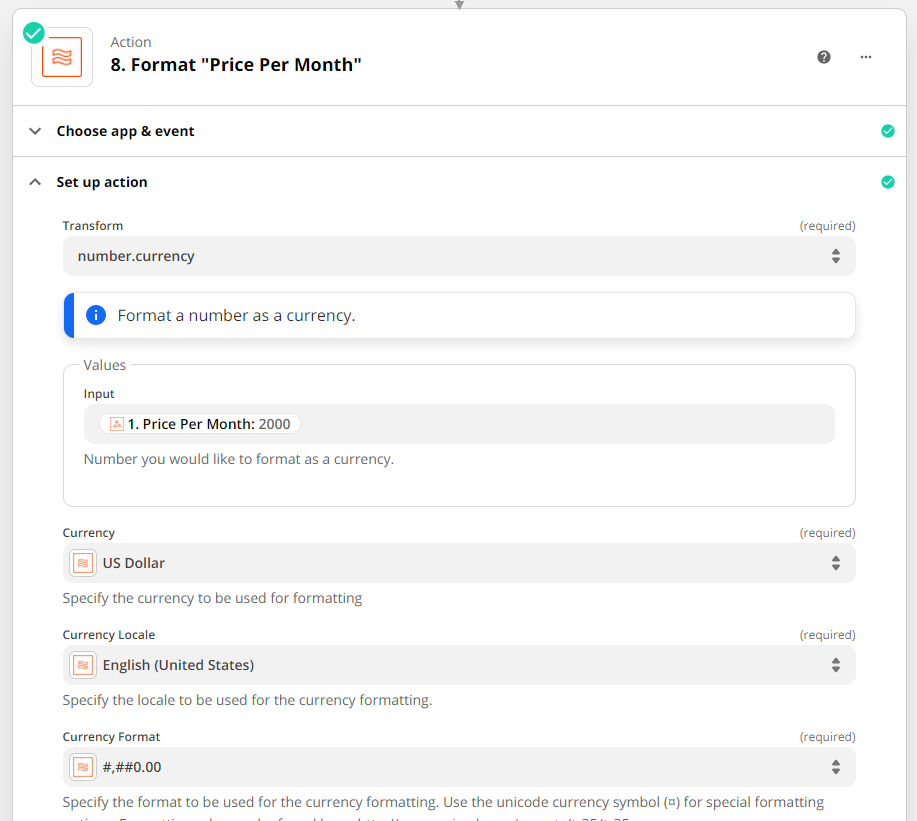
Did a client close using a discount code? How much will their total amount payable come to? Rather than compute this manually, we let Zapier do the computation for us using the Formatter tool.
We format dates, compute specific items like discount and total amount, and parse other factors —all happening and interpreted within Zapier.
Determine payment status
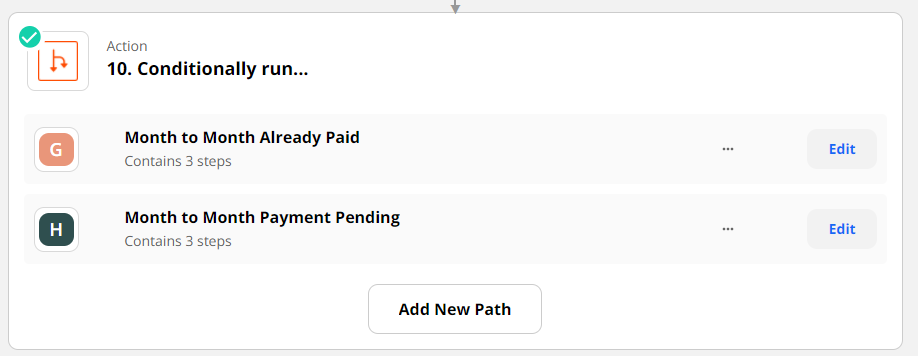
Next up, our Zap looks for invoice information, determining whether the client has received an invoice, and if so, whether or not they have paid. If they haven’t paid, the Zap will trigger a series of actions ranging from sending an invoice to delivering a payment reminder. And if they have paid, a different set of actions will kick in.
This information is incorporated into PandaDoc, so we’ll use a Path to automate the different sets of steps, depending on these conditions. The inquiry here incorporates information from the original onboarding form.
Customize service agreement
Although a customer service agreement will include loads of boilerplate terms, there are still sections that must be personalized. For instance, terms relating to specific deliverables, basic client information, and any other special terms will need to be customized.
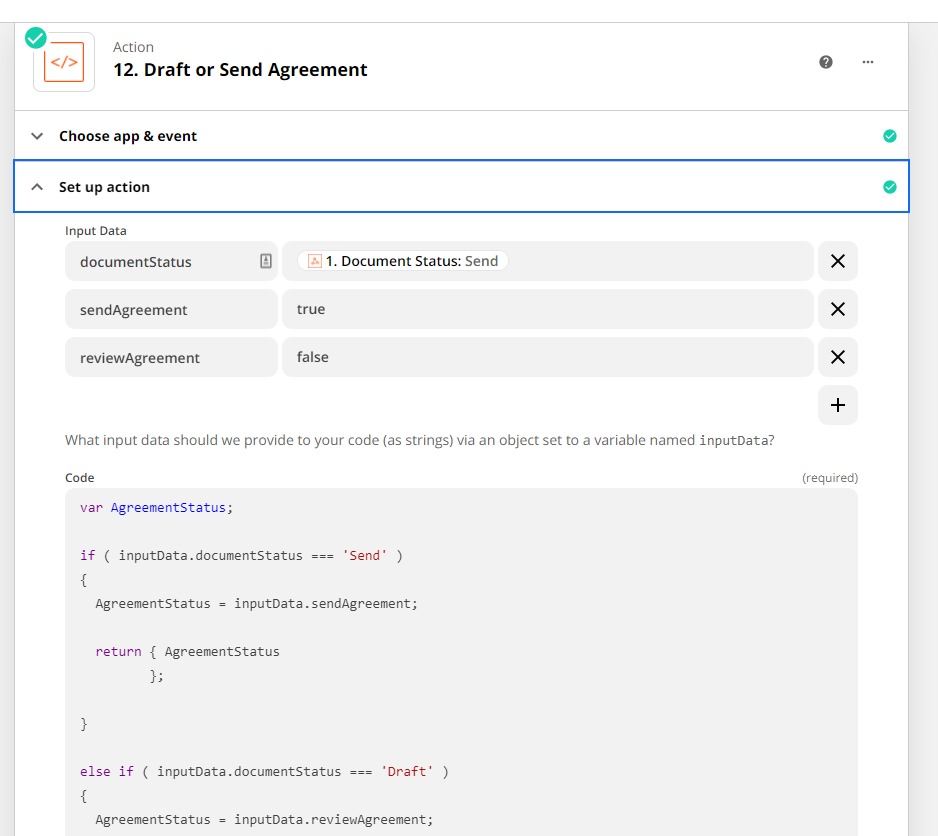
We use Code by Zapier, mostly in JavaScript, to determine whether to customize the service agreement or send it automatically. This Zap includes an option for the client to change the agreement if there’s an important edit or accept it at once. The code we implement here is critical for the next step.
Send or draft agreement
Based on the code we’ve already used in this Zap, this section will determine whether to draft the service agreement or not. This is interesting because every placeholder we have on PandaDoc can be seen by Zapier, and we can fill in that information using the items we put on the GoHighLevel survey.

Generate client ID
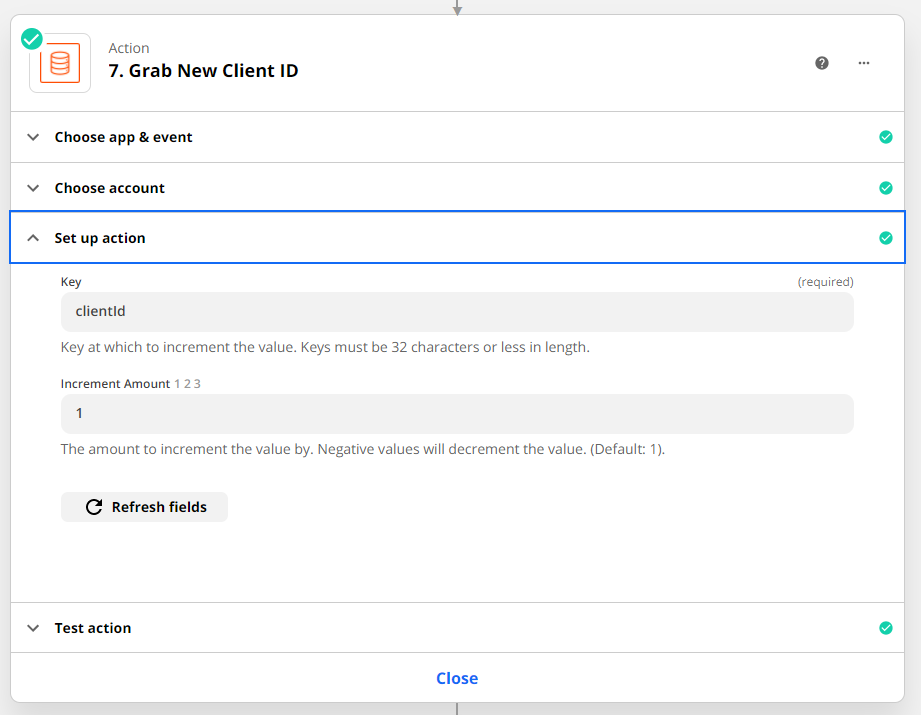
Next, we’ll generate a unique client ID using Storage by Zapier in increments of 1. We assign a unique ID to each of our clients to assist with routing which client fills out a form into our system. The ID will be used on the onboarding form.
Create Google Drive folders
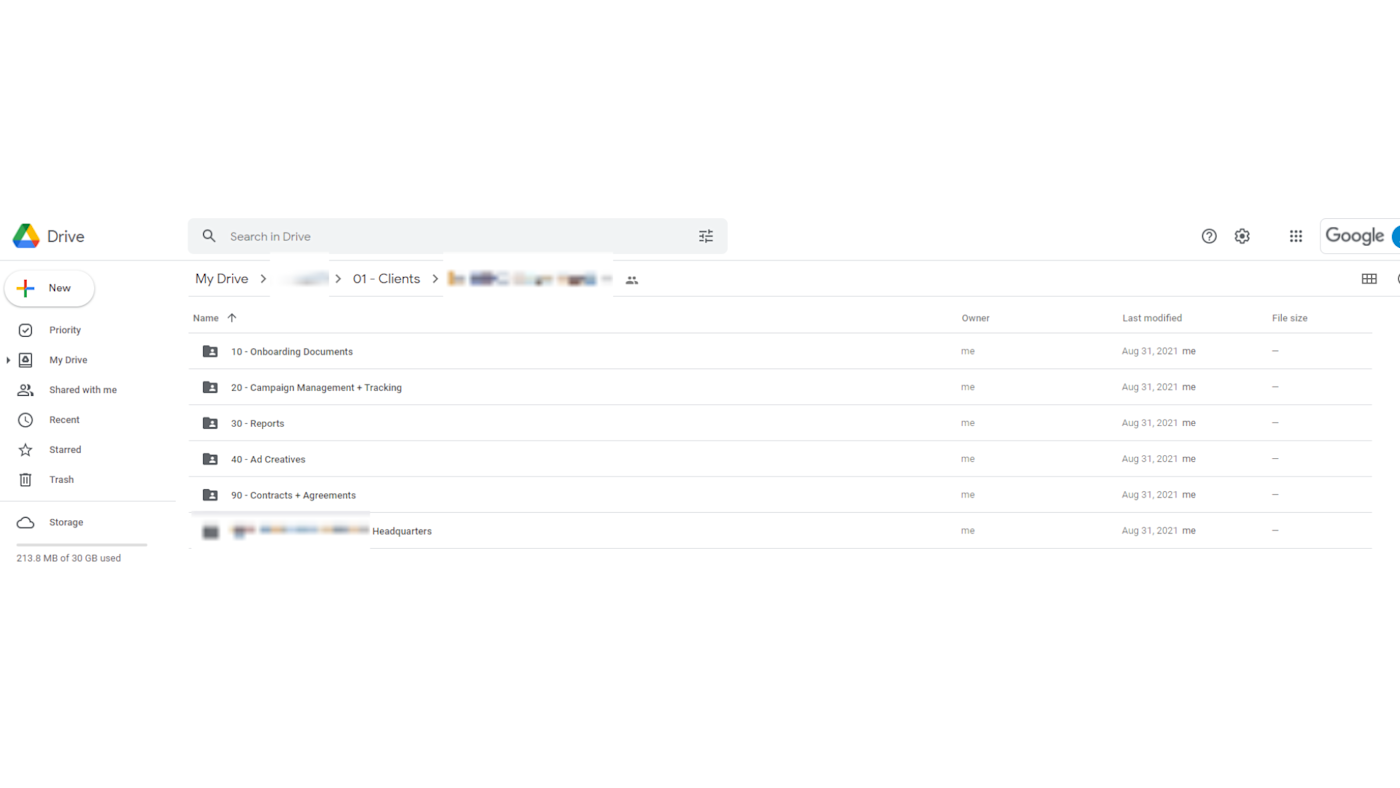
We’re close to the end of the process now. At this point, we need to create client folders for first-line record keeping and collaboration. We create internal and client-facing folders, complete with subfolders. With Zapier, we can create the many folders and files needed for our clients with no manual work.
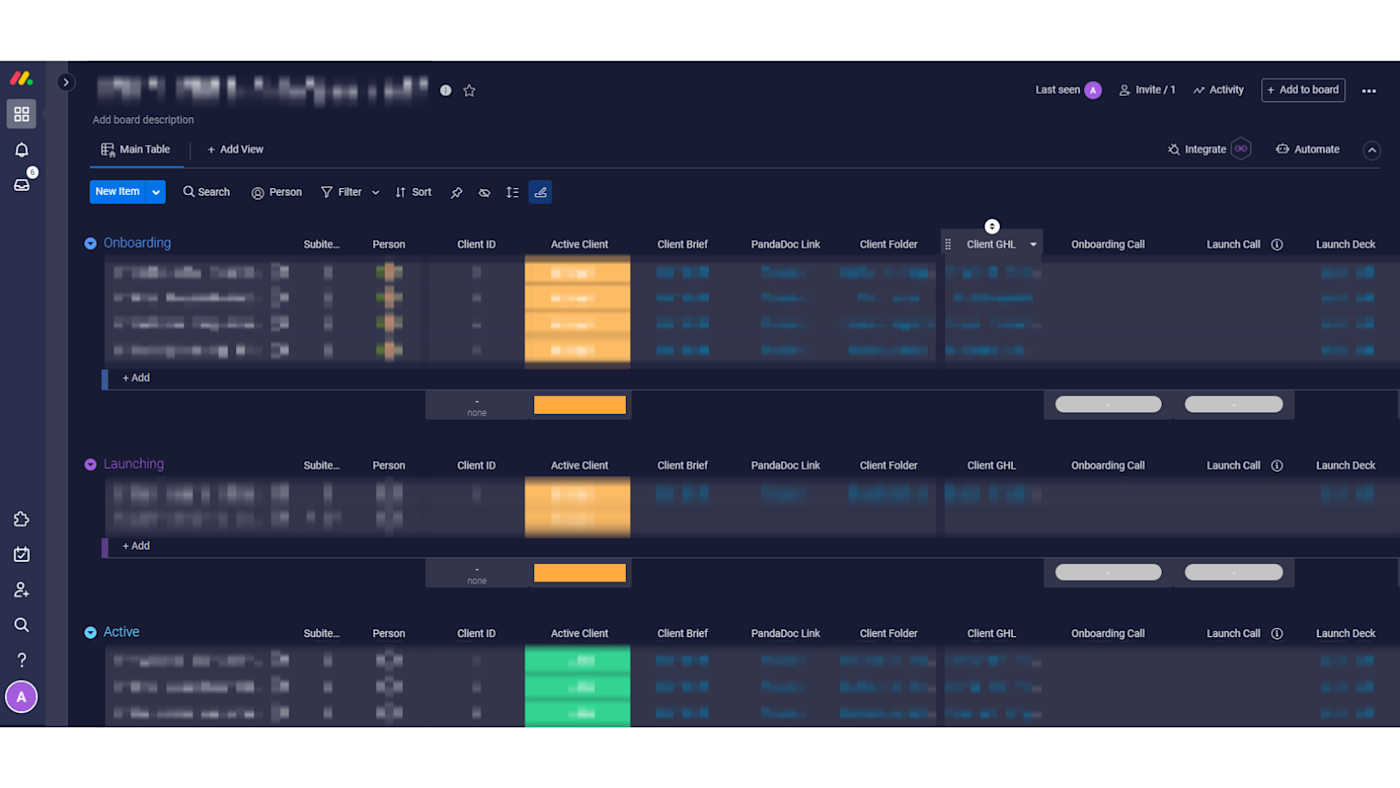
Create item in Monday
Zapier will automatically create a new item on the existing Monday board to represent the closed client.
The old item created on the pre-enrollment automation will be moved to the completed group so there’s no confusion about whether the client is closed or not. Additional tasks help us track the entire client journey through the fulfillment process.
Add client data in repositories
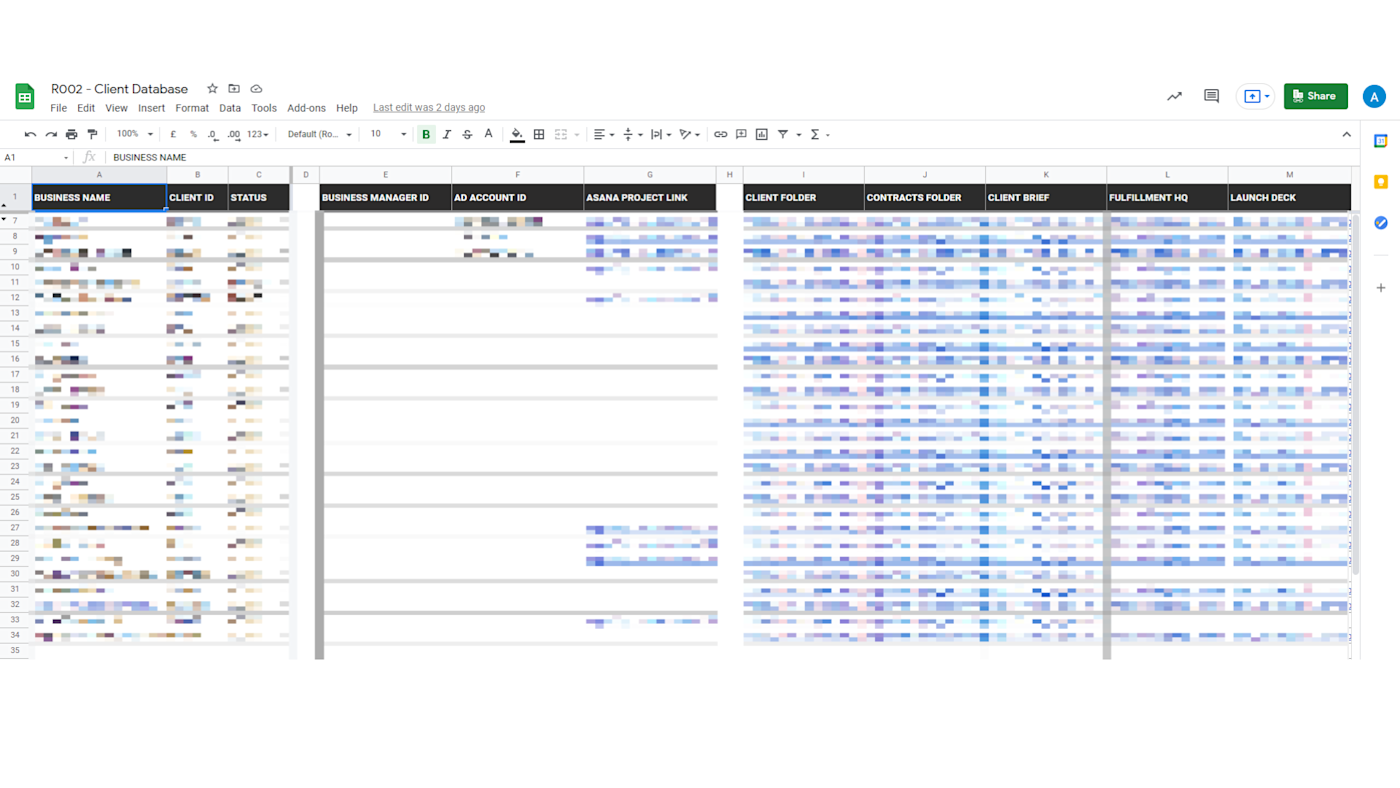
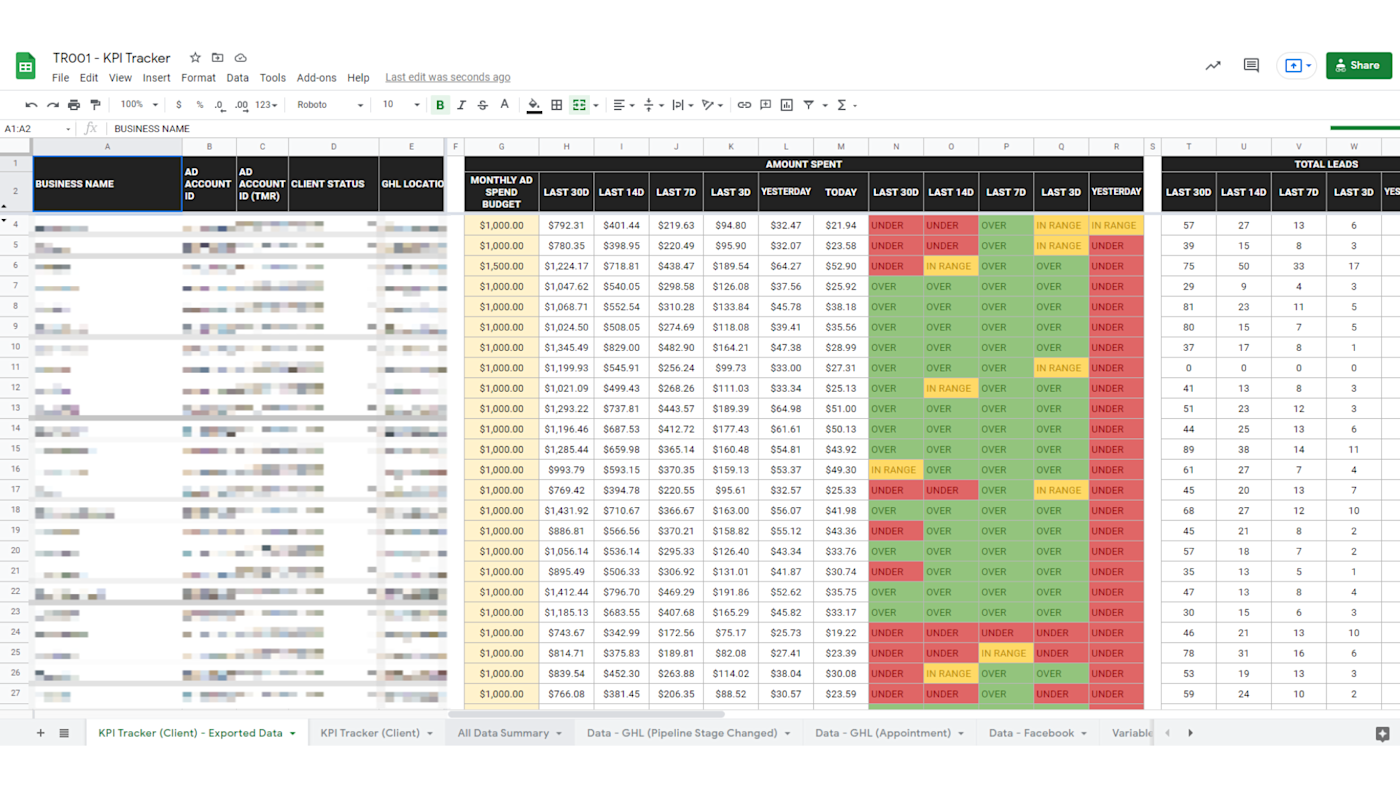
With the onboarding process nearly done, we’ll transfer all of the client’s information into the client database, indicating that a new client has onboarded. The client database is a directory of all the active clients we have, while the trackers are used for sales KPI and overall agency KPI.
We use other sheets to track sales KPIs and overall agency KPIs.
Send welcome email in Gmail
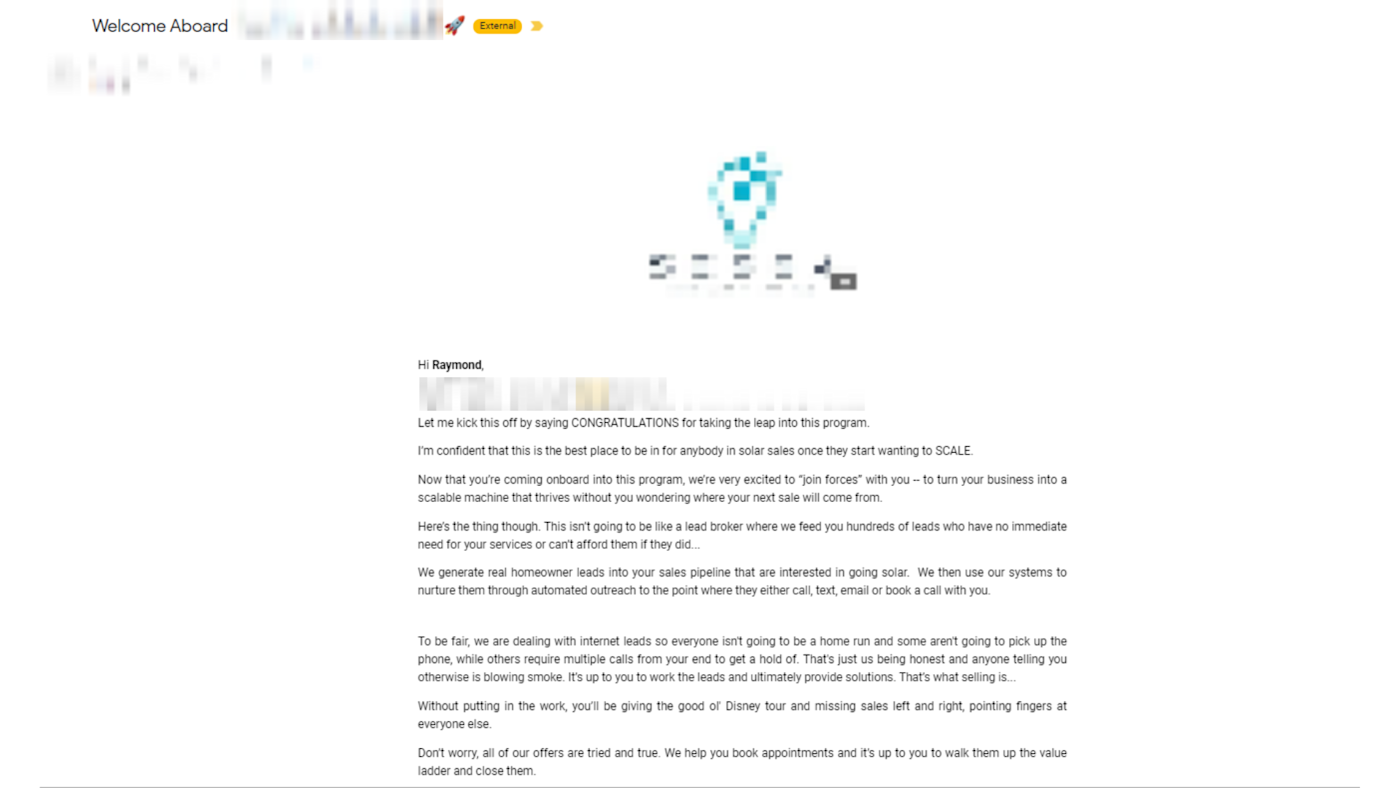
Finally, we’ll send a welcome email to the client, sharing the client’s headquarters folder, their client ID, and a link to the onboarding form—all delivered automatically and unique to every client.
Saving hours per client onboarded
Total time saved = 5-10 hours per client
Although some client onboarding will take less time than others, the time saved with these automations eventually stack up—and that’s a great thing not only for your business but for your personal life as well.
With the time savings gained on each step, you’ll have more time to spend on actually meeting your client’s goals, fulfilling expectations, taking in more clients, or just spending time with your loved ones.
This was a guest post from Franbeau Rhaz Beduya of Agency Rocket Fuel. Agency Rocket Fuel is a consulting agency that helps marketing agencies scale their profits by creating comprehensive processes, building smart automations, and hiring a talented team for the business.
[adsanity_group align=’alignnone’ num_ads=1 num_columns=1 group_ids=’15192′]
Need Any Technology Assistance? Call Pursho @ 0731-6725516


