Automation helps me run my business, Saastronomical, where I help other people automate their businesses. And while automation helps us keep things moving, sometimes things go wrong: we get an error message telling us there’s a problem with our workflow.
When that happens, it’s important to know how to fix it. Here are some of the common errors you might see with your Zaps—the automated workflows you create with Zapier— and how to troubleshoot so you get things back on track quickly.
This post was developed from a session Andy Wingrave gave at ZapConnect, Zapier’s user conference. Watch the session here.
Table of contents:
Zapier lets you automatically send information from one app to another, helping you reduce manual tasks. Learn more about how Zapier works.
How to find error notifications
Zap error notifications can appear in three places:
-
In the Zap editor: this is basically when you’re building the Zap, you get an opportunity to see whether there was a success or a failure.
-
Email notifications: The second place you might encounter an error notification is after you’ve turned your Zap on. Zapier will send an email to the address on your account, informing you that something has gone wrong with your live Zap and it needs to be investigated.
-
Zapier dashboard: The last place we might see an error is within the Zapier interface, specifically in your Zap history. Whenever a Zap is halted due to an error, from your dashboard, you can choose whether or not to replay the Zap.
Zap editor
Errors often appear in the Zap editor when you’re testing each step in your Zap. (You are testing, right?)
You’ll often see an error message telling you what Zapier couldn’t accomplish and why.

When you’re testing a trigger—the event that starts your Zap—you might encounter an error if Zapier could not find a recent entry. For example, if you want a Zap to trigger off of a new Airtable record in a view, it may not work if that specific view is empty.
Email notifications
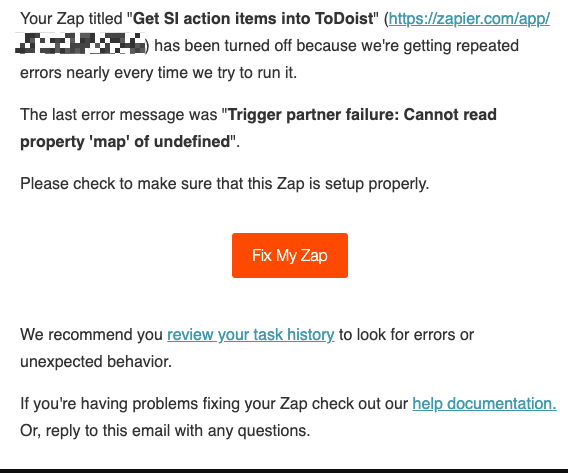
These messages come into your email address when something goes wrong with a Zap that has previously been running. These are warnings that you should head into your account and take a look.
The email will contain some key information about the error:
This can help you identify what could’ve gone wrong and you’ll have the context needed to troubleshoot your Zap.
You’ll also see an orange Fix My Zap button, which will direct you to the Zap editor to fix the issue. We’ll get to that piece later.
Zapier dashboard
In some instances, Zapier will hold a Zap run if more come through than usual. It’s a safeguard to ensure that you’re not burning through your task usage for the month.

If a number of Zap runs are held, you can also replay them in bulk or choose individually which ones you want to run.
Common error types
When you’re troubleshooting, you’ll often see a few types of errors. In the error message, you’ll usually see a three-digit error code. The most common ones are 4XX errors and 5XX errors.
4XX errors
4XX errors are typically issues with Zapier. It’s often caused by data you’re trying to send to an application. You’ll usually come across these four types of errors:
-
400 Bad Request: The app you’re sending data to doesn’t understand the request. Usually, this shows up when you try to map a value in the Zap editor to the wrong field type. For example, sending a true/false (boolean) value to a date field.
-
401 Unauthorized: Reauthorize the application.
-
403 Forbidden: The account is connected properly, but the action you’re attempting to perform is not allowed.
-
404 Not Found: The item doesn’t exist.
5XX errors
5XX errors, on the other hand, are server errors. This indicates that there’s an issue with the application itself. It doesn’t understand the request or it hasn’t been configured correctly to receive the request.
When this occurs, you should reach out to the app developer and find out what’s happening.
Remember, when you’re not sure about any of these errors or what’s happening, head on over to the Zapier documentation and the help pages to identify the best course of action for each error.
Troubleshooting checklist
The best way to avoid many of these error messages in the first place? Troubleshoot before you turn on your Zap.
I used to have a manager who often said, “measure twice, cut once.” What he meant was that if you check your work and what you’ve created, you can avoid errors that would cause issues in the future. The same is true when you make a Zap: if you ensure everything is set up properly before turning it on, you can spot—and fix—problems before they derail your automation.
We’ll walk through each of the troubleshooting steps you can take to fix a broken Zap in more detail.
Troubleshooting steps:
-
Check that all fields are entered correctly
-
Check your app connection and account permissions
-
Read help docs for Zapier and the app
1. Check your fields
One of the most common mistakes when creating Zaps is incorrectly entering data in fields. There are several field types, each of which tell Zapier how to handle the data you place there.
Field types need to match the data type. You can’t pair a static plain text value that says “January” with a date field, for example, because Zapier won’t understand it.
One of the common field types people make mistakes with is dropdown menus.
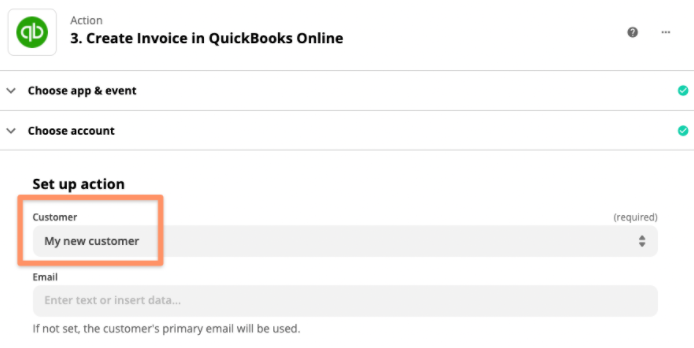
Here’s an example: We’re trying to create an invoice in QuickBooks and add a customer to it. Here’s a dropdown menu with our customers. We want Zapier to dynamically set the customer based on what happened in the previous step—but we’re presented with limited options.
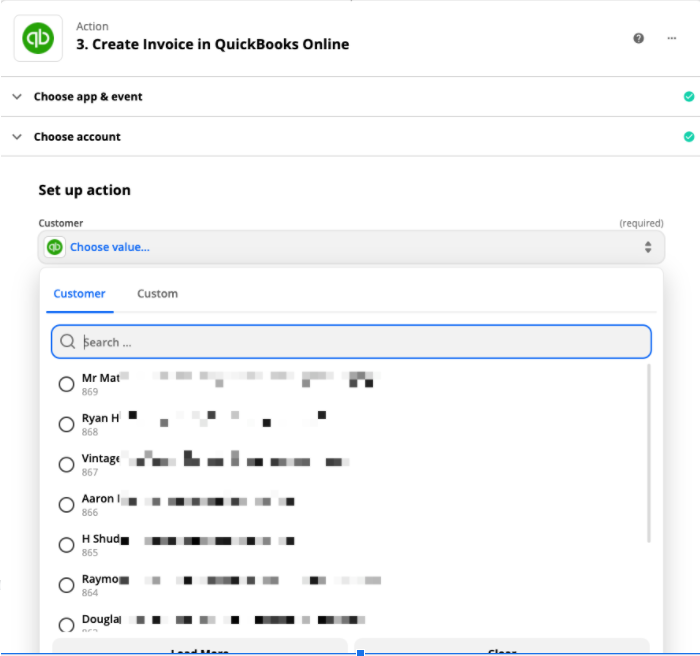
Dropdown menus understand IDs, not text. Note the tiny grey number underneath each customer. However, most people make the mistake of entering text. This will fail because Zapier is expecting a specific value or ID instead.
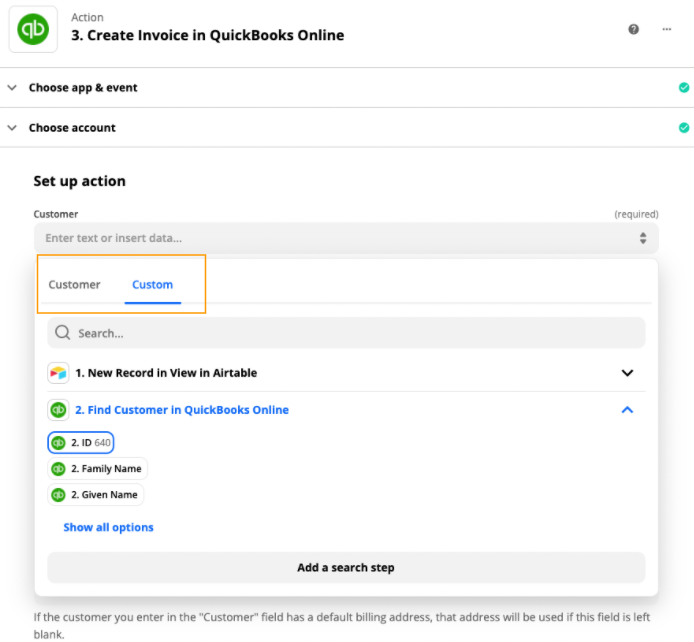
So how can we dynamically set our customer? Instead, click on the Custom tab, and select the value you want to use from a previous step in your Zap. Now you’ll pass your dynamic data every time your Zap runs.
If you can get your head around different field types, you will avoid many mistakes in the future.
I always recommend testing and reviewing your Zap. Click on Test and Review instead of Test and Continue to get in the habit of reviewing your data. You can catch mistakes early before they escalate!
2. App connections and account permissions
The next step in our troubleshooting checklist is to check your app connection and account permissions.
First, make sure your app connection is up to date. Connections between an app and Zapier will expire after a given time, such as after a year. You can reconnect your account in the Zap editor. If the connection expires, there will be a red message prompting you to connect it again.
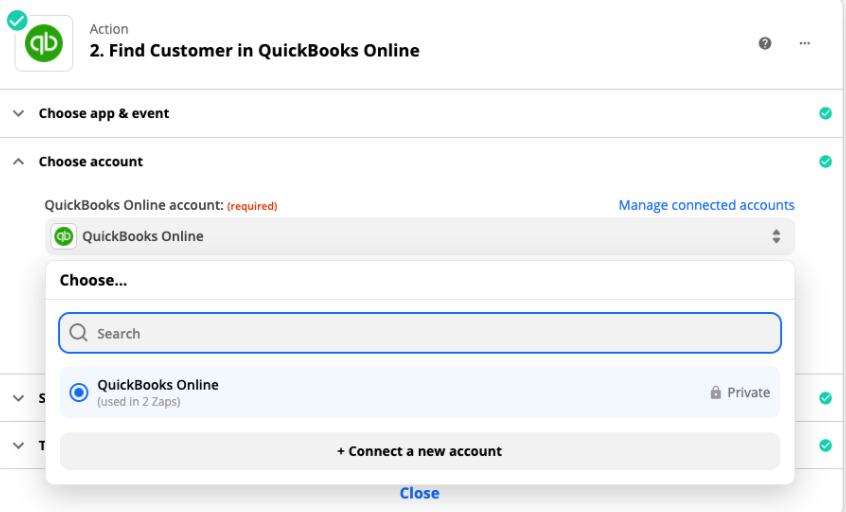
If you’ve connected the wrong account—for example, if you used a testing account to create your Zap but forgot to connect the primary account to the Zap—you can also click + Connect a New Account to quickly add it.
Then, check your app permissions. Some apps require certain permissions for a trigger or action. For example, some integrations like QuickBooks Online require you to have admin permissions to use it.
To figure out which permissions you need, check the Zapier help docs for the app you’re using.
3. Read help docs for Zapier or the app (or both)
There are a few places where you can access help docs for Zapier or a specific app.
You can find the help page for a specific Zapier integration by searching for the app in the App Directory. On the integration page, click on the Help tab to view the available help docs. Clicking those links will open up the relevant document in our Help center.

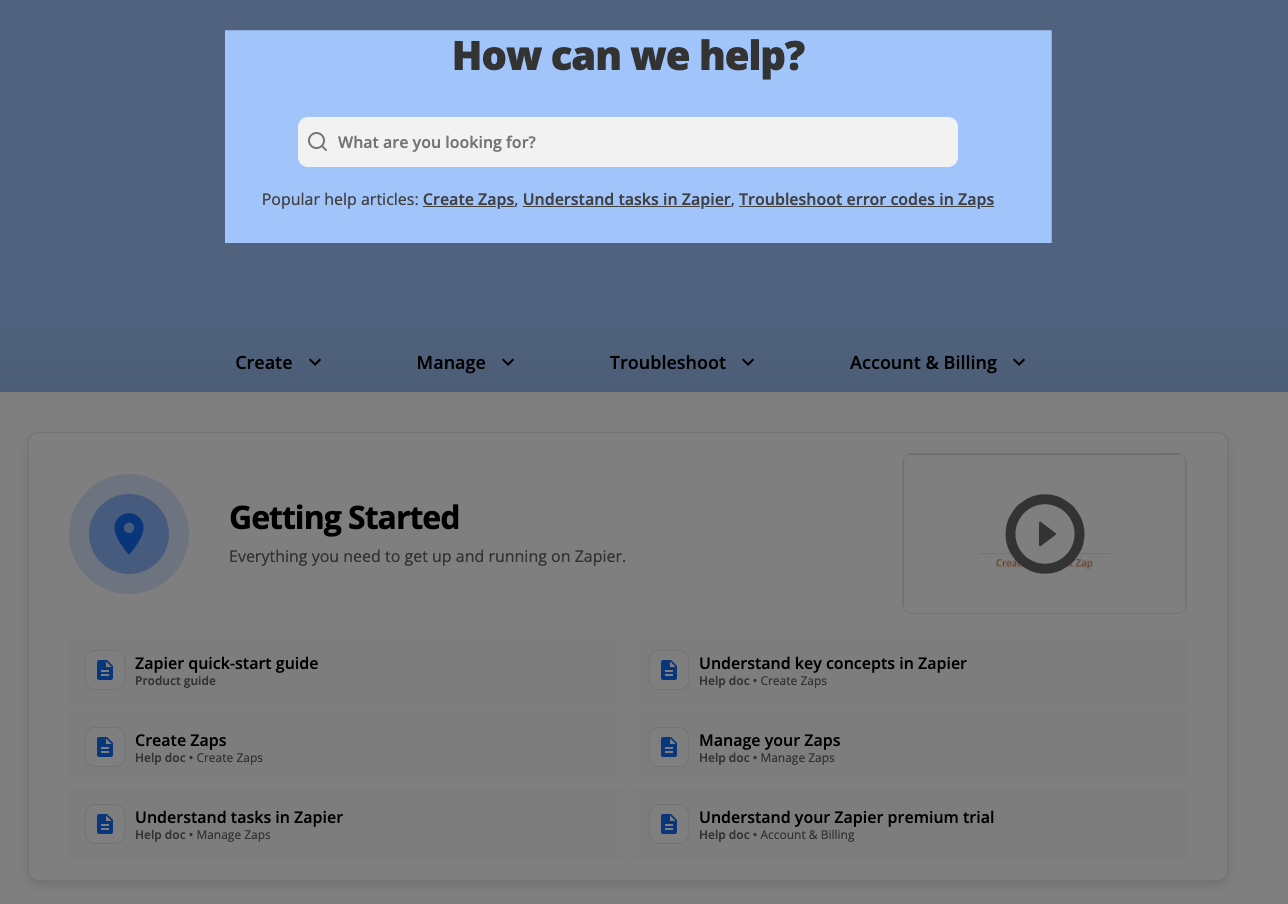
You can also access Zapier’s main Help center by clicking on Resources in the top menu, and then selecting Help center.
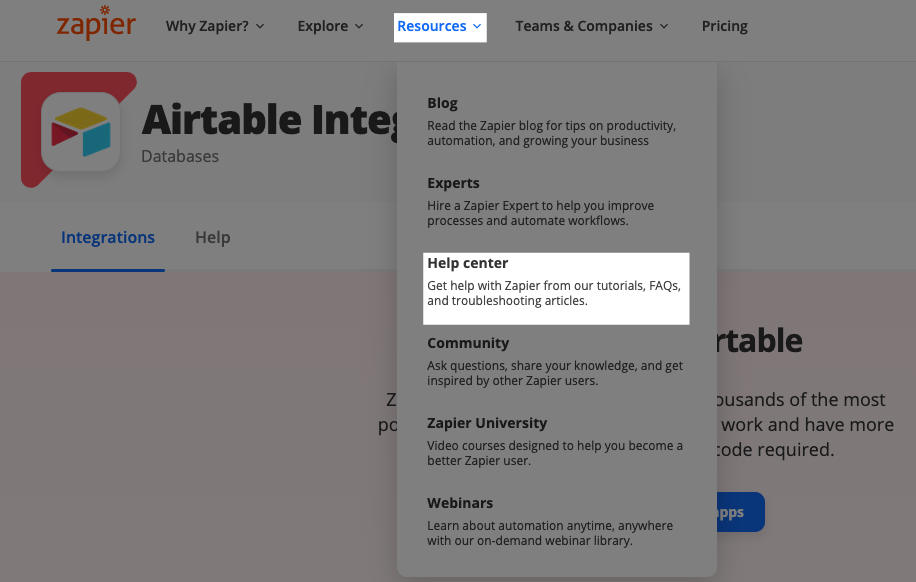
You can search for the specific issue, or navigate the Help center based on topic.
Troubleshooting within your Zap history
If you’ve tried those steps and your Zap is still encountering errors, you can troubleshoot the issue based on your Zaps’ previous runs. You can do so in your account’s Zap history.
How to read your Zap history
Your Zap history is just that: a history of every time your Zaps have run. You can access your Zap history in the left-hand navigation window of your Zapier account.
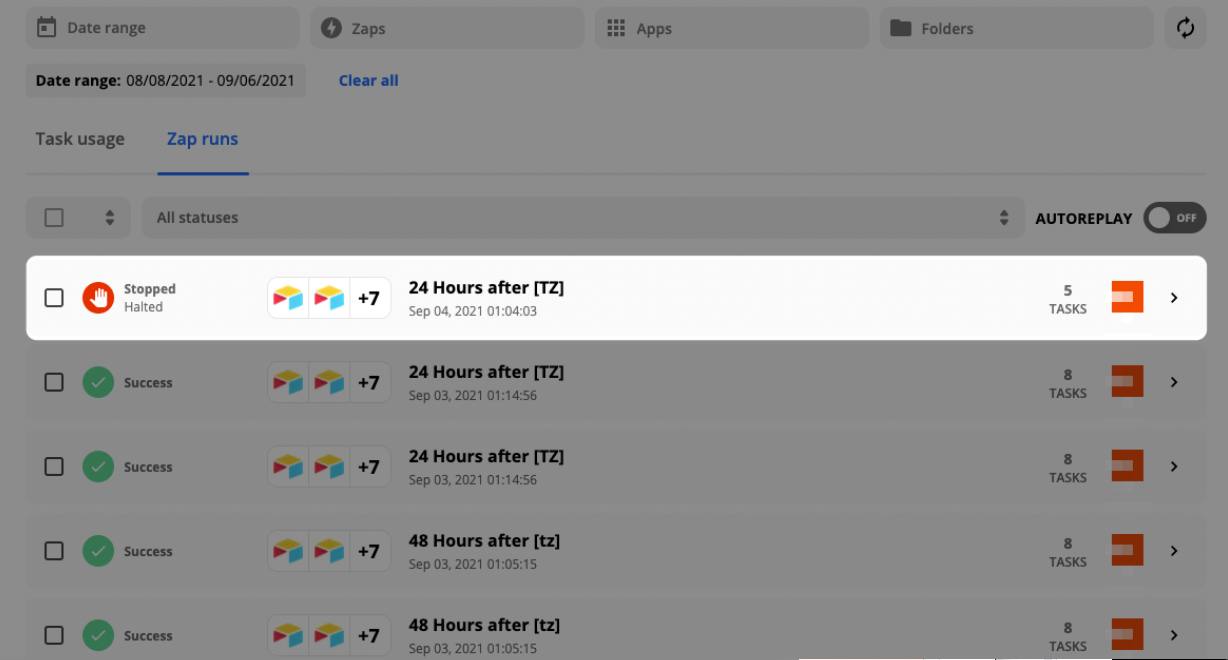
In your Zap history, click on the Zap runs tab. You can search for a particular Zap run by a date range, the Zap associated with it, the apps involved, and more.
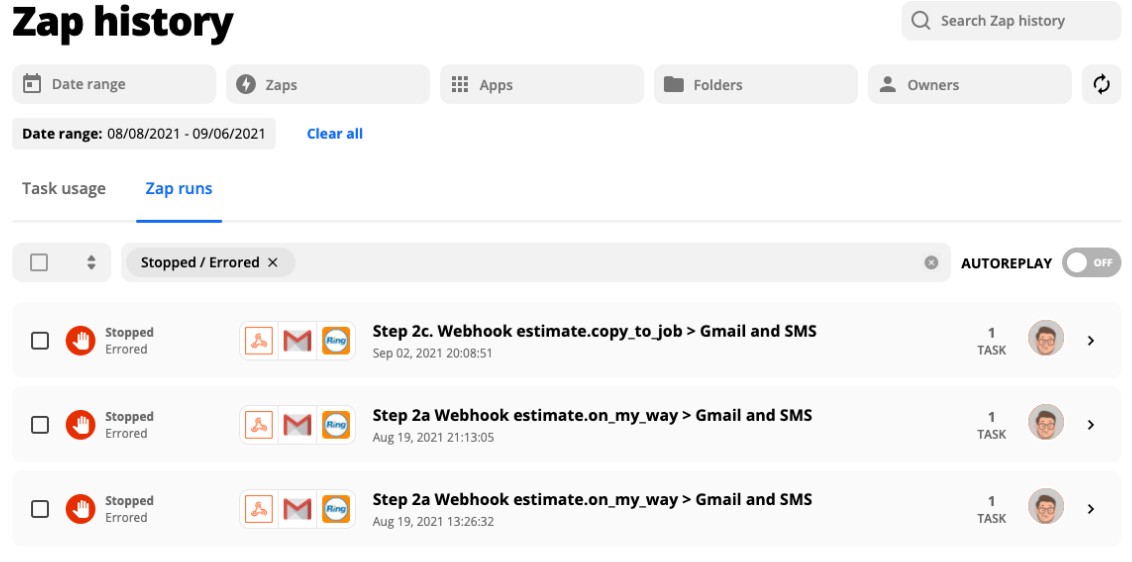
There are three core statuses that we should be aware of when troubleshooting the Zap history: stopped, waiting, and holding.
-
Stopped: Stopped statuses include errored tasks—where the error isn’t expected—or a halted task, where an error was expected and the Zap was stopped from proceeding. Only error tasks will turn a Zap off automatically.
-
Waiting: This status could occur when you’ve added a delay step in a Zap or your Zap is waiting to be tried again because you’ve enabled Autoreplay.
-
Holding: This could be any number of account-related issues, such as high task usage, an account connection issue, you don’t have enough tasks for your Zap to run, or you haven’t paid your Zapier bill.
How to investigate the Zap run
When you’ve identified a Zap run that’s encountered an error, click on it.
The first thing you’ll notice at the top is the Replay Zap run button. This allow you to play this specific Zap run again. Before we do that, scroll down.
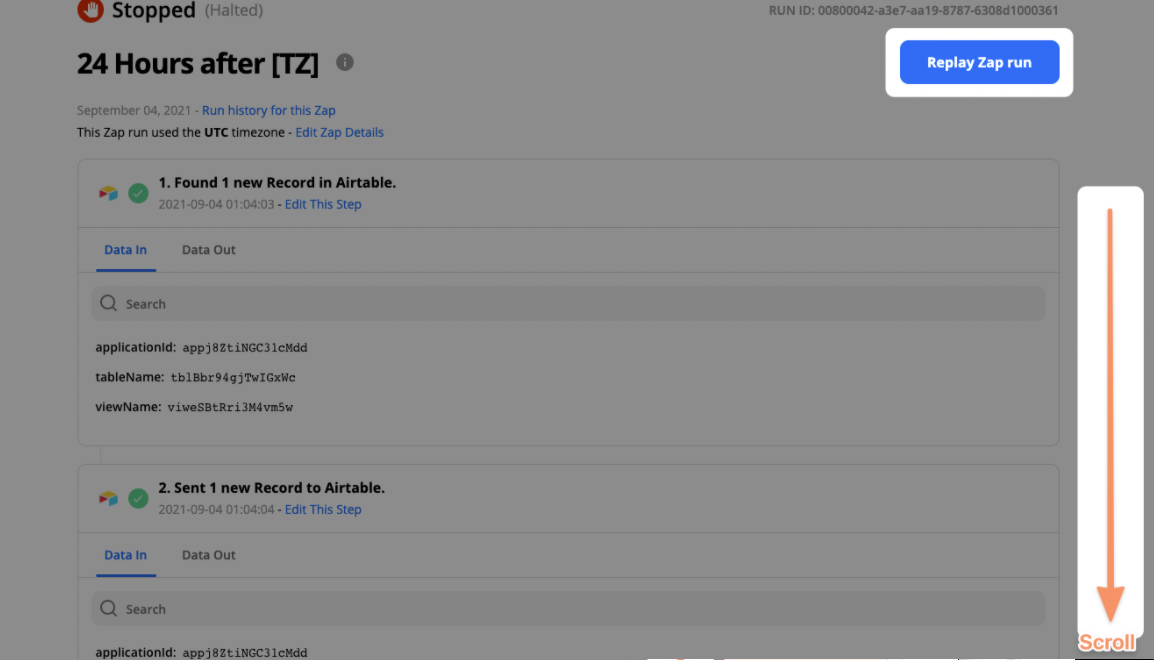
Depending on how complex your Zap is, it may be several steps down before you find the error. It will have the red icon with a hand, indicating that this step was stopped, along with an error message.
In this example, the error message in step six says “nothing could be found for the search.” Remember: that’s a 404 error.
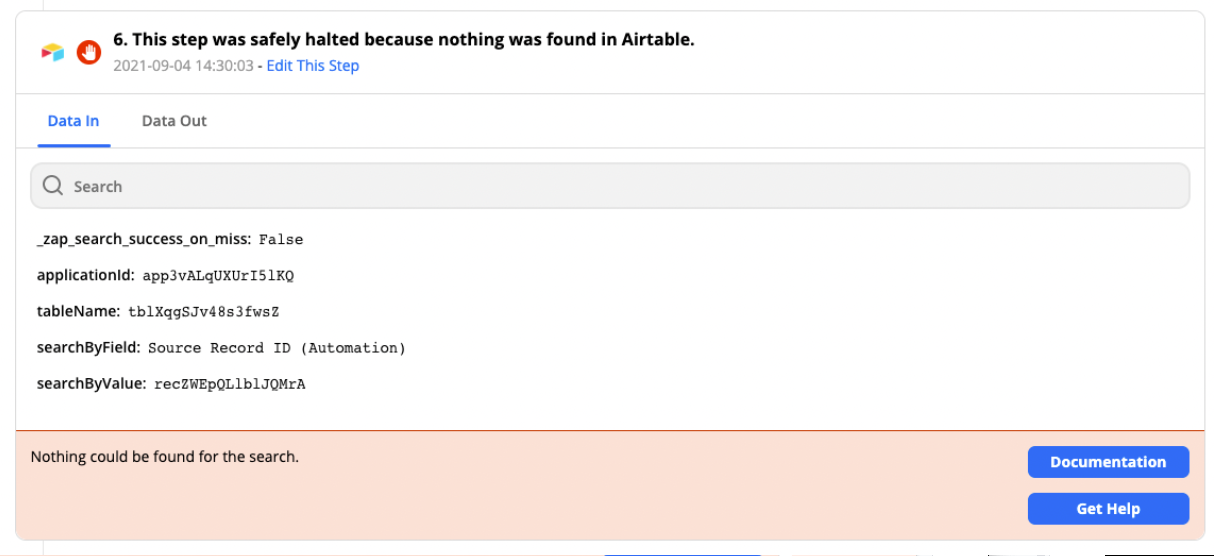
Navigate between the Data In and Data Out tabs. Data In contains the information passed through this step. Data Out is what the application returned.
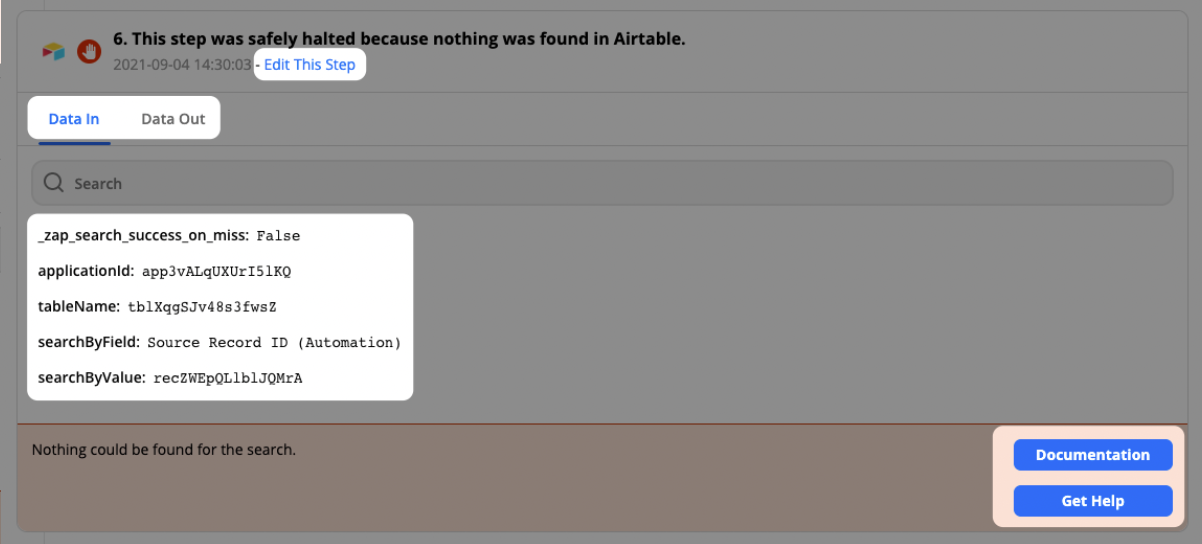
In this example, we can see that our application, Airtable, couldn’t find anything in the search.
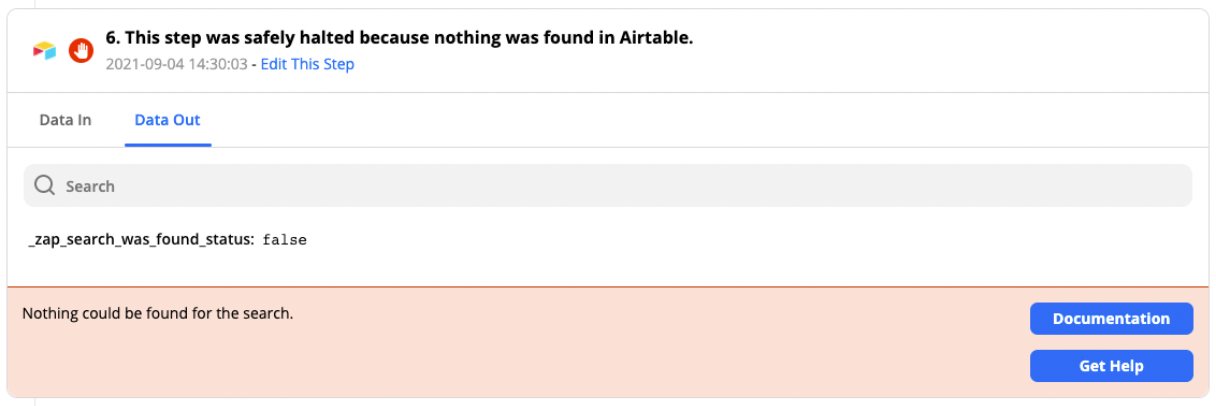
If you’re confident you know what the problem is, or want to investigate further, click on Edit This Step. It will direct you to the specific step in the Zap editor, where you can perform all the troubleshooting steps.
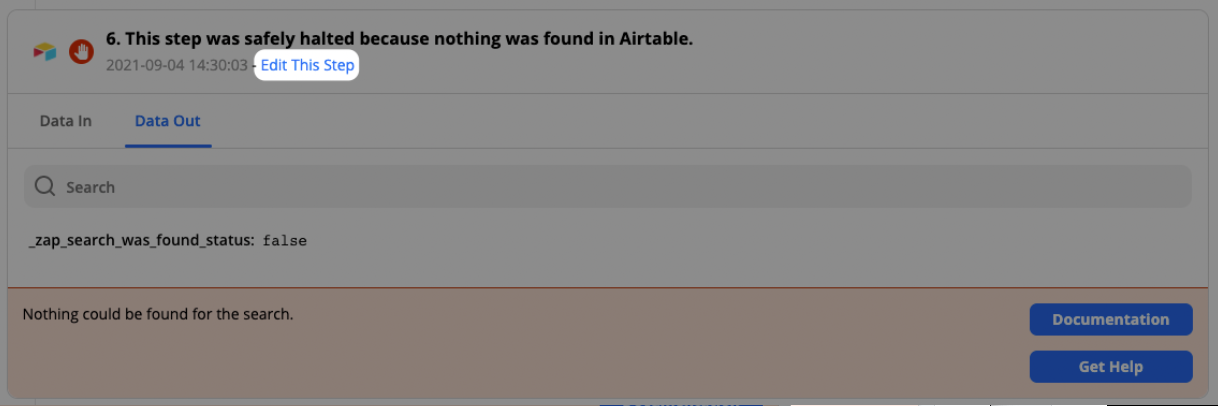
If you’re unsure of how to fix the issue, click on Documentation, which will take you to the application’s specific documentation. Get Help will put you in touch with Zapier’s amazing support team. You can also turn to the Zapier Community for help.

Zapier status page
Another resource available to you is Zapier’s status page. When you visit status.zapier.com, it will provide you with updates in three areas: system, app status, and incident history.
-
System metrics: This covers trigger reliability and response time. Essentially, whether there any issues with Zaps triggering.
-
App status: Covers issues with specific applications.
-
Incident history: Highlights any major instance within Zapier.
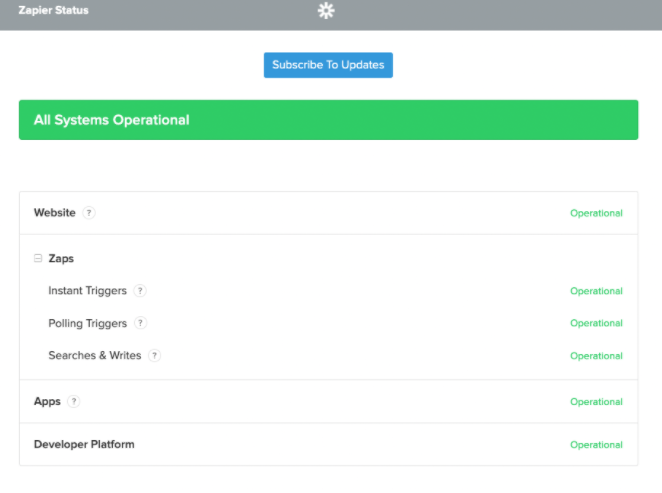
You can also subscribe to status updates for up-to-the-minute notifications when there’s an incident.
Keep calm and troubleshoot on
When you need to troubleshoot a Zap, don’t panic. Everything will be okay. Remember to follow the troubleshooting order of operations. If all else fails, you can find a solution in Zapier’s Community, contact Zapier support, or hire a Zapier Expert.
[adsanity_group align=’alignnone’ num_ads=1 num_columns=1 group_ids=’15192′]
Need Any Technology Assistance? Call Pursho @ 0731-6725516


