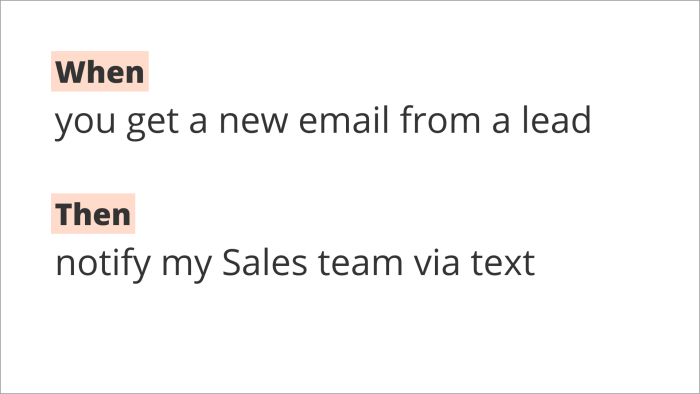
Once you get the hang of automation with Zapier, it’s pretty straightforward: When this thing happens in one app, automatically do this thing in another app.
Zaps—the automated workflows you create with Zapier—typically run whenever your trigger event happens. But what if you don’t want your Zap to carry out an action right away? For example, instead of automatically sending a follow-up email whenever you get a new Facebook lead, perhaps you want that email to go out two days later.
That’s where Delay by Zapier can help. Delay allows you to put part of your Zap on hold for a specific amount of time before your actions run.
This guide will walk you through how to use Delay by Zapier and teach you how to have more control over when your Zaps run.
What you’ll find in this guide:
Using Delay by Zapier requires a multi-step Zap, which means you’ll either need to be in your trial period or have a paid account to set it up.
What is Delay by Zapier?
In a standard Zap, every step fires off one after the other. Your trigger starts your Zap, and the action immediately follows.
Delay allows you to put part of your Zap on hold for a specific amount of time before your actions run.
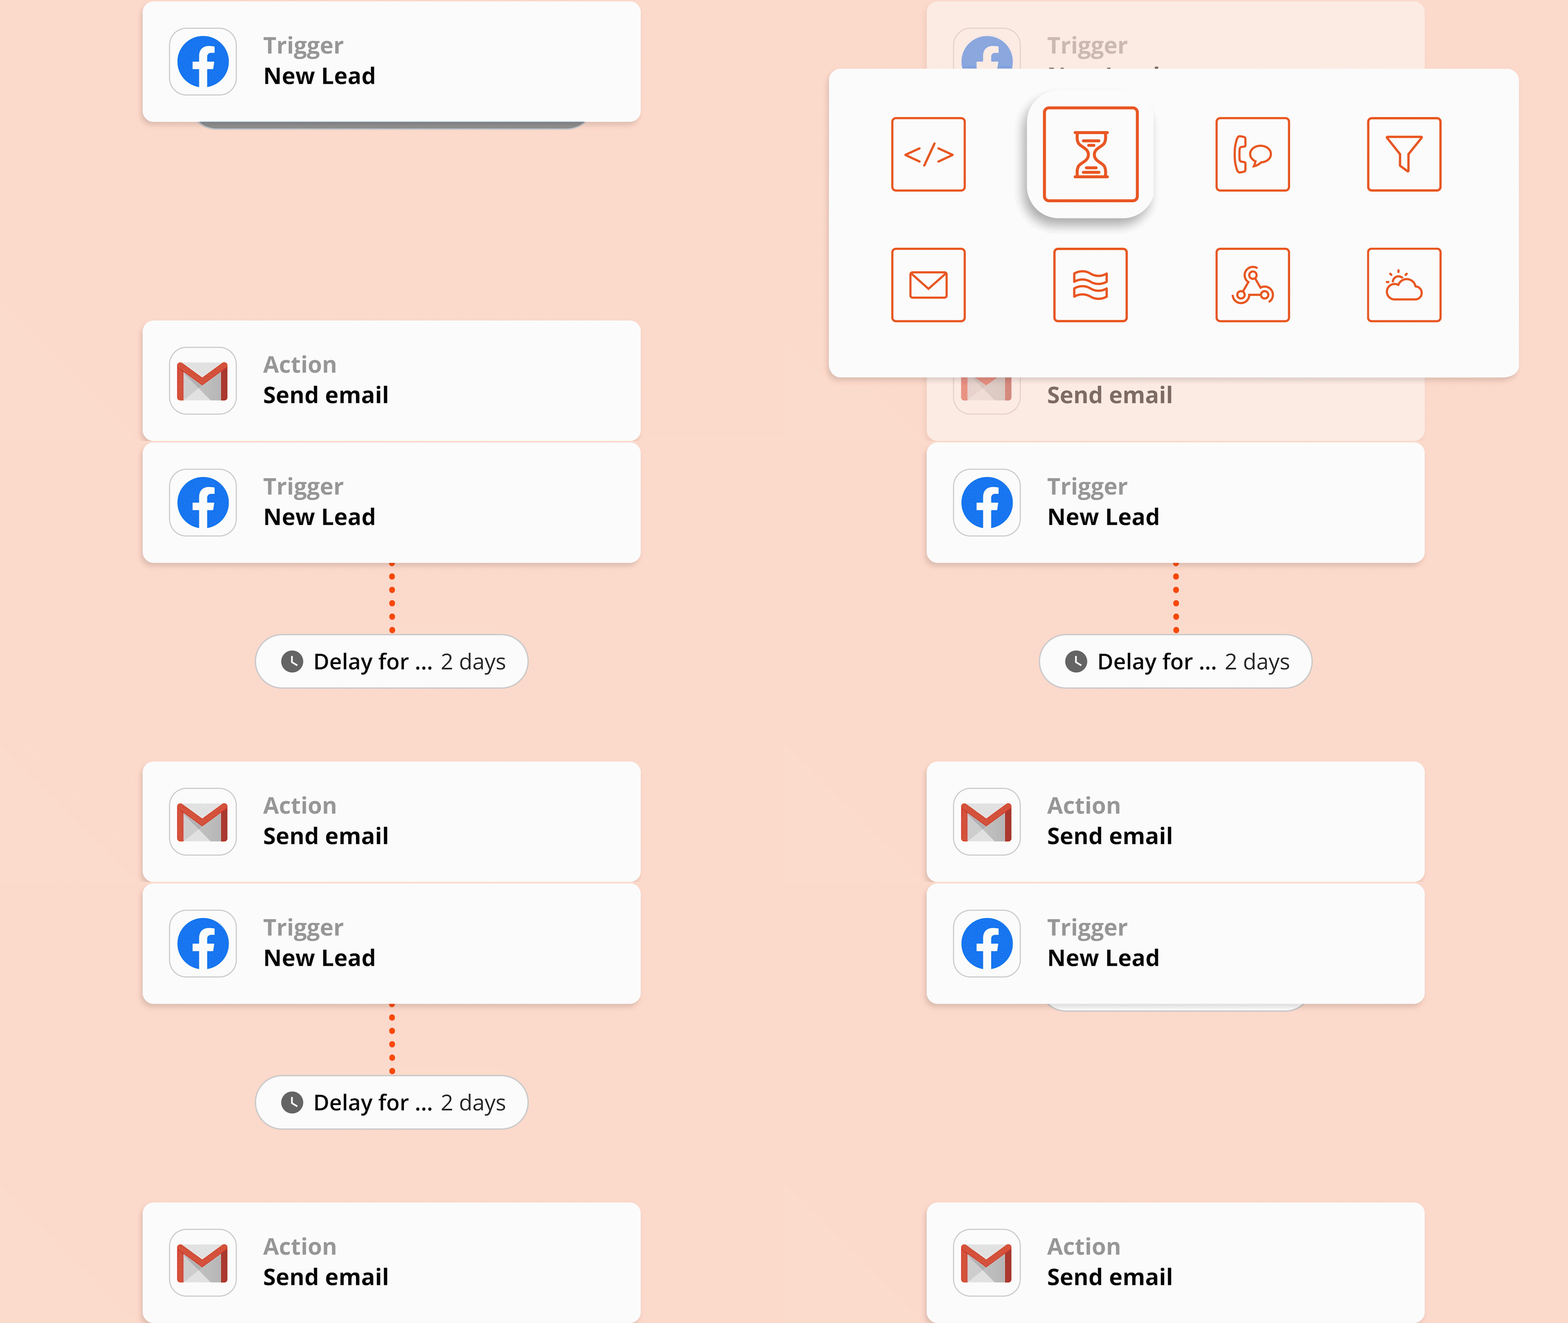
In traditional actions—events your Zap performs after receiving information from your trigger—you can clearly see a change in a specific app, such as a new row in a spreadsheet, soon after the trigger event takes place.
Delay is different: it’s like a rest stop for your Zap—and waiting is an action, too!
The difference between Schedule and Delay by Zapier
At first glance, it may seem like Delay by Zapier is similar to another app—Schedule by Zapier. While both deal with timing, there are a few key differences:
-
Schedule by Zapier is a trigger, while Delay by Zapier is an action.
-
Delay by Zapier will pause your Zap for a specific amount of time after a trigger or action runs, giving you more flexibility in the timing of your automated workflow. So for example, you can delay what happens after you receive a new lead or after a task is added to your project management app.
-
Schedule by Zapier only controls when a Zap starts. For example, you can automatically send an email every Friday at noon, but you can’t use Schedule again in the same Zap.
However, you can use Schedule and Delay in the same Zap and tailor your automated workflows to how you work.
Understand the three types of delays
Delay by Zapier has three different actions. You can use it after your trigger, before any other actions take place, or between actions. You can even add multiple delay steps to the same Zap.
The type of delay you use will depend on what you want to accomplish with your Zap.
Delay For
Best for: Delaying for a specific amount of time
The Delay For action is used when you want to delay the next step in your Zap for a specific amount of time after a trigger or action. Delay For is relative to the previous step in a Zap—for example, whenever a new task is added to your to-do app—and it’s usually a duration like minutes, hours, or days.
Delay For has a wide variety of applications. For example, let’s say you wanted to send a follow-up email when you receive a new lead. You could use Delay For in a Zap to wait two days before sending that email—making it look like a real person followed up.
Learn how to set up Delay For steps
Delay Until
Best for: if you need your action or actions to run at a specified time.
Delay Until will delay the next action in your Zap until a specific date or time. Delay Until is most often used along with a specific date pulled in from an earlier step, like the date of a booked appointment, or a relative day and time, like Mondays at 3 p.m.
Delay Until is often used to dynamically set a delay based on information from previous steps in your Zap.
Let’s say you have a new invitee in your booking or scheduling app. You could use Delay Until to delay the send of an automated follow-up email until after the appointment ends.

Delay Until is helpful for apps that often deal with dates, such as scheduling tools, calendars, task managers, and project management apps. It ensures your Zap runs on your preferred schedule.
Learn how to set up Delay Until
Delay After Queue
Best for: Ensuring each action step has enough time to process before your Zap continues.
When a Zap triggers, it runs from top to bottom. So when you have a Zap with many steps, your actions will run one right after the other, often within seconds of each other.
If you want to space out the timing of when your actions run, you can use the Delay After Queue action. It lines up your tasks and runs them one at a time, preventing steps from running simultaneously.
Let’s say we have a Zap that adds new Facebook Leads to a Google Sheet—and one day, it triggers several times at once. Because of that, it tries to write on the same row in the sheet.
Delay After Queue will make your Zap write the rows one at a time, preventing what we call a race condition. Race conditions occur when all your steps try to finish at once, just like a running race.
Learn how to set up Delay After Queue
How to set up Delay by Zapier
Before you begin: adjust your timezone if needed
Unless you specify your timezone within the Zap editor, Zapier will default to the timezone in your account settings. You want to ensure your timezone is set correctly for your Zapier account, so your delay releases when you want it to.
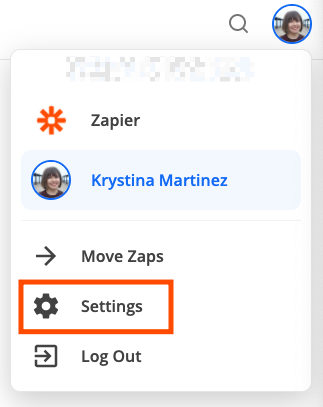
To do this, sign in to your Zapier account and click on your profile icon located in the top-right. Under the dropdown menu, click on Settings.
You’ll be automatically directed to the My profile tab in your settings. Under the Timezone field located at the bottom, click on the dropdown and select your correct timezone. Click Save changes when you’re done.
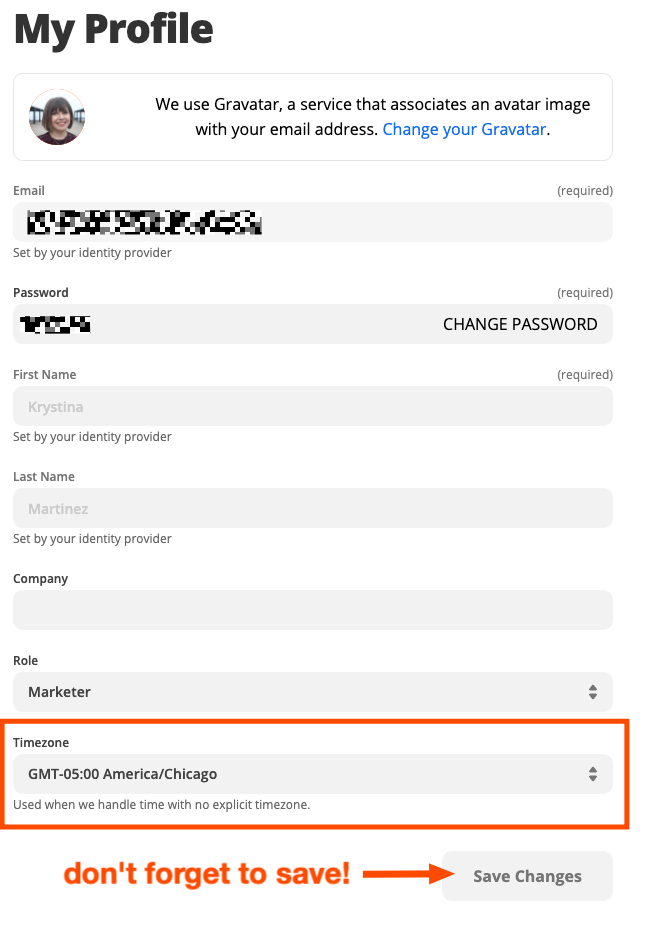
You can also adjust your timezone on a per-Zap basis. For example, if you use a specific Zap for clients in a different timezone, you can set it to a specific timezone without worrying about entering the wrong timezone abbreviation.
Within the Zap editor, you can click on the gear icon on the left-hand side. The Settings pane for your Zap will expand.
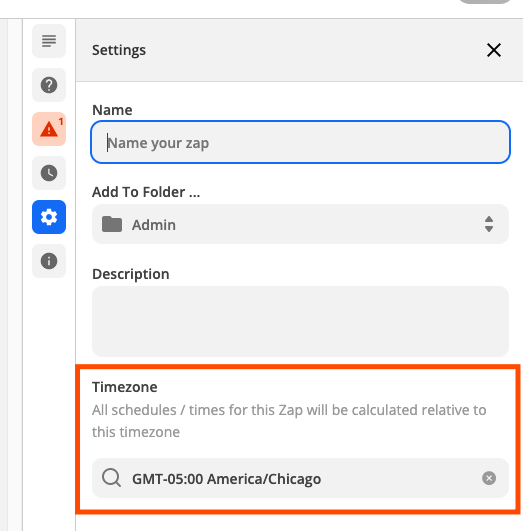
Just click the x under Timezone to clear the existing setting. Then, click in the blank field to reveal a dropdown menu, select the appropriate timezone, and close your settings.
Outline your Zap
Sometimes it’s hard to recognize when you’ll need a delay step in a Zap. If you need to create a Zap that’s particularly complex, sometimes it’s helpful to write down a sentence and a few bullet points outlining what you want your Zap to accomplish.

As you’re outlining what you want your Zap to accomplish, keep an eye out for words such as “wait,” “hold,” or “pause.” Also look out for phrases that signal a time in the future, such as “at the end of the day” or “when the task is due.”

How to set up a delay
Now that you’ve got your Zap outlined, you can start creating it in the Zap editor. When you come to the point in your Zap where it’s time to add a delay step, click the plus (+) button in the editor to add another step.
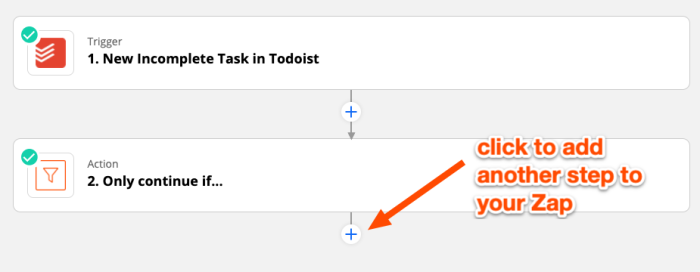
You can either search for Delay by Zapier in the search bar, or click Delay on the lower-right hand side.
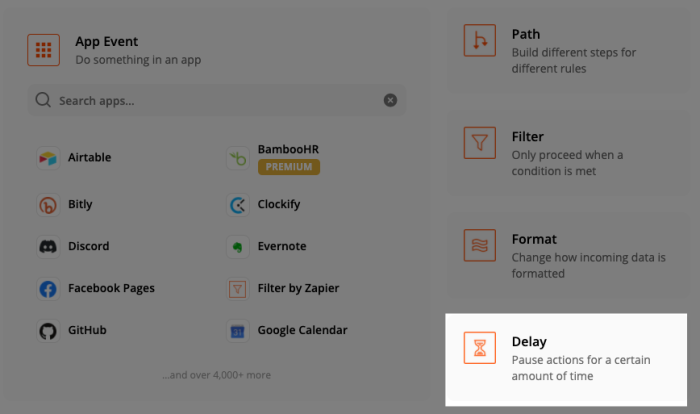
The Zap editor will direct you to select your Action event—the type of Delay you want to set up.
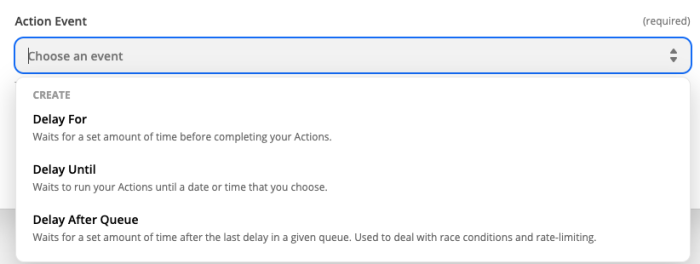
Now that you understand what each delay type is used for, let’s jump into how to set up each type.
Delay For
To pause your Zap for a set amount of time before it continues, select Delay For as your action event then click Continue.
Next, you’ll set how long you want your Zap to wait before running the next action. Remember: Delay For is best used when you need a more general period of waiting, such as 30 minutes, eight hours, or two days. There are two parts to a Delay For action: the value (how many) and the unit (the type of time).
For example, if you wanted to delay your next action for an hour and a half, you would type in 1.5 for the value and then choose hours for the unit. You can enter numeric values (including decimals) in the value area, and then choose between minutes, hours, days, or weeks for the unit. When you’re done, click Continue.

Now you’ll need to test your Zap. It’s important that you test this step to make sure Delay is pausing for the amount of time that you’d like. Click any of the testing buttons to continue.
You should see a message saying that the test is successful. Pay attention to the date or time under release_at. Since this is a test, the sample information will be a delay relative to when you tested the Zap.
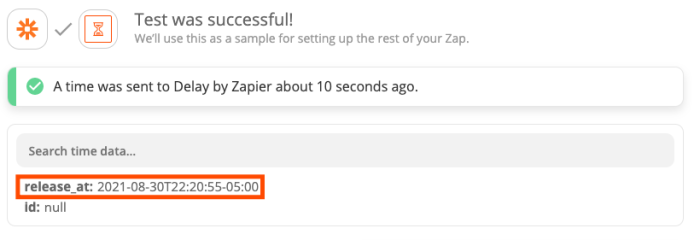
In this example, I want my Zap to delay for eight hours and 45 minutes and then turn off my Philips Hue lights. In a test, Zapier adds the time delay from the moment I tested this Zap, not when my lights turned on for the day.
Once you’ve tested your delay, finish setting up the rest of your Zap and then turn it on.
Delay Until
Select Delay Until as your action event and then click Continue.
Next, you’ll set up when you want your Zap to run the next action. Remember: Delay Until is best used when you need to delay an action until a specific calendar date, like a date pulled in from your trigger, or a specific type of day or time, like next Monday or at 5 p.m.
Under the Date/Time Delayed Until field, enter the date and time you want the Zap to delayed until before it runs the next step. You use a date/time field from a previous step. Be sure you specify the day or date you want to delay until.

You’ll also need to decide how Zapier should handle instances where the date has already passed when the Delay Until step is reached. For example, you might want your Zap to Delay Until five days after a to-do list item is originally created. But if the originally-created timestamp is already 20 days in the past, Zapier might interpret your instructions as “delay until 15 days in the past.”
How do you fix this? By default, the Zap will continue if the date is within one day of when the step is reached. To change this, click on the dropdown under How should we handle dates in the past? to select either a pre-set option or customize it yourself. Then click Continue.
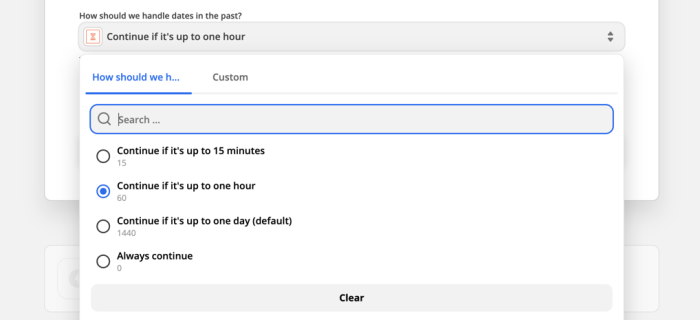
Now it’s time to test your Delay Until step, so click any of the testing buttons to continue.
In this example, I want my Zap—which alerts my coworkers when I’m out of office—to delay until the date I’ve requested off to send a message in my team’s Slack channel.
Whenever you test a Delay Until step, the sample information will show when the delay will release, according to how it’s set up in the previous step. Check the release_at field in your test. It should return the date and time you specified in the prior step. If the information is incorrect, go back to the previous step and make changes.
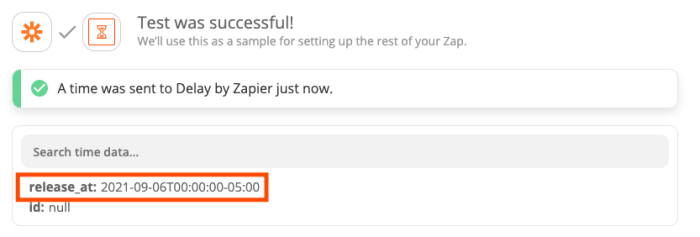
Once Delay Until is set up, you can continue setting up the rest of your Zap. Don’t forget to turn it on!
Delay After Queue
Select Delay After Queue as your action event and then click Continue.
Next, you’ll set up when you want your Zap to run the next action. Remember: Delay After Queue is best used for instances where you anticipate getting multiple instances of data at once. For example, getting multiple form submissions at the same time, or creating something in bulk such as calendar events.
Give your delay a name under the Queue title field. Click on the Time Delayed For (value) field. You can enter a number—or select information from previous steps in your zap—to set the length of your delay. The minimum delay you can set is one minute.
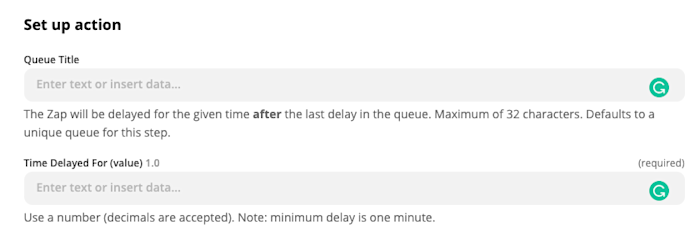
Click on the dropdown under Time Delayed For (unit) to select your unit of time.
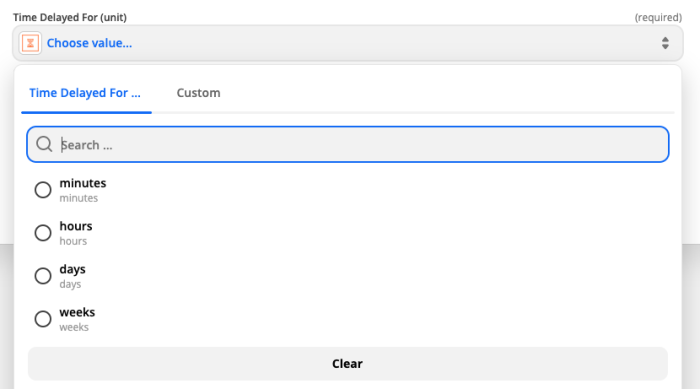
When you’re done, click Continue.
Now you’ll test your Delay After Queue setup. Click any of the testing buttons to continue.
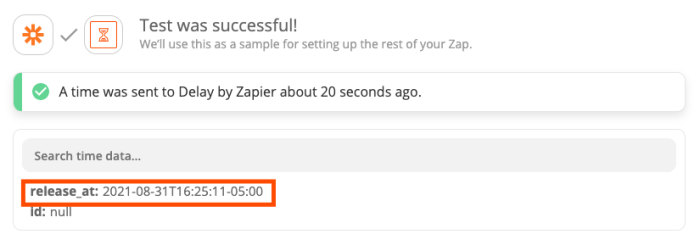
The sample information will show when the delay will release, according to how it’s set up in the previous step. Check the release_at field in your test. It should return the date and time you specified in the prior step. If the information is incorrect, go back to the previous step and make changes.
Once you’re satisfied, finish setting up the rest of your Zap and turn it on.
Pro tip: adding and subtracting with date and time values
Within Zapier, you can adjust date or time fields with simple modifiers that will add or subtract time. For example, if I wanted to delay the next action until two hours after an appointment ends, I can select my appointment end time and add a modifier such as +2h and Zapier will automatically calculate it.
This is helpful especially with Zaps that use Delay Until.

How to add date and time modifiers
To add a modifier, enter a space after the date or time value, then enter the modifier. Modifiers always need a number, a plus or minus sign to add or subtract time, and a time unit for the amount of time you want to adjust.

Checking to see if your delay worked
Although you can test your Delay step in the Zap editor, it’s hard to know for sure whether it worked until you see it in action. You can confirm things in your Zap History, which is a log of all your Zaps and the tasks automated.
How to troubleshoot in your Zap History
In your Zapier account, click on Zap History in the left-hand navigation menu. You’ll see a list of all of your Zaps, when they last ran, the tasks used in each Zap, and other details.
You can search for your Zap using the filters at the top. Click on Zap, type in the name of your Zap or select one of the apps used in it, and then click on the Zap you want to check.

You’ll be directed to the Task Usage tab for your specific Zap. Click on the Zap runs tab.

The Zap runs section will show how many times your Zap has run and what happened during each step. Zap runs are listed in order by recency.
If you see a Waiting / Delayed status next to a specific Zap run, that means your Zap is delaying or waiting for an auto-replay. You’ll have to wait to see if the next action runs successfully.

If you see a Stopped or Holding status next to a Zap run, you can click on it for more details.

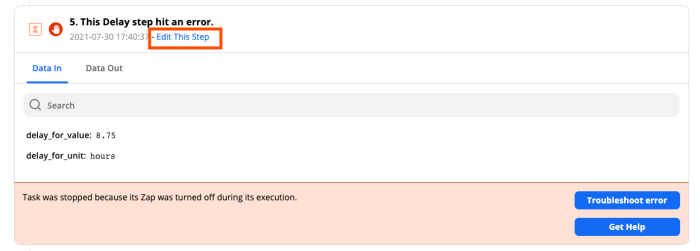
In this example, my Zap hit an error at the Delay step. The red message warns me that my Zap was turned off at some point.
Click on Edit This Step. You’ll be directed to the Zap editor where you can make changes to your Zap to try to solve the problem.
And if you’re still struggling, you can always reach out to our Support team for help.
Delay by Zapier: a chill pill for your Zaps
If you need more control over when certain actions occur in your favorite apps, don’t lift a finger. Delay by Zapier can pause your Zaps for a certain amount of time, allowing you the freedom and flexibility to automate tasks when you’d like.
Visit Delay by Zapier’s integrations page to find more popular Zaps, or create your own with your favorite apps.
[adsanity_group align=’alignnone’ num_ads=1 num_columns=1 group_ids=’15192′]
Need Any Technology Assistance? Call Pursho @ 0731-6725516

