Simplicity is a big part of Typeform’s appeal: you can set up a great-looking form or survey in just a couple of minutes. But that simplicity doesn’t get in the way of customization.
There’s a lot of power hidden just below the surface in Typeform, and you might miss it unless you know to click this little gear.
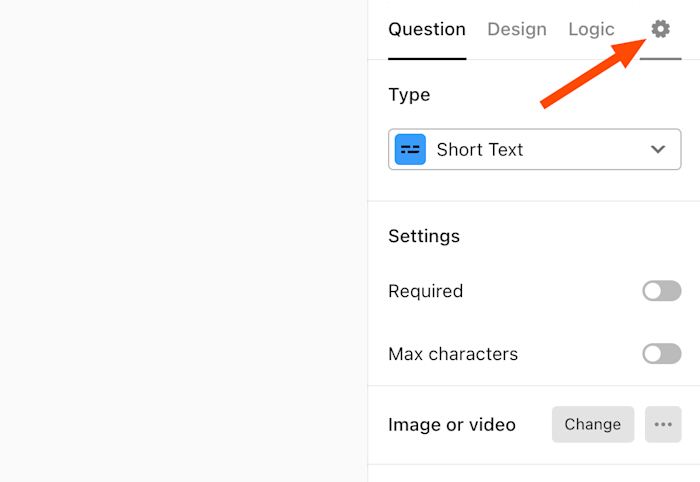
That brings up the settings for your form, which let you customize how Typeform looks and operates. Let’s go over a few highlights.
1. Customize the interface messages
There’s a lot of default copy in Typeform’s forms. The big button on most pages, for example, says “OK,” and there are instructions below each different kind of question.
You can change this copy in the Messages section.
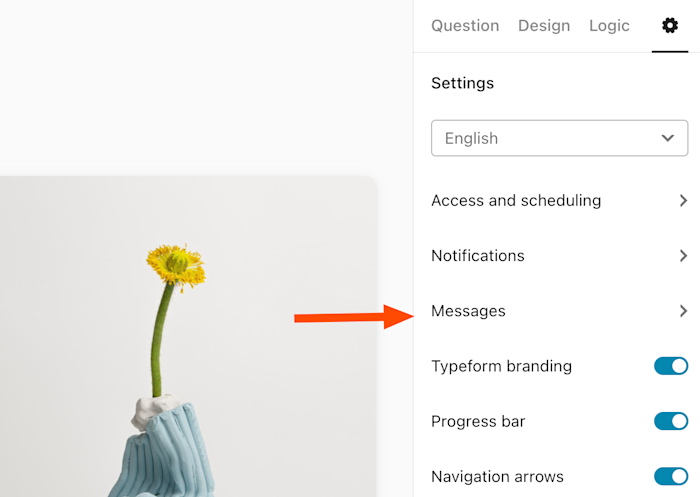
You’ll see boxes for all kinds of interface elements in your form: buttons, hints, and shortcuts.
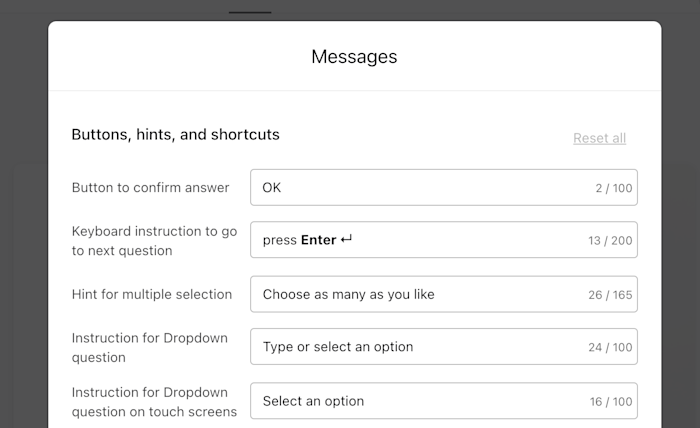
For example, you could replace the press Enter text with something else.
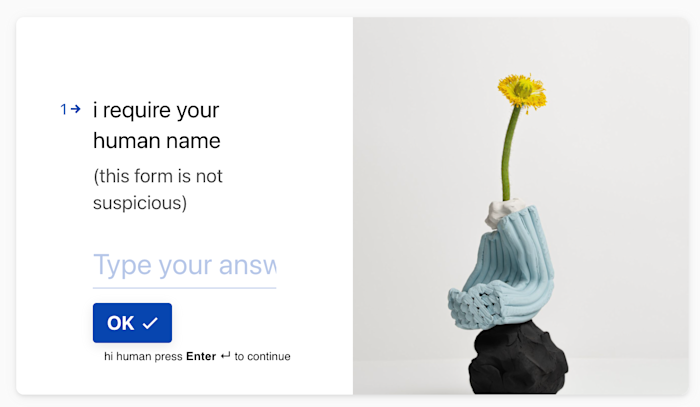
You might have fun with it, sure, but you could also use it to add instructions that are particular to whatever form you’re building.
2. Get email notifications for all submissions
What happens when someone responds to a form? By default, Typeform collects the results for you to check later, but you can also get a notification by email if you want. Just click the Notifications setting.
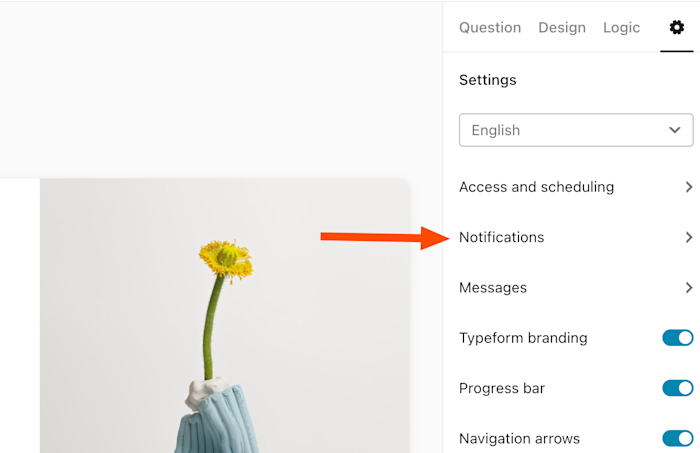
From there, you’ll set up an email notification for every form submission, including as much information from the form as you’d like.
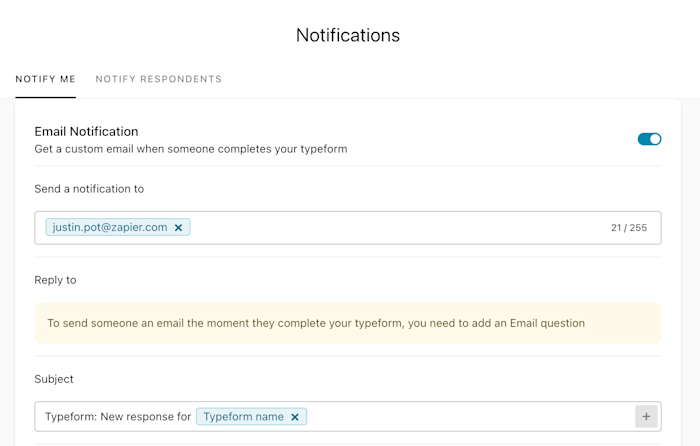
You’re also able to send a message to the people who respond to your form, though you’ll need to collect their email addresses to use that feature.
If you want notifications, but not via email, Zapier’s Typeform integration lets you get notifications in Slack, Microsoft Teams, and thousands of other apps. Plus, you can add submissions straight to a Google Sheet or even your CRM or email marketing tool.
3. Design custom themes
This is maybe a little less hidden than the other features here, but it’s something I haven’t seen people use a lot: custom themes. There are a bunch of great themes offered, but odds are none of them match up with your branding. So make your own.
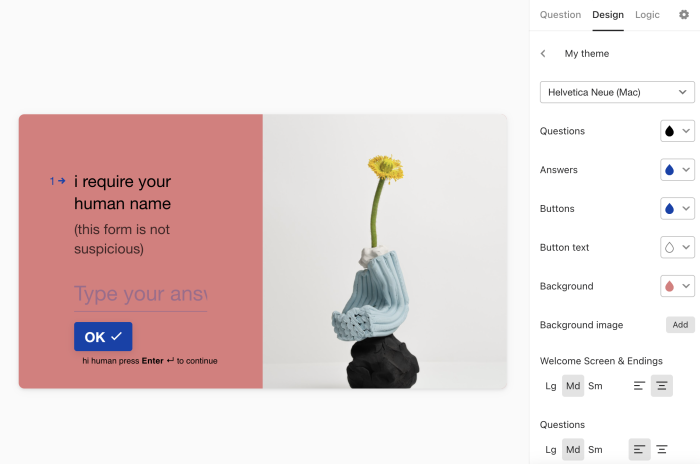
It’s not overwhelming, but in the Design tab, you can change the colors of various elements and choose from hundreds of fonts. With a few touches, you’ll be able to match your form to your brand, and then save your theme for future forms.
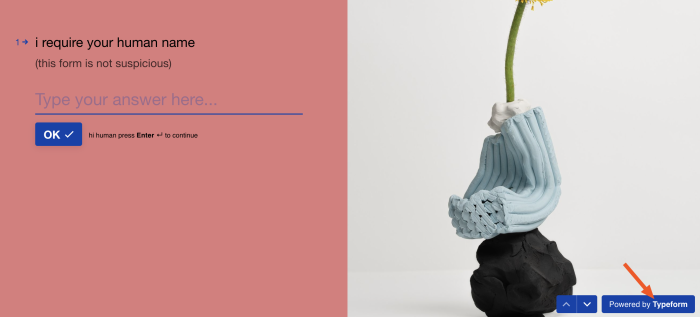
Paid users can go even further, turning off all Typeform branding in the settings.
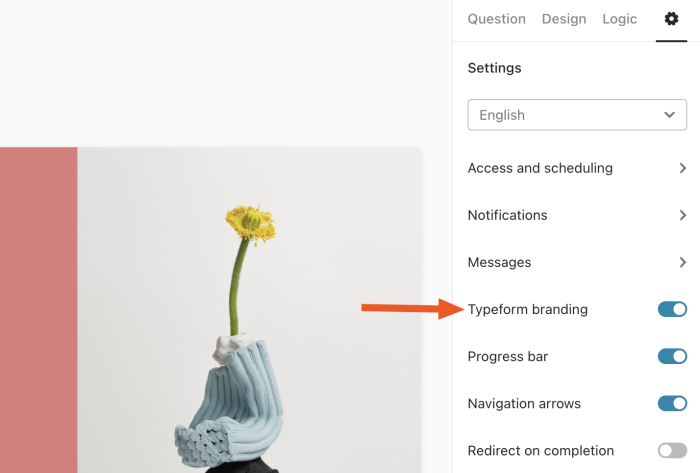
This will remove the Powered by Typeform badge in the bottom-right corner, making your form look just a little more professional.
4. Add UTM tracking
Want to keep track of how people are finding your form? That’s what UTMs are for. UTM stands for Urchin Tracking Module, and it’s a core feature of most data analytics tools. Urchin is what Google Analytics used to be named, before Google bought it, in case you’re wondering why I’m bringing up sea creatures.
Where was I? Oh yeah: you can enable support for UTMs in any form using the UTM tracking setting.
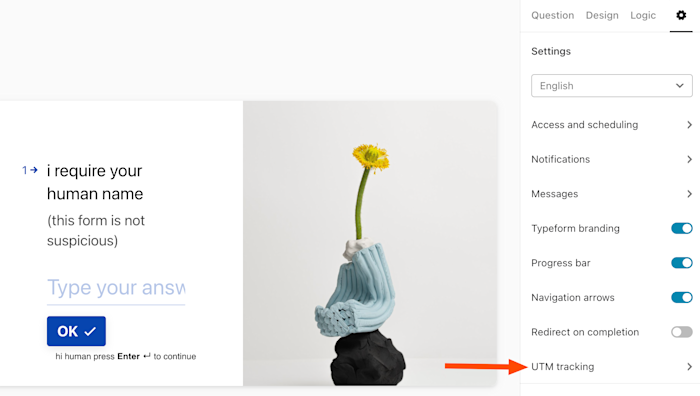
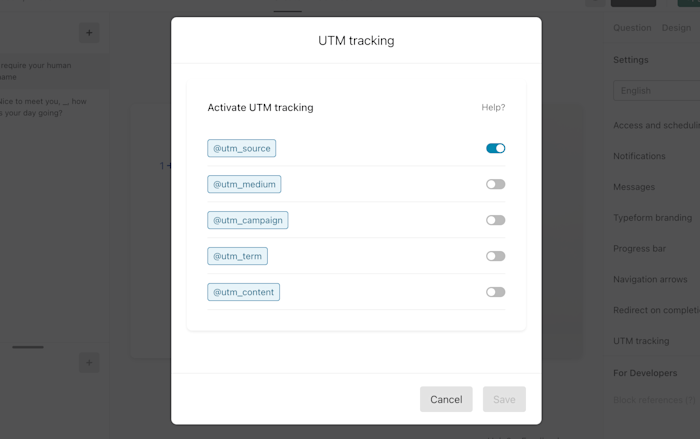
From there, you’ll have the option to enable the five main UTMs: source, medium, campaign, term, and content.
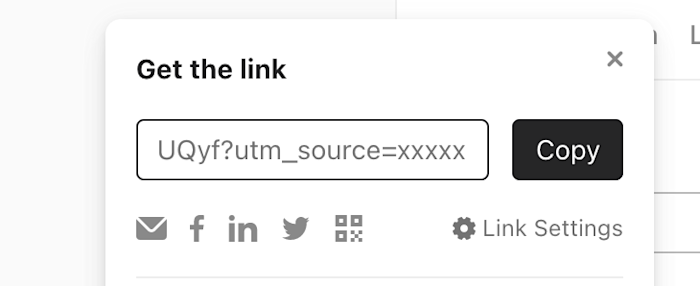
You’ll find the UTMs in the sharing URL after you publish your form. Note that you’ll need to replace the xxxxx.
UTMs are only offered if you’re paying for a business account, and they’re most useful if you’ve set up Google Analytics with your Typeform account. Read more in Typeform’s documentation.
And more!
There are a few other things you can customize if you’re a paying Typeform customer, including:
-
Scheduling a date for the form to close
-
Setting a limit to the number of submissions
-
Redirecting people back to your website after they’ve completed the form
Want to learn more? Here’s how to connect Typeform to Google Sheets, and here are a few ways to simplify critical business processes with Typeform.
[adsanity_group align=’alignnone’ num_ads=1 num_columns=1 group_ids=’15192′]
Need Any Technology Assistance? Call Pursho @ 0731-6725516


