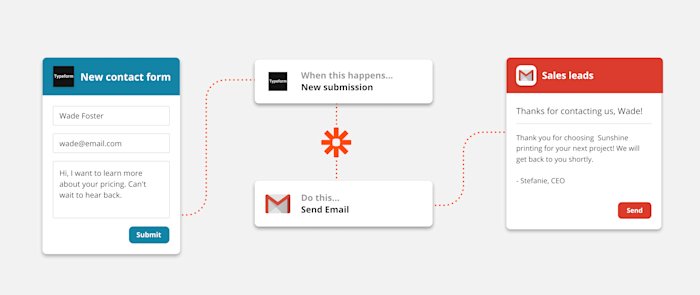
Hooray, someone just filled out your form! This means you have a hot, new lead. You need to respond ASAP while they’re interested and engaged. If you wait too long to respond—or *gasp* forget to follow-up entirely—there’s a decent chance you’ll lose a customer.
But, following up with leads in a timely manner isn’t as easy as it sounds. It’s time-consuming and tedious. Often, there are a bazillion other tasks on your to-do list that feel more important or need more brainpower and focus time. Sending an email—while quick—is easy to put off.
Fortunately, automation is here to help you promptly respond to new leads and ensure no one slips through the cracks.
Easily build automatic workflows that send emails to new leads
With Zapier, you can automate recurring tasks—giving you back valuable time to focus on higher priority items. The workflows you build in Zapier—we call them Zaps—can automate many common tasks, such as sending personalized emails to new leads that fill out your forms.
Every Zap follows the same structure: When this happens, do that.
A Zap always consists of two parts:
-
The trigger: an event that starts a Zap, like when a new lead fills out a form on your website.
-
The action: an event a Zap performs after it’s triggered, like sending an email to that new lead. A single Zap can perform one or more actions.

To help you get started, we collected a few popular Zaps that send emails to new leads who fill out your form. Just click on Use this Zap button below to get started.
You can also create your own Zap that automatically sends a customized email to leads. This is approach is best if you’d like your Zap to do perform more than one action, like emailing your leads but also posting a notification in Slack or adding their information to a CRM or other database.
You’ll need a Zapier account to use the workflows in this piece. If you don’t have an account yet, it’s free to get started.
It takes five steps:
Step 1: Create a new Zap in your Zapier account.
Step 2: Select the platform you use for forms as your trigger app and choose the event that corresponds with someone filling out your form (look for something like “new submission” or “new entry”).
Step 3: Select your email platform and choose Send Email as the action event.
Step 4: At this point, you will finish filling out the email details, including the email subject line and body copy. You can pull information from the form, like the person’s name and other details to further personalize the email. (If you’d like to add more actions, this is where you’d click the plus sign (+) and repeat steps 2-4 as needed.)
Step 5: Test your Zap, and if all looks good, turn it on and watch as you automatically respond to new leads!
Note: When you test your Zap it will send an email, so we recommend setting up a test form submission that uses your own email address so you don’t accidentally email people who don’t need something from you at this time.
Use automation to do the busywork
With hundreds of integrations, you can use Zapier to automate most (if not all) of your tedious tasks—gaining back valuable time. By automating tasks, like intro emails to new leads, you’ll be able to spend less time on busy work and more time on the important things.
New to Zapier? It’s a tool that helps anyone connect apps and automate workflows—without any complicated code. Sign up for free to use this app, and many others, with Zapier.
Related reading:
[adsanity_group align=’alignnone’ num_ads=1 num_columns=1 group_ids=’15192′]
Need Any Technology Assistance? Call Pursho @ 0731-6725516


