Starting a new job is overwhelming. So is learning new software. It’s a good thing no one expects you to do both things at once.
Just kidding. If your job involves using a computer, half of getting started will be setting up software and learning how to use it. That was my situation when I started working at Zapier, whose blog team runs its entire editorial schedule on Airtable. I opened that schedule and was…intimidated.

Look at all that. It’s a lot.
You can create just about anything in Airtable, which is great. But in this case, I was jumping headfirst into a system that my team had spent a lot of time setting up, with all kinds of details and customizations—and without any context. I figured it out (eventually), and I think you can figure it out too. Here are some tips for learning your way around Airtable and generally making it less intimidating as you go.
1. Play with some templates
Automate Airtable to get more from your database
Airtable offers the power of a database in a way that doesn’t require any programming knowledge. (For more details, read our article about what Airtable even is.)
The best way to learn tech like this is to push all the buttons, but you probably don’t want to start pushing random buttons in a way that will negatively affect your coworkers. For that reason, I suggest starting by making a new “base” (what Airtable calls individual databases), at least to start.
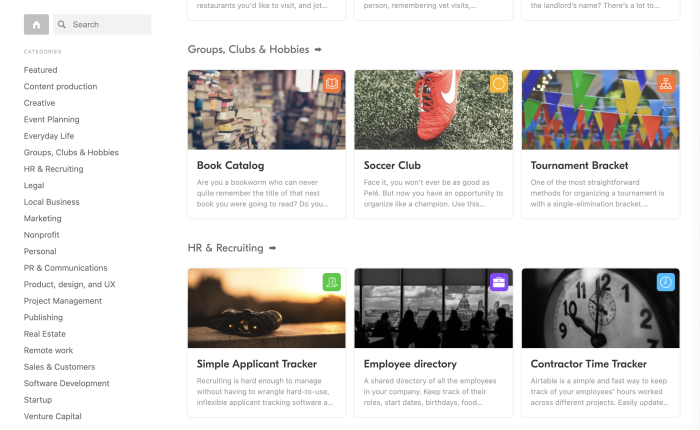
Head to the collection of Airtable templates, and find something you’d like to mess around with.

Ideally, you should find something you might be actually interested in using. I’ve been wondering about keeping better track of the books I’m reading, so I chose that template. It’s pre-populated with some example information, just to give you a feel for the system.

Find a template like this, then try to add some more information to it. In this example, I would add a few of the books I’ve read lately, then look at a few of the different views in the left-hand panel. For example, there’s a Gallery view that highlights all the covers.

This is one of Airtable’s best features: you can look at the same information in different ways. Templates like this one are built to highlight this.
That’s just one feature—you should click around, a lot, until you comprehend what’s happening. Templates are a great way to get a feel for how Airtable works, and you don’t have to worry about messing up a system your entire company is depending on.
2. Open an entire record
I found Airtable very annoying when I started using it, until I found what should have been an obvious feature: the expanded view.
Airtable is organized by “records” (the equivalent of a row in a spreadsheet), and each record has any number of “fields” (the equivalent of a column in a spreadsheet). So in the book template, the records are books, and the fields are things like author, cover photo, and synopsis. But in any given view, you can’t easily see an entire record at once.
To do this, click on anything and hit the spacebar key, or right-click any cell and click Expand record. You’ll see all the details about the record you’re currently looking at—including every field that’s associated with that record. There’s even an activity history and comment feature.

It’s a small thing, but discovering it made Airtable click for me in a way that nothing else did. Give it a shot.
3. Create custom views
One of the best things about Airtable is that you can create custom views. This is a great, no-risk way to learn more about the complicated system your team has, while also creating something that’s useful for you.
Let’s talk about the Zapier editorial calendar again. The sheer volume of what we’re working on at any given moment means I can’t possibly use the existing views to keep track of my work, so I can create a custom view for that. To get started, I choose the kind of view I want in the Create section of the left-hand sidebar, which is toward the bottom. The Kanban view sorts everything into columns, like Trello—I like that.

I can then choose what attribute to sort items by. I choose Status, so I can visualize how far along in the editorial process each article is.

I don’t want my mess of a view to be seen by the rest of the team, so I set it to be a Personal view.

Now I can mess around with it, without the rest of my team seeing it. My goal is to only see my articles, so I’m going to use filters to do that.

I filtered things so only articles I’m writing or editing show up.

I now have a way to see all of the articles I’m working on or have worked on in the past.

This is just one example, but for me, playing around with custom views is how I learned the way Airtable works. It’s incredibly customizable, but you’ll never learn all the tricks if you’re worried about breaking an existing system.
(True story: while setting up this view, I discovered several articles I wrote but never published. That On hold category really paid off.)
4. Star the views you actually use
If your team’s base is anything like mine, the number of views made by your teammates is overwhelming. One feature that helped me with this: marking views as favorites. Right-click any view in the left-hand sidebar, then click Add to ‘My favorites’.

Your favorites will show up at the top of the list, making them a lot easier to find.

I hope you find your way around Airtable—it’s actually pretty straightforward, and definitely powerful, once you get used to it.
[adsanity_group align=’alignnone’ num_ads=1 num_columns=1 group_ids=’15192′]
Need Any Technology Assistance? Call Pursho @ 0731-6725516


